Saltar al contenido principal

Repairing HTC Droid Incredible Logic Board

Guía Archivada
Esta guía se mantiene únicamente para fines históricos. Utiliza la última versión de la guía para llevar a cabo tu reparación.

Qué necesitas

  1. Repairing HTC Droid Incredible Logic Board, Battery: paso 1, imagen 1 de 3 Repairing HTC Droid Incredible Logic Board, Battery: paso 1, imagen 2 de 3 Repairing HTC Droid Incredible Logic Board, Battery: paso 1, imagen 3 de 3
    • Pry off back plastic, starting at the gap provided at the bottom of the phone. A spudger can be used to make this easier.

  2. Repairing HTC Droid Incredible Logic Board: paso 2, imagen 1 de 2 Repairing HTC Droid Incredible Logic Board: paso 2, imagen 2 de 2
    • Remove battery, prying from the provided gap at the upper-right corner of the battery

  3. Repairing HTC Droid Incredible Logic Board, Back Panel: paso 3, imagen 1 de 2 Repairing HTC Droid Incredible Logic Board, Back Panel: paso 3, imagen 2 de 2
    • Depress MicroSD to eject it from the side of the case.

  4. Repairing HTC Droid Incredible Logic Board: paso 4, imagen 1 de 3 Repairing HTC Droid Incredible Logic Board: paso 4, imagen 2 de 3 Repairing HTC Droid Incredible Logic Board: paso 4, imagen 3 de 3
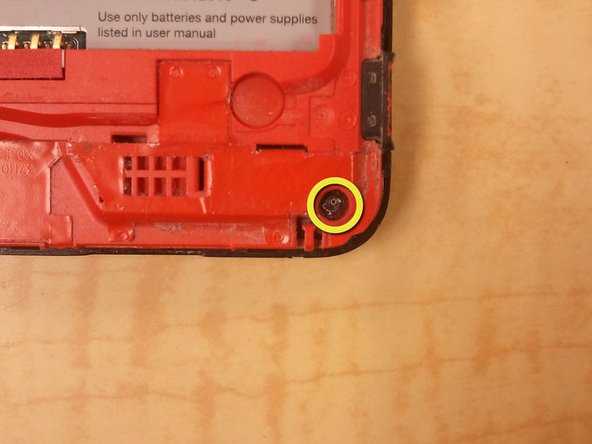
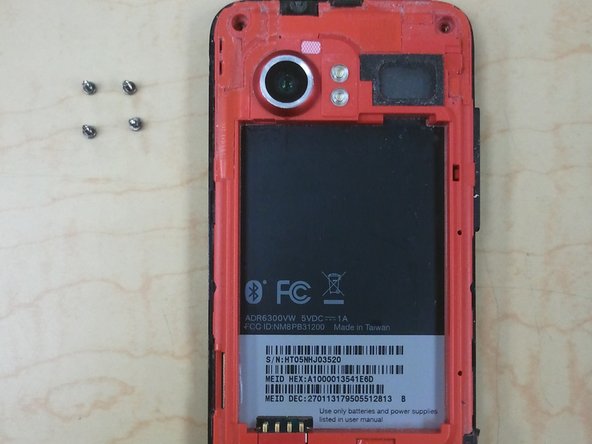
    • Remove 4 corner screws, you may have to remove a "VOID" sticker from one of the screw heads.

  5. Repairing HTC Droid Incredible Logic Board: paso 5, imagen 1 de 3 Repairing HTC Droid Incredible Logic Board: paso 5, imagen 2 de 3 Repairing HTC Droid Incredible Logic Board: paso 5, imagen 3 de 3
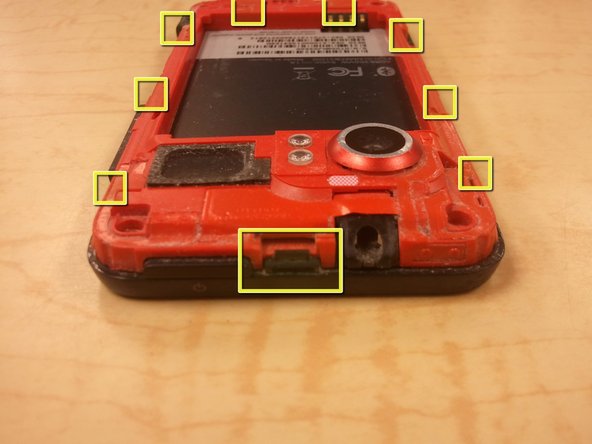
    • Using a spudger, unclip the nine clips holding the back panel to the front panel, highlighted in included pictures.

    • Start at the top, and work clockwise, being careful not to break the clips.

    • There are, 1, 3, 2, and 3 clips on each side, respectively.

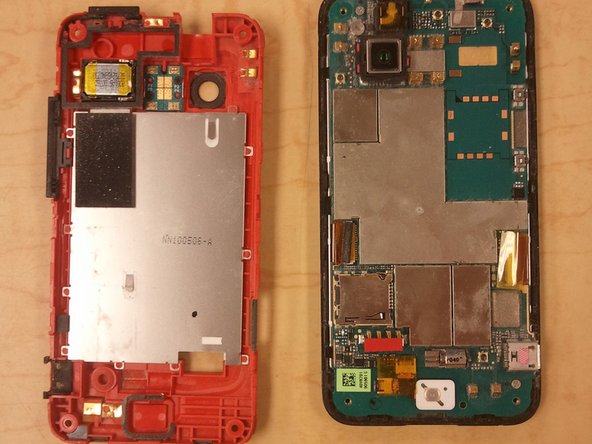
    • After the clips are disengaged, there are no cables holding the back panel in place.

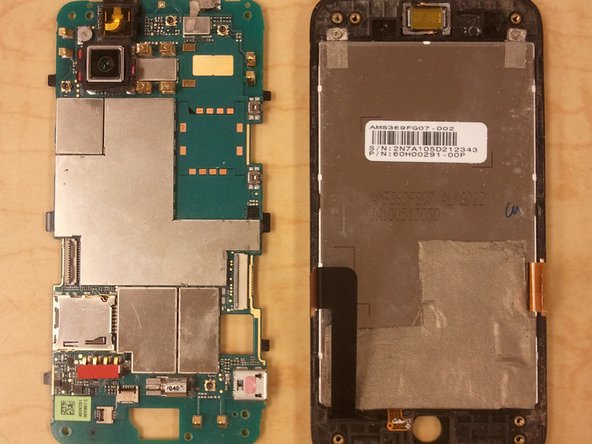
  6. Repairing HTC Droid Incredible Logic Board, Logic Board: paso 6, imagen 1 de 1
    • Use your spudger to release the remaining clips, disconnecting the ribbon cables from the logic board.

  7. Repairing HTC Droid Incredible Logic Board: paso 7, imagen 1 de 2 Repairing HTC Droid Incredible Logic Board: paso 7, imagen 2 de 2
    • Remove 2 Phillips Screws holding the logic board to the front panel.

    • Gently lift the logic board off the front panel.

Conclusión

To reassemble your device, follow these instructions in reverse order.

6 personas más completaron esta guía.

0 comentarios

Agregar Comentario

Ver Estadísticas:

Ultimas 24 horas: 0

Ultimos 7 días: 0

Ultimos 30 días: 1

Todo El Tiempo: 3,983