Esta traducción podría no reflejar los cambios más recientes añadidos a la guía de referencia. Ayúdanos a actualizar la traducción o revisa la guía original.
Introducción
Ce tutoriel vous montrera comment remplacer le port de charge de l'appareil.
Qué necesitas
-
-
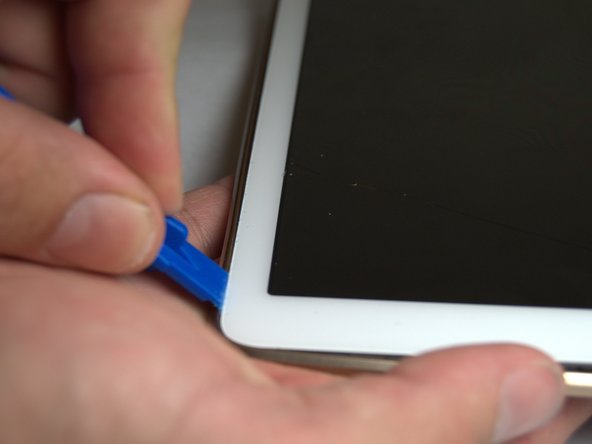
Placez l'outil d'ouverture en plastique dans la fente pour carte SD ou le port de chargement.
-
Soulevez dans un mouvement vers le haut jusqu'à ce que vous voyez une séparation entre la tablette et la couverture arrière.
-
-
-
Placez l'outil d'ouverture en plastique entre la jointure extérieure.
-
Déplacez l'outil dans un mouvement vers le bas pour séparer les 2 parties.
-
Exécutez l'outil le long de la jointure pour déconnecter tous les connecteurs tenant la jointure extérieure à l'arrière de l'appareil.
-
-
-
-
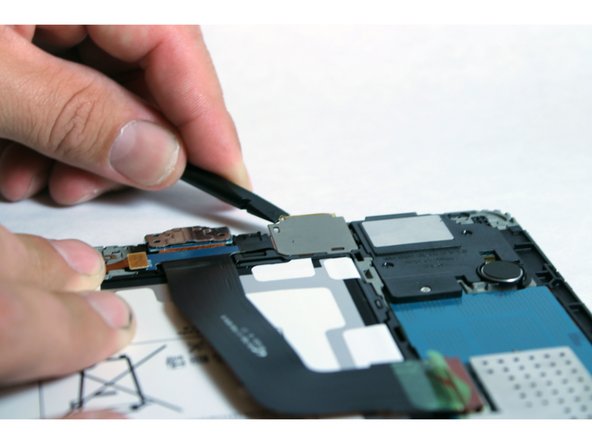
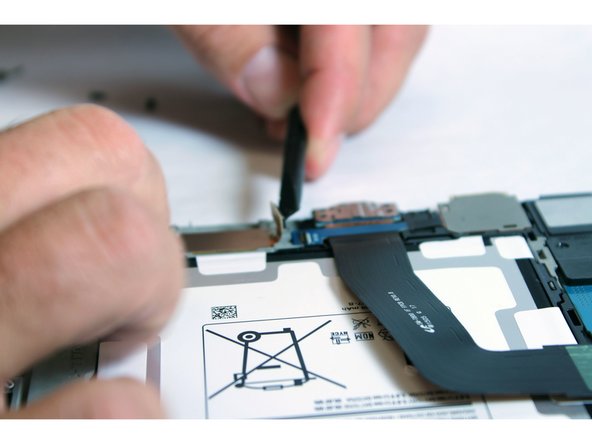
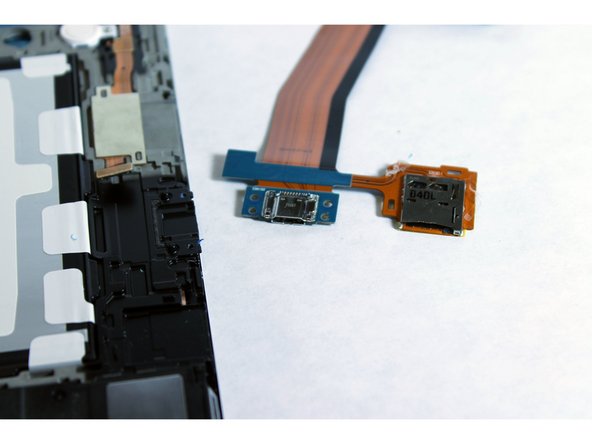
Retirez les quatre vis cruciformes #000 de 2 mm du cache du connecteur de charge.
-


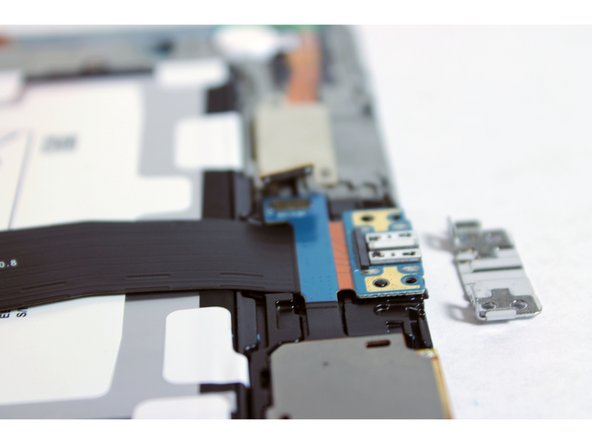

Pour remonter votre appareil, suivez ces instructions dans l'ordre inverse.
Pour remonter votre appareil, suivez ces instructions dans l'ordre inverse.
Cancelar: No complete esta guía.
52 personas más completaron esta guía.
Un agradecimiento especial a estos traductores:
88%


Estos traductores nos están ayudando a reparar el mundo! ¿Quieres contribuir?
Empezar a traducir ›
Equipo

USF Tampa, Team 3-2, Eyestone Fall 2015 Miembro de USF Tampa, Team 3-2, Eyestone Fall 2015
USFT-EYESTONE-F15S3G2
3 Miembros
20 Guías creadas
27 comentarios
Very easy, but first part was bad... SD card wouldn't latch. So TIL to test ports for mechanical function before doing the repair.
You might want to add a description on how to disconnect / reconnect the ribbon cable at the other end of the port. I pried up and did not slide out the ribbon cable. Thus breaking off the connector. Totally my fault and not reflective on your tutorial. I just want others not to experience my goof.
I broke mine as well. Do you know where I can purchase a new connector??
Abby -
Same happened to me. I broke that connector and I had to stick it with a tape and put some paper to strengthen it before covering the back. It is a very fragile and tricky part. The correct way is just to pull the cable back without moving it up. Please add this note to step 10
Alright tutorial. Missed 2 things: 1) I was able to spludge around the rim and easily removed it and the back at the same time. 2) Forgetting to include how to disconnect the ribbon on the inside end could be problematic for first timers.
However, the pictures of how to get the port out were first rate (another tutorial showed different and potentially damaging way to remove it). I am glad I read both. All together it took less than 10 minutes to get everything back together and now it is charging like a champ! Thanks for taking the time to make this.