Saltar al contenido principal

Refrigerator Handle with No Drills Installation

Guía Archivada
Esta guía se mantiene únicamente para fines históricos. Utiliza la última versión de la guía para llevar a cabo tu reparación.

Qué necesitas

  1. Refrigerator Handle with No Drills Installation, Refrigerator Handle with No Drills Installation: paso 1, imagen 1 de 3 Refrigerator Handle with No Drills Installation, Refrigerator Handle with No Drills Installation: paso 1, imagen 2 de 3 Refrigerator Handle with No Drills Installation, Refrigerator Handle with No Drills Installation: paso 1, imagen 3 de 3
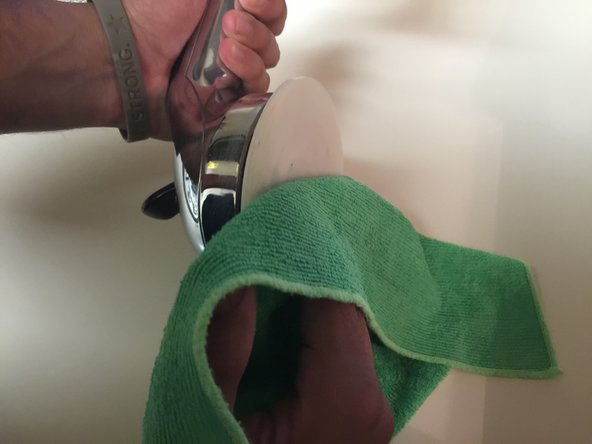
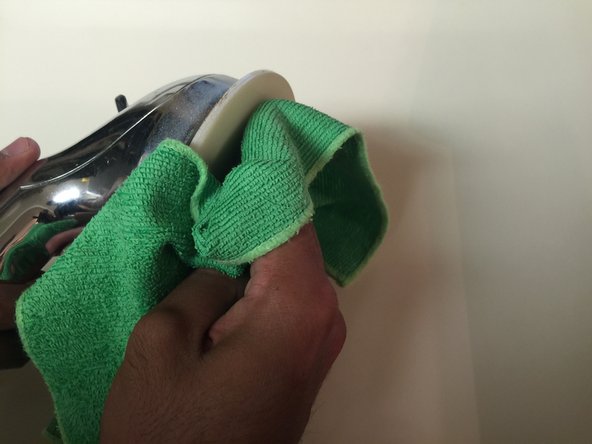
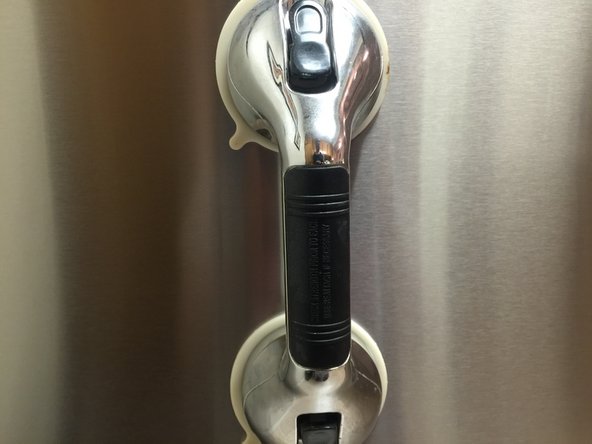
    • Use a clean sponge or damp lint free cloth to apply the handle to the surface.

    • Soapy water or other mild cleansers may be used to clean the surface from all grease or grime.

    • Preferably use cold or luke warm water.

  2. Refrigerator Handle with No Drills Installation: paso 2, imagen 1 de 3 Refrigerator Handle with No Drills Installation: paso 2, imagen 2 de 3 Refrigerator Handle with No Drills Installation: paso 2, imagen 3 de 3
    • Gently clean the surface of refrigerator where handle will be applied.

    • Ensure the surface is completely dry before application.

  3. Refrigerator Handle with No Drills Installation: paso 3, imagen 1 de 3 Refrigerator Handle with No Drills Installation: paso 3, imagen 2 de 3 Refrigerator Handle with No Drills Installation: paso 3, imagen 3 de 3
    • Clean the bottom of the handle's suction cups with a damp sponge or lint-free towel.

    • Ensure the surface is completely dry up before application.

  4. Refrigerator Handle with No Drills Installation: paso 4, imagen 1 de 1
    • Once both surfaces are dry, place the handle with suction cups facing the refrigerator.

    • Position the handle on the side you would open the refrigerator.

  5. Refrigerator Handle with No Drills Installation: paso 5, imagen 1 de 1
    • Position the handle vertically and at an appropriate height.

    • The height is up to your own personal preference.

  6. Refrigerator Handle with No Drills Installation: paso 6, imagen 1 de 2 Refrigerator Handle with No Drills Installation: paso 6, imagen 2 de 2
    • Apply pressure to both ends of the handle for approximately 15 seconds.

  7. Refrigerator Handle with No Drills Installation: paso 7, imagen 1 de 3 Refrigerator Handle with No Drills Installation: paso 7, imagen 2 de 3 Refrigerator Handle with No Drills Installation: paso 7, imagen 3 de 3
    • Lock the suction cups in place by pushing down on the hatches.

    • Depending on manufacturer, locking the suction handles may differ in method.

  8. Refrigerator Handle with No Drills Installation: paso 8, imagen 1 de 2 Refrigerator Handle with No Drills Installation: paso 8, imagen 2 de 2
    • Slowly release the handle.

    • If handle detaches, repeat steps 4-8 until successful.

Conclusión

To reassemble your device, follow these instructions in reverse order.

Jaskaran Buttar

Miembro Desde 09/29/15

125 Reputación

1 Guía escrita

Equipo

Cal Poly, Team 10-7, Green Fall 2015 Miembro de Cal Poly, Team 10-7, Green Fall 2015

CPSU-GREEN-F15S10G7

3 Miembros

3 Guías creadas

Un comentario

Help to fix a big hole where the door is holding on door falling off

Joya Hall - Contestar

Agregar Comentario

Ver Estadísticas:

Ultimas 24 horas: 1

Ultimos 7 días: 1

Ultimos 30 días: 10

Todo El Tiempo: 269