Introducción
Es un procedimiento fácil para solucionar el problema. Puedes ver el desmontaje del mouse para obtener más ayuda.
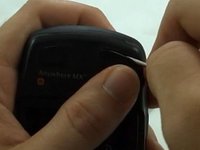
- Desmonta la carcasa del ratón, sostenida por 4 tornillos
- Desolda y reemplaza el microinterruptor
He encontrado 3 fabricantes diferentes que venden repuestos de microinterruptores para Logitech Anywhere. Solo he probado E-Switch.
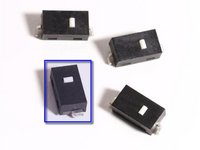
- E-Switch TS20100F070S (Digi-Key | Mouser Electronic)
- Omron D2LS (eBay | Digi-Key | Mouser Electronic)
- Kailh MI873101S01 (eBay)
- ZIPPY DA T Type (microinterruptor original)
Qué necesitas
-
-
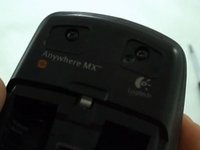
2 tornillos se encuentran debajo de las pegatinas de la batería.
-
2 tornillos, uno debajo de cada una de las almohadillas deslizantes debajo de la nariz del mouse.
-
-
-
-
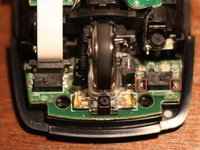
Desolda el microinterruptor y reemplazalo por uno nuevo, E-Switch TS20100F070S. Algunos tienen problemas para desoldar el interruptor. Eventualmente, puedes recortar la pestaña para quitar el interruptor. Una vez que se quita el interruptor, puedes quitar fácilmente la pestaña de soldadura.
-
Utiliza una punta cónica Weller ST7 0.03" X0.79 mm ST Series para quitar y soldar el microinterruptor
-
Solo recuerda, el microinterruptor no tiene polaridad. Pero los conectores te guiarán hacia qué lado debe mirar el microinterruptor.
-
Interruptor electrónico TS20100F070S
-


Para volver a armar tu dispositivo, sigue estas instrucciones en orden inverso.
Cancelar: No complete esta guía.
39 personas más completaron esta guía.
Un agradecimiento especial a estos traductores:
100%

¡ Francisco Javier Saiz Esteban nos está ayudando a reparar el mundo! ¿Quieres contribuir?
Empezar a traducir ›

25Guía Comentarios
Thanks, my mouse actually arrived out of the package with the double-click issue, and this fixed it. Needed pretty high-temp soldering iron to get OEM micro-switch off, and tight fit soldering the new one on the inside terminal, but otherwise pretty easy.
Got this mouse, had this problem, sent it off for an RMA. The one they sent back eventually developed this exact same issue. Here's to hoping I won't have to do this again for a while now. Thanks for the guide.
Ended up having to repeat the process for the right mouse button. This time I managed to knock off one of the solder pads. Eventually by applying a lot of pressure and heat though, I was able to get the switch to bind with whatever was left of it, although I still have no idea how long my fix will actually hold for. But, something to watch out for if you're doing this.
This is great as now i have a part number as when I pulled the original microswitch apart to fix it internally, the button flew away - never to be found.
These are great prices for little switches, however living in the UK means an expensive courier to £15 and a lounge wait. They simply do not sell these here in the GB :-(
The part with shipment is far cheaper than a brand new MX Anywhere mouse.
Thanks again for the info!