Introducción
Use esta guía para reemplazar un ventilador defectuoso en su computadora portátil MSI GS65 Stealth Thin 8RE.
El ventilador es el método principal que usa su dispositivo para mantener fría la CPU. Hay dos ventiladores a cada lado de la computadora portátil que expulsan aire caliente por las rejillas de ventilación. Para asegurarse de que sea necesario reemplazar uno o ambos ventiladores, navegue hasta MSI Dragon Center y controle las velocidades de los ventiladores para determinar si están funcionando según sea necesario. Si un ventilador está compensando, significa que el otro ventilador debe reemplazarse. Si la temperatura de la computadora es superior a la nominal y ninguno de los ventiladores tiene una alta velocidad de RPM, entonces ambos ventiladores deben reemplazarse.
En el paso 8 de esta guía, deberá aplicar pasta térmica a su computadora portátil. Para asegurarse de no dañar su computadora por uso excesivo, por favor revise la [guía | 744 | Instrucciones de pasta térmica] antes de comenzar. Asegúrese de apagar su computadora portátil por completo y desconectarla de cualquier fuente de alimentación externa antes de comenzar el proceso.
Qué necesitas
-
-
Quite los quince tornillos Phillips #00 negros de 6.0 mm de la cubierta posterior.
-
Retire con cuidado la cubierta trasera levantando la caja con una herramienta de apertura de plástico, comenzando en el extremo de apertura y terminando en la bisagra.
-
-
-
Desenchufe el conector de la batería pellizcando y moviendo el extremo del cable blanco hacia afuera.
-
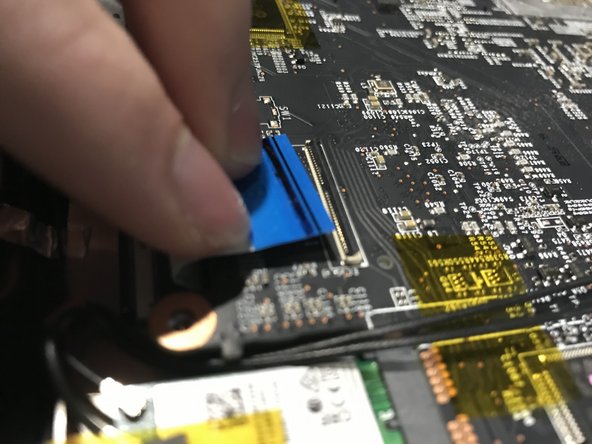
Destrabe y desenchufe los diversos cables planos blancos y azules de la placa base levantando las pestañas de bloqueo negras de los conectores ZIF con un spudger.
-
Luego, extraiga suavemente los cables planos.
-
-
-
-
Desatornille el tornillo Phillips #00 de 4.0 mm que sujeta la tarjeta WiFi.
-
Tenga mucho cuidado de no desenchufar los diminutos cables al levantar la tarjeta WiFi, ya que puede ser bastante difícil volver a enchufarlos.
-
Levante ligeramente y deslice la tarjeta hacia usted para quitarla.
-
Con unas pinzas o una manipulación cuidadosa con la mano, desenchufe el cable que está justo al lado de la tarjeta WiFi.
-
-
-
Retire los 2 últimos cables planos conectados a la placa base de manera similar a los anteriores.
-
Retire lentamente el cable plano negro grande del ventilador, ya que está ligeramente adherido.
-
Desatornille los dos tornillos Phillips #00 negros de 6.0 mm debajo de cada ventilador.
One screw is below the GPU fans, the other is beneath the CPU fan on the other side.
-
-
-
Da la vuelta a la placa base.
-
Cada uno de los tornillos puede tener un número junto a él en el metal negro, desatornille en ese orden tanto para el desmontaje como para el montaje (es decir, no invierta el orden en el montaje). Si no está seguro del pedido, debería ser el siguiente:
-
Primer tornillo: rojo
-
Segundo tornillo: naranja
-
Tercer tornillo: amarilla
-
Cuarto y quinto tornillos: verde en cualquier orden
-
Desenchufe los cables conectados a cada ventilador: 2 para el ventilador de la GPU y 1 para el ventilador de la CPU. Uno de los cables del ventilador de la GPU está debajo de un trozo de cinta negra.
I flipped the board around and placed it in the bottom part of the cover. This let me put a little more pressure down on the screws with less risk of bending the board. And OH BOY were they tight.
-
-
-
Para reemplazar el ventilador de la CPU, que es el reemplazo más común, retire los tres tornillos negros Phillips #000 de 3.0 mm del ventilador singular.
-
Para reemplazar el ventilador de la GPU, retire los 5 tornillos Phillips #000 negros de 3.0 mm de la configuración del ventilador doble.
-
Luego, retire la cinta muy resistente que sella las rejillas de ventilación.
-
Después de quitar el ventilador e insertar el nuevo, siga todos los pasos de la guía nuevamente en orden inverso.
Great description, very helpful! Only for me it’s not necessary to remove the heat pipes. The fans can be removed by pulling them out sideways. Just a little lift of the heat pipes is enough to create room.
Yes what Michiel said - step 8 is unnecessary, so you don't need thermal paste. Leave it connected and just pop out and replace the fan.
Side note: Might make sense to replace BOTH fans even if only one is having problems. I replaced the GPU fans about a year ago and now my CPU fan went out. Wish I had replaced both last time...
-


Después de seguir todos los pasos de la guía nuevamente en orden inverso para volver a ensamblar su dispositivo, 'conecte su computadora a su cargador, espere unos momentos, luego enciéndalo' . Debería funcionar de manera óptima ahora; sin embargo, si experimenta algún problema nuevo, debe verificar una vez más si ha vuelto a enchufar todos los cables y cintas en sus puntos específicos.
Después de seguir todos los pasos de la guía nuevamente en orden inverso para volver a ensamblar su dispositivo, 'conecte su computadora a su cargador, espere unos momentos, luego enciéndalo' . Debería funcionar de manera óptima ahora; sin embargo, si experimenta algún problema nuevo, debe verificar una vez más si ha vuelto a enchufar todos los cables y cintas en sus puntos específicos.
Cancelar: No complete esta guía.
16 personas más completaron esta guía.
Un agradecimiento especial a estos traductores:
100%

¡ Elliot nos está ayudando a reparar el mundo! ¿Quieres contribuir?
Empezar a traducir ›
Equipo

Embry-Riddle Aeronautical University, Team S10-G10, Salas Spring 2020 Miembro de Embry-Riddle Aeronautical University, Team S10-G10, Salas Spring 2020
ERAU-SALAS-S20S10G10
2 Miembros
3 Guías creadas
10 comentarios
Very helpful, thank you!
The only issue I encountered was removing the GPU fan. I couldn't get it from “picture 2 to picture 3” in Step 9 as easily as you did it here. Frustrating!
Very helpful guide! I replaced the GPU fan, got it all put back together, and freaked out a bit when it didn’t power on at all… then I realized there was an important note in the conclusion to PLUG IT IN first. Phew!
Amazing guide. Many thanks to the author!
However, I have a few extra comments or details for anyone else doing this.
1.) I think it’s better to leave the battery connector until you flip the motherboard. On my system it was actually impossible to pull it out without at least lifting the motherboard. There’s some extra rubber pad on my laptop that is glued onto the laptop’s base and it blocks the battery connector from being pulled out. This piece is completely missing in the photo in this guide so there’s some variation between my system and the one used here. Even after lifting the motherboard so the piece was not in the way, I felt uncomfortable tugging on the electric cords rather than the plastic, because that connector is *very* tight, and it was impossible to grasp the plastic of the connector. Only after flipping the motherboard over, was I able to get a grip on the white plastic of the connector and managed to pull it out.
3.) In step 4, I was also confused about how to actually pull out the WiFi card. It’s completely impossible to grasp it with fingers—there just isn’t enough room. I don’t understand the part in the guide about slightly lifting it either. Anyway, the solution is to simply pull on the kapton tape (after the screw is removed, of course) rather than trying to grab the card itself. That piece of tape makes it so easy!
4.) Also, reconnecting those “tiny wires” on the WiFi card is actually pretty simple: they just snap into the connector.
5.) I mention 4.) because for me it was impossible to thread the WiFi card through the hole by the GPU fans, as instructed in step 6. Maybe the layout of the wiring varies, but on my laptop, the wires for one of the GPU fan was blocking me from sliding the WiFi card through, and then those “tiny wires” came off the card as I was trying to do it. I say don’t bother and just disconnect them. I found out later that it was easy to reconnect.
Even after the warning I strip a screw in "Step 7". How I fixed it?
1. STOP trying to get it out, you're just gonna make worse.
2. Grab a small piece of plastic tape and put it between the screw and the screwdriver. Try it now.
Note: If it doesn't turn STOP, fold the tape and try it again. Remember every time you fail you make it worse.
3. After getting it out, replace the screw with a new one. If you're as lazy as me, just use one from the battery instead.