Introducción
Guía de reemplazo para el ensamblaje de pantalla OEM Samsung Galaxy Tab A 8.0 (SM-T350).
Qué necesitas
-
-
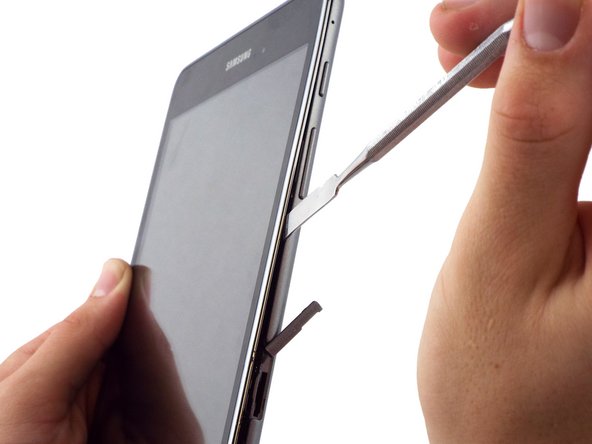
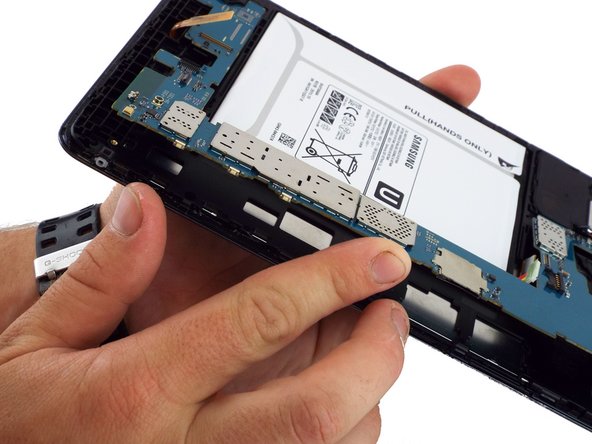
En la parte superior de la ranura de la tarjeta de memoria, usa el pequeño spudger de metal para crear una separación entre la cubierta posterior y el resto del dispositivo.
-
-
-
Use el spudger de metal intermedio en lugar del spudger de metal pequeño para quitar la tapa posterior. Esto se hace deslizando el spudger de metal intermedio alrededor del perímetro del dispositivo, comenzando en la parte superior de la ranura de la tarjeta de memoria.
-
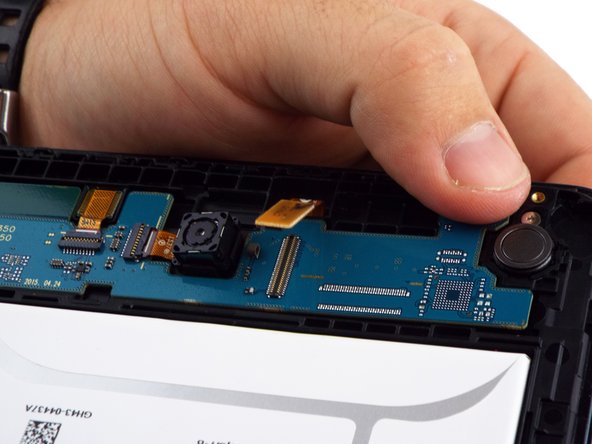
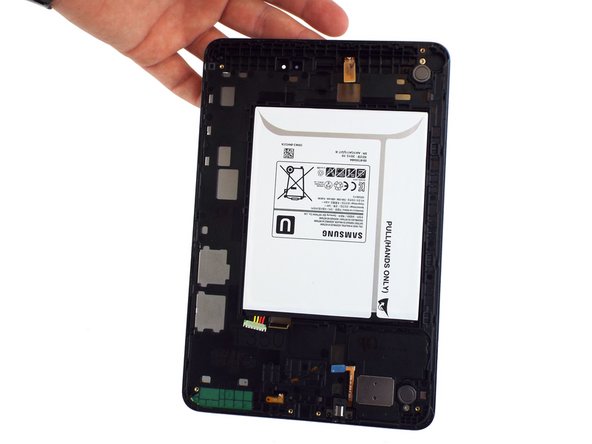
La segunda imagen muestra la parte interna del dispositivo una vez que se quita la cubierta posterior.
I bought a replacement battery for my Tab A 8” and the plastic tool that came with it broke within a minute of trying to open the case. I wound up buying the iFixit Pro Tech Toolkit and, with the metal spudger and the opening picks, I was finally able to get the case open and remove the battery. The kit and these directions were lifesavers, thanks!
Please check my tab
-
-
-
Desconecta el conector eléctrico de la placa base con las pinzas dobladas de precisión.
The outside edges of the white clip on the battery side of the connector have hooks that need to be released. It is much better to use the tweezers there than underneath the wires.
Thanks, I figured that but NO WHERE does it state this. Fu*king '''
if i buy new battery for my samsung do it will still work if but it in there
-
-
-
Usa el extremo plano del spudger de plástico para separar la batería del resto del dispositivo.
-
Una vez que se quitan la tapa posterior y la batería, el dispositivo debe verse como se ilustra en la segunda imagen.
I really appreciated these instructions, thank you. I had the tools but because it was quite difficult getting the back open the plastic tools here weren’t much help. I had to use a medium sized flat head screwdriver. Upon prying there was minor damage around the memory card slot to the casing but that couldn’t be helped and didn’t hurt the operation of the TabA. The original battery inside has a thin layer of black glue around the edge so it took a little effort and patience to get out. I had to carefully use the screwdriver without scratching the tab interior, to loosen the battery. My tools came with a suction cup on a ring which was invaluable on getting the battery out safely. My TabA seems to work well now. Thanks again.
Das öffnen funktionierte nur mit Hilfe eines kleinen Schraubendrehers als Hebel. Der Akku selbst ist zusätzlich noch mit 11 kleinen Kreuzschlitz Schrauben im Gerät befestigt. Trotzdem vielen Dank für tolle Anleitung
I felt i didn’t need to remove the battery or take the mother board out to remove the lcd & digitiser. I did however disconnect the battery and use the tape that covers the connection to tape between the 2 connections.
I will also comment in later steps where i made shortcuts to removing the display
Cheers Wayne
Hi, Basically steps 6,7,9,10,11,&12 aren’t needed to remove the lcd/digitiser
Cheers Wayne
Hi there
I just replaced the battery on my TabA. It seemed to be OK until it ran right out of charge and then the new battery wouldn't recharge.
Ideas please?
-
-
-
-
Usa un spudger para levantar y soltar el conector del cable de pantalla a presión de la placa base.
-
-
-
Usa un spudger para levantar y soltar el conector ZIF; tire suavemente del cable plano de la cámara trasera para liberarlo.
-
Usa un par de pinzas para asegurar suavemente la cámara y sacarla del marco.
-
Si no puede asegurar la cámara con pinzas, desliza una púa de apertura entre el marco y la cámara y levante la cámara.
-
-
-
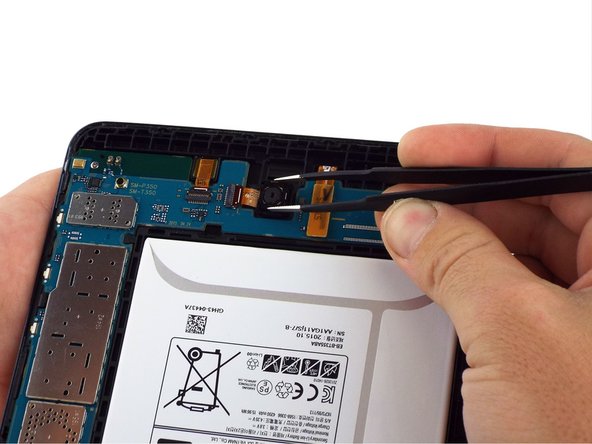
Usa un spudger para voltear el conector ZIF de la cámara frontal hacia arriba; tira suavemente del cable plano para liberarlo.
-
Usa pinzas para quitar suavemente la cámara frontal del marco.
-
-
-
Usa el extremo plano de un spudger para levantar y desconectar el conector de ajuste a presión del conector de auriculares de 3,5 mm.
-
-
-
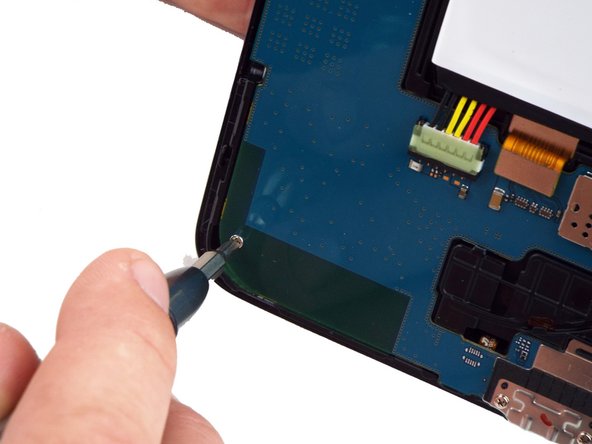
Utiliza un destornillador PH000 para quitar los dos tornillos de 3 mm que conectan el protector del puerto USB al marco medio.
-
-
-
Utiliza un destornillador PH000 para quitar los dos tornillos de 3 mm en el lado izquierdo de la placa base.
-
-
-
Levanta la placa base para liberarla del lado del botón de encendido y volumen.
-
Puedes usar un spudger para ayudar a levantar suavemente la placa base desde el lado del botón.
-
Un pequeño soporte de plástico asegura la placa base al marco; Primero levanta la placa base desde el lado del botón de encendido y volumen y deslízala hacia afuera del soporte.
In My shortcut there is no need for this step. I now follow the guide to remove the digitiser.
But basically all you need to do is heat the edge of the screen with a heat gun or hairdryer until it’s almost too hot to touch. Then work a thin metal spudger under the screen and work your way around the screen. Be careful around the home button. Use picks on the corners once you’ve loosened the grip and also the middle of the sides. Reheat if you find it difficult to continue with the spudger around the edges. Be patient and you will have success. My replacement lcd/digitiser didn't come with adhesive so i applied 3M 2mm double sided tape for the sides & 5mm double sided tape either end. if you don’t have this you could use B-7000 glue it will do the job.
Cheers Wayne
-


Para volver a montar tu dispositivo, sigue estas instrucciones en orden inverso.
Para volver a montar tu dispositivo, sigue estas instrucciones en orden inverso.
Cancelar: No complete esta guía.
13 personas más completaron esta guía.
Un agradecimiento especial a estos traductores:
100%


Estos traductores nos están ayudando a reparar el mundo! ¿Quieres contribuir?
Empezar a traducir ›


3 comentarios
Where is the rest of this guide? Just stops after removing motherboard :[
It appears that it is intended to remove all parts from the case (battery and motherboard) and install them in a new body with a good screen attached.
Ben D -
After removing the motherboard, I continued with disassembly by following the iFixit guide for the Digitizer removal.
( Samsung Galaxy Tab A Digitizer Replacement )
After removing the glass/digitizer, I was able to remove the LCD relatively easy by pushing it through the gaps on the back end of the frame. It appeared to not have any adhesive holding it in place. I was replacing the LCD and the digitizer in my case so I was I bit more careless with the removal of those components. I did place a bit of adhesive on the new LCD replacement and everything fit back snuggly.
this photo does NOT look like a Galaxy A tablet, and it's constructed differently-- so your instructions are misleading.
GREG GOLDEN - Contestar