Introducción
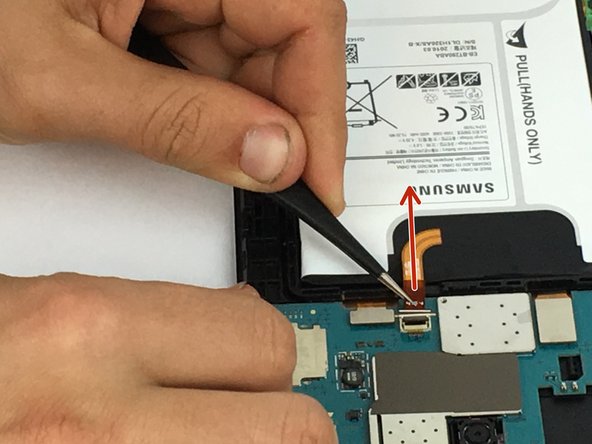
Durante todos los pasos, manipule cada componente con cuidado, ya que son piezas electrónicas muy delicadas.
Qué necesitas
-
-
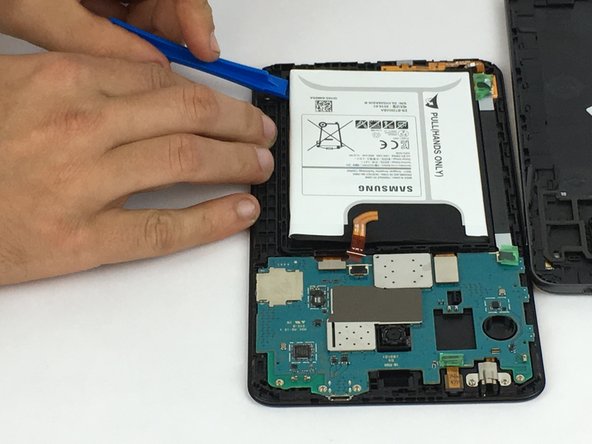
Utilizando la herramienta de apertura de plástico, comenzando en cualquier esquina de la tableta, inserte la herramienta entre el panel posterior y el panel frontal.
-
Deslice la herramienta alrededor de la tableta para desbloquear los paneles entre sí.
-
-


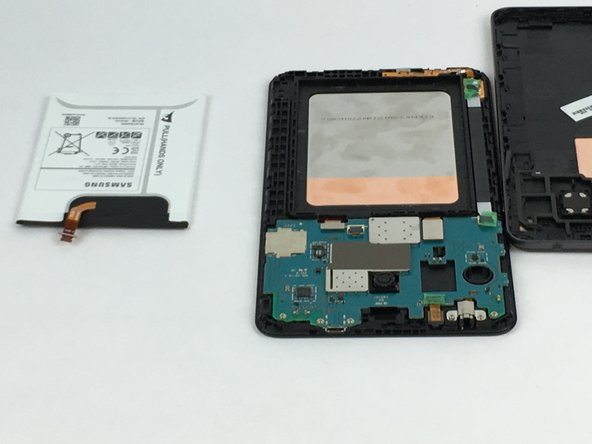
Para volver a montar el dispositivo, siga estas instrucciones en orden inverso.
Para volver a montar el dispositivo, siga estas instrucciones en orden inverso.
Cancelar: No complete esta guía.
14 personas más completaron esta guía.
Un agradecimiento especial a estos traductores:
100%

¡ Pablo Vargas nos está ayudando a reparar el mundo! ¿Quieres contribuir?
Empezar a traducir ›

Equipo

USF Tampa, Team 5-4, Passmore Spring 2017 Miembro de USF Tampa, Team 5-4, Passmore Spring 2017
USFT-PASSMORE-S17S5G4
3 Miembros
9 Guías creadas
4 comentarios
The OEM battery in my device expanded and pushed the screen from the housing. I had to temporarily separate the screen from the housing while leaving the connectors in their sockets while I pried the front housing from the back to reveal the battery. Once the front and back of the chassis were separated, I reattached the screen to the front housing and continued with the procedure. A heat gun made the process much easier by loosening the tape between the screen and housing, but was not necessary to lift the battery or separate the front from the back of the chassis.
Bought a new battery, replaced as said, but seems like new battery is dead. How does one boost it? If I plug into charge, it almost seems like te sceen "flashes" but doesnt come on or show charge bar. Please help.