Saltar al contenido principal

Razer Phone Motherboard Replacement

Qué necesitas

  1. Razer Phone Motherboard Replacement, Display Assembly: paso 1, imagen 1 de 3 Razer Phone Motherboard Replacement, Display Assembly: paso 1, imagen 2 de 3 Razer Phone Motherboard Replacement, Display Assembly: paso 1, imagen 3 de 3
    • Remove the plastic speaker grills by using the metal spudger to pry underneath the strips.

    • Peel off the plastic speaker grill to reveal the screws.

    • Heating up the plastic grills make them easier to remove.

    • Peeling off the plastic speaker grill will ruin the adhesive used to keep it in place. A new adhesive must be used to put the grill back on the device.

  2. Razer Phone Motherboard Replacement: paso 2, imagen 1 de 2 Razer Phone Motherboard Replacement: paso 2, imagen 2 de 2
    • Pry the top plastic grill off with the metal spudger and reveal the screws.

  3. Razer Phone Motherboard Replacement: paso 3, imagen 1 de 3 Razer Phone Motherboard Replacement: paso 3, imagen 2 de 3 Razer Phone Motherboard Replacement: paso 3, imagen 3 de 3
    • Remove five (two bottom, three top) 2.5 mm screws with the Phillips #000 screwdriver.

    • Remove five (four bottom, one top) 5.5 mm screws with the Torx Head T5 screwdriver.

  4. Razer Phone Motherboard Replacement: paso 4, imagen 1 de 2 Razer Phone Motherboard Replacement: paso 4, imagen 2 de 2
    • Remove the display assembly by using the Jimmy to separate the assembly from the phone's frame.

    • Lift the display assembly away from the other half of the phone.

  5. Razer Phone Motherboard Replacement: paso 5, imagen 1 de 3 Razer Phone Motherboard Replacement: paso 5, imagen 2 de 3 Razer Phone Motherboard Replacement: paso 5, imagen 3 de 3
    • Remove one 2.5 mm screw holding down the metal bracket connector using the Phillips #000 screwdriver.

    • Peel back the metallic shielding over the connector using tweezers.

    • Remove the metal bracket connector.

  6. Razer Phone Motherboard Replacement: paso 6, imagen 1 de 2 Razer Phone Motherboard Replacement: paso 6, imagen 2 de 2
    • Grab hold of the the screen ribbon with the tweezers and remove it from the rest of the phone to free the assembly display.

  7. Razer Phone Motherboard Replacement, Battery: paso 7, imagen 1 de 3 Razer Phone Motherboard Replacement, Battery: paso 7, imagen 2 de 3 Razer Phone Motherboard Replacement, Battery: paso 7, imagen 3 de 3
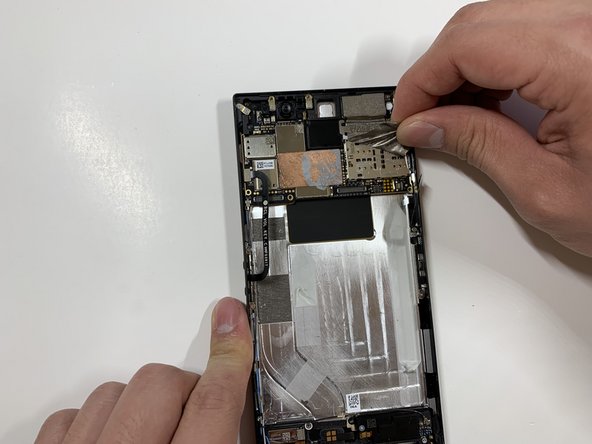
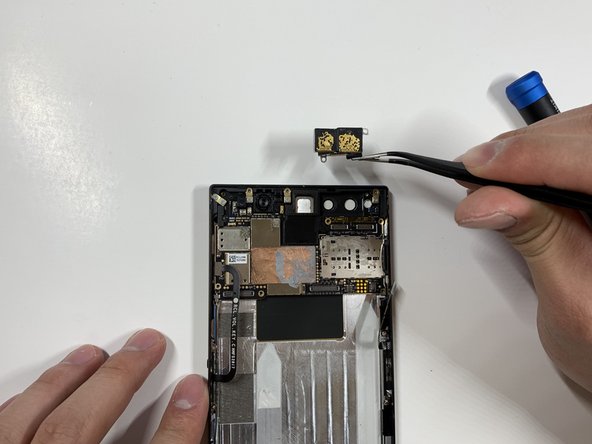
    • Grab hold of the connector on the right side of the phone (just above the battery) using the tweezers.

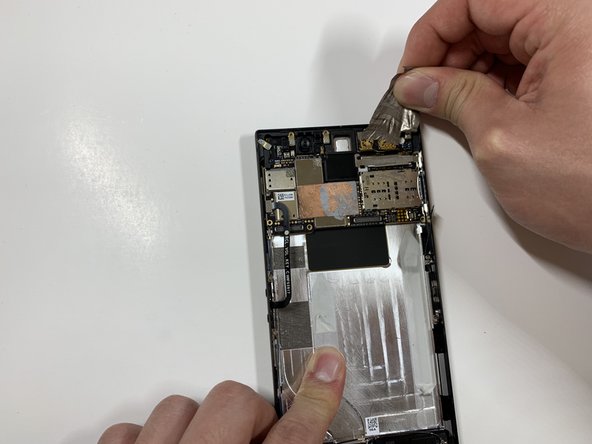
    • Remove the connector.

  8. Razer Phone Motherboard Replacement: paso 8, imagen 1 de 2 Razer Phone Motherboard Replacement: paso 8, imagen 2 de 2
    • Remove the 2.5 mm screw holding down the bracket with a Phillips #000 screwdriver.

    • Grab the bracket with the tweezers and remove it.

  9. Razer Phone Motherboard Replacement: paso 9, imagen 1 de 3 Razer Phone Motherboard Replacement: paso 9, imagen 2 de 3 Razer Phone Motherboard Replacement: paso 9, imagen 3 de 3
    • Peel off and pull out the elastic tabs at the bottom of the battery.

  10. Razer Phone Motherboard Replacement: paso 10, imagen 1 de 2 Razer Phone Motherboard Replacement: paso 10, imagen 2 de 2
    • Carefully use the Jimmy to wedge the battery out of the phone.

  11. Razer Phone Motherboard Replacement, Rear Camera: paso 11, imagen 1 de 2 Razer Phone Motherboard Replacement, Rear Camera: paso 11, imagen 2 de 2
    • Remove the one 2.5 mm screw with the Phillips #000 screwdriver.

  12. Razer Phone Motherboard Replacement: paso 12, imagen 1 de 3 Razer Phone Motherboard Replacement: paso 12, imagen 2 de 3 Razer Phone Motherboard Replacement: paso 12, imagen 3 de 3
    • Remove the protective peel covering the rear cameras using your hands.

  13. Razer Phone Motherboard Replacement: paso 13, imagen 1 de 1
    • Use the tweezers to remove the white tab connector.

  14. Razer Phone Motherboard Replacement: paso 14, imagen 1 de 1
    • Grab and remove the metal tab with the tweezers.

  15. Razer Phone Motherboard Replacement: paso 15, imagen 1 de 3 Razer Phone Motherboard Replacement: paso 15, imagen 2 de 3 Razer Phone Motherboard Replacement: paso 15, imagen 3 de 3
    • Grab the connectors with the tweezers and gently lift the connectors loose.

  16. Razer Phone Motherboard Replacement: paso 16, imagen 1 de 2 Razer Phone Motherboard Replacement: paso 16, imagen 2 de 2
    • Remove the one 2.5 mm screw with the Phillips #000 screwdriver.

  17. Razer Phone Motherboard Replacement: paso 17, imagen 1 de 1
    • Remove the one 2.5 mm screw underneath the connectors with the Phillips #000 screwdriver.

  18. Razer Phone Motherboard Replacement: paso 18, imagen 1 de 3 Razer Phone Motherboard Replacement: paso 18, imagen 2 de 3 Razer Phone Motherboard Replacement: paso 18, imagen 3 de 3
    • Grab the loose connectors with a tweezer and gently remove the rear camera unit from the phone.

  19. Razer Phone Motherboard Replacement, Motherboard: paso 19, imagen 1 de 1
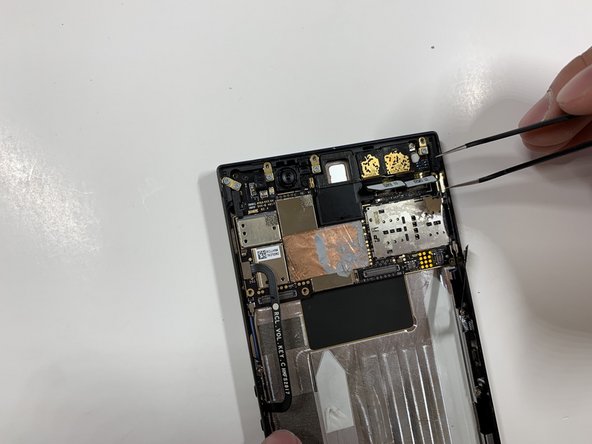
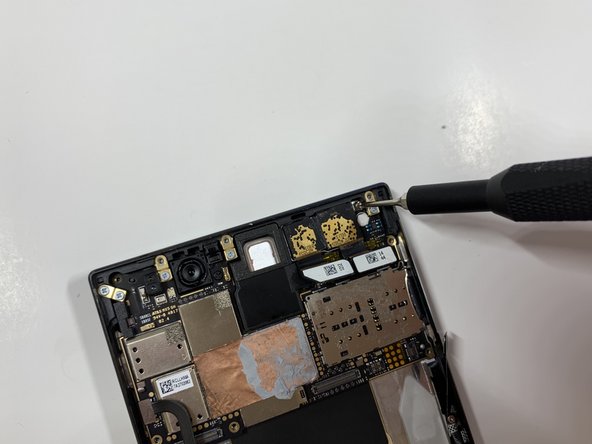
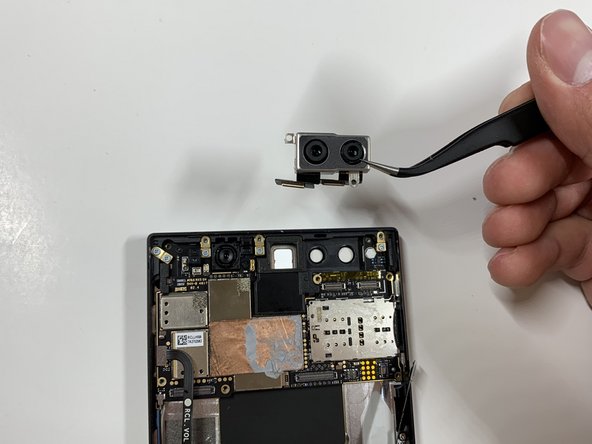
    • Grab and remove the blue connector with the tweezers.

  20. Razer Phone Motherboard Replacement: paso 20, imagen 1 de 2 Razer Phone Motherboard Replacement: paso 20, imagen 2 de 2
    • Remove the five 1 mm screws holding down the gold antenna line brackets to the motherboard using the Phillips #000 screwdriver.

  21. Razer Phone Motherboard Replacement: paso 21, imagen 1 de 2 Razer Phone Motherboard Replacement: paso 21, imagen 2 de 2
    • Remove the 2.5 mm screw next to the front-facing camera with the Phillips #000 screwdriver.

  22. Razer Phone Motherboard Replacement: paso 22, imagen 1 de 2 Razer Phone Motherboard Replacement: paso 22, imagen 2 de 2
    • Remove the four gold antenna line brackets with the tweezers.

  23. Razer Phone Motherboard Replacement: paso 23, imagen 1 de 1
    • Using the tweezers remove the SIM card tray from the body of the phone.

  24. Razer Phone Motherboard Replacement: paso 24, imagen 1 de 1
    • Carefully lift up the motherboard away from the device.

Conclusión

To reassemble your device, follow these instructions in reverse order.

David Todd

Miembro Desde 01/25/19

161 Reputación

1 Guía escrita

Equipo

Cal Poly, Team S19-G6, White Winter 2019 Miembro de Cal Poly, Team S19-G6, White Winter 2019

CPSU-WHITE-W19S19G6

5 Miembros

12 Guías creadas

0 comentarios

Agregar Comentario

Ver Estadísticas:

Ultimas 24 horas: 0

Ultimos 7 días: 2

Ultimos 30 días: 8

Todo El Tiempo: 1,476