Saltar al contenido principal

Razer Blade Stealth 2017 Speaker Replacement

Qué necesitas

  1. Razer Blade Stealth 2017 Speaker Replacement, Battery: paso 1, imagen 1 de 2 Razer Blade Stealth 2017 Speaker Replacement, Battery: paso 1, imagen 2 de 2
    • Before you begin, be sure to turn off your laptop and discharge the battery down to 25%.

    • Use a Torx T5 screwdriver to remove the eight, 3mm screws on the bottom cover of the laptop.

    • Whenever you remove screws from the device, remember to save and label them.

  2. Razer Blade Stealth 2017 Speaker Replacement: paso 2, imagen 1 de 1
    • Remove the bottom cover of the laptop by sliding it away from the hinge.

    • Do not force the cover up!

  3. Razer Blade Stealth 2017 Speaker Replacement: paso 3, imagen 1 de 2 Razer Blade Stealth 2017 Speaker Replacement: paso 3, imagen 2 de 2
    • Use your fingernail to pry up and disconnect the battery from the motherboard.

  4. Razer Blade Stealth 2017 Speaker Replacement: paso 4, imagen 1 de 1
    • Use a Phillips #00 screwdriver to remove the six, 5mm screws securing the battery.

  5. Razer Blade Stealth 2017 Speaker Replacement: paso 5, imagen 1 de 2 Razer Blade Stealth 2017 Speaker Replacement: paso 5, imagen 2 de 2
    • Remove any tape attached to the battery.

    • Use the plastic spudger to pry out the battery.

  6. Razer Blade Stealth 2017 Speaker Replacement, Speaker: paso 6, imagen 1 de 2 Razer Blade Stealth 2017 Speaker Replacement, Speaker: paso 6, imagen 2 de 2
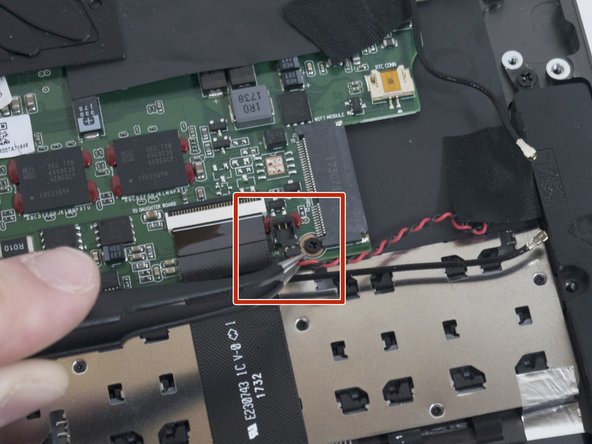
    • Use tweezers to disconnect the red and black speaker cables by lifting up on the pin-header.

    • The same process is used for both speaker connections.

    • Do not pull horizontally on the wires!

  7. Razer Blade Stealth 2017 Speaker Replacement: paso 7, imagen 1 de 2 Razer Blade Stealth 2017 Speaker Replacement: paso 7, imagen 2 de 2
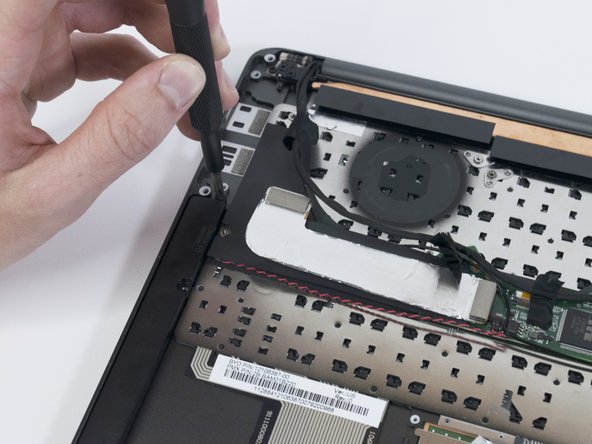
    • Use a Phillips #00 to remove the two, 4mm screws on each speaker.

  8. Razer Blade Stealth 2017 Speaker Replacement: paso 8, imagen 1 de 3 Razer Blade Stealth 2017 Speaker Replacement: paso 8, imagen 2 de 3 Razer Blade Stealth 2017 Speaker Replacement: paso 8, imagen 3 de 3
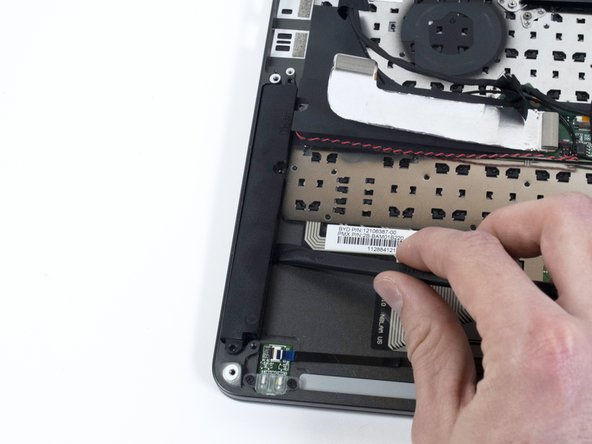
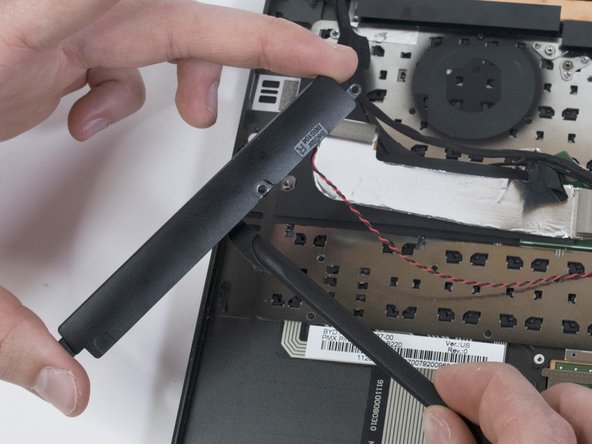
    • Use a plastic spudger to pry the speaker(s) away from the chassis.

    • The speakers are glued to the chassis, making them difficult to remove.

    • The same process is used for both speakers.

Conclusión

To reassemble your device, follow these instructions in reverse order.

Una persona más ha completado esta guía.

Helene Willits

Miembro Desde 10/10/19

762 Reputación

6 Guías creadas

Equipo

Cal Poly, Team S11-G3, Regan Fall 2019 Miembro de Cal Poly, Team S11-G3, Regan Fall 2019

CPSU-REGAN-F19S11G3

4 Miembros

7 Guías creadas

0 comentarios

Agregar Comentario

Ver Estadísticas:

Ultimas 24 horas: 1

Ultimos 7 días: 2

Ultimos 30 días: 14

Todo El Tiempo: 1,082