Saltar al contenido principal

Esta guía ha sufrido modificaciones. Revisa la última versión sin revisar.

RIDGID R84015 X2 Planetary Gear Replacement Guide

Qué necesitas

  1. RIDGID R84015 X2 Planetary Gear Replacement Guide, RIDGID R84015 X2 Case Removal: paso 1, imagen 1 de 2 RIDGID R84015 X2 Planetary Gear Replacement Guide, RIDGID R84015 X2 Case Removal: paso 1, imagen 2 de 2
    • Remove the backplate.

    • Using a Torx T20 screwdriver, remove the four screws attaching the back plate.

  2. RIDGID R84015 X2 Planetary Gear Replacement Guide: paso 2, imagen 1 de 1
    • Remove the drill handle.

    • Using the Phillips #2 screwdriver, remove the five screws attaching the drill handle to the body.

  3. RIDGID R84015 X2 Planetary Gear Replacement Guide: paso 3, imagen 1 de 2 RIDGID R84015 X2 Planetary Gear Replacement Guide: paso 3, imagen 2 de 2
    • Remove the gear casing from the body.

    • Using the Philips #2 screwdriver, remove the four screws attaching the gear casing to the body.

  4. RIDGID R84015 X2 Planetary Gear Replacement Guide, Planetary Gear: paso 4, imagen 1 de 1
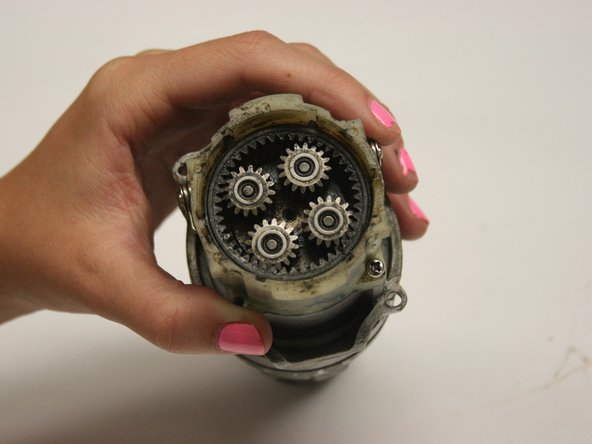
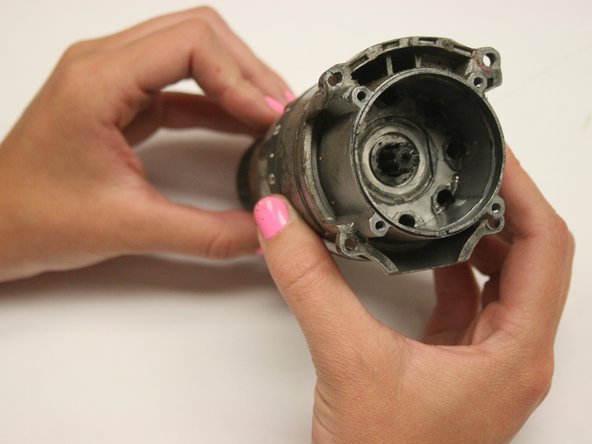
    • Prepare to remove the gear chamber.

    • Using the Phillips #2 screwdriver, unscrew the four screws at the rear of the plastic gear chamber.

  5. RIDGID R84015 X2 Planetary Gear Replacement Guide: paso 5, imagen 1 de 2 RIDGID R84015 X2 Planetary Gear Replacement Guide: paso 5, imagen 2 de 2
    • Remove the motor from the drill by gently pulling the motor away from the gear chamber.

    • NOTE: Handle the gear chamber with caution as the gears are now loose.

  6. RIDGID R84015 X2 Planetary Gear Replacement Guide: paso 6, imagen 1 de 1
    • Remove the plastic gear chamber.

    • Using the Phillips #2 screwdriver, remove the four screws that attach the plastic gear chamber.

  7. RIDGID R84015 X2 Planetary Gear Replacement Guide: paso 7, imagen 1 de 2 RIDGID R84015 X2 Planetary Gear Replacement Guide: paso 7, imagen 2 de 2
    • Remove each component from the gear assembly. Replace components as needed.

    • Reassemble the drill following the gear replacement instructions in reverse order.

Linea de Meta

4 personas más completaron esta guía.

Evan Long

Miembro Desde 04/15/10

262 Reputación

4 Guías creadas

Equipo

Cal Poly, Team 15-48, Garner Spring 2010 Miembro de Cal Poly, Team 15-48, Garner Spring 2010

CPSU-GARNER-S10S15G48

6 Miembros

10 Guías creadas

Un comentario

Very helpful, thank you! I was not sure how to detach the motor from the gearbox and didn't want to apply any brute force, and this explained it well.

YURIY - Contestar

Agregar Comentario

Ver Estadísticas:

Ultimas 24 horas: 0

Ultimos 7 días: 3

Ultimos 30 días: 12

Todo El Tiempo: 6,217