Saltar al contenido principal

Quantum Axis A23 Motherboard Replacement

Qué necesitas

  1. Quantum Axis A23 Motherboard  Replacement, Removing the Case: paso 1, imagen 1 de 1
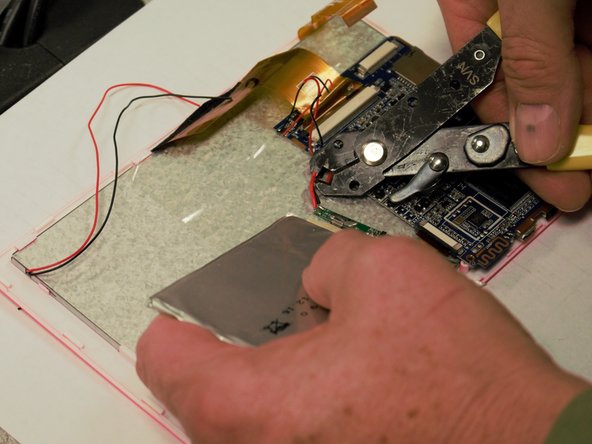
    • Use plastic opening tools to pry open the rear casing of the your Quantum Axis A23. Slide the tool along the edges to release the plastic tabs.

    • Be careful not to crack front screen in the process.

  2. Quantum Axis A23 Motherboard  Replacement, Unscrewing the Motherboard: paso 2, imagen 1 de 1
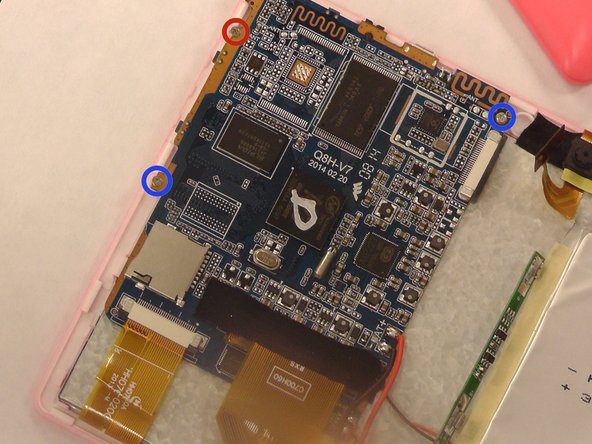
    • Remove all three screws holding down the motherboard, using the Phillips #00 Precision Screwdriver and slot in the Phillips Head PH #0.

  3. Quantum Axis A23 Motherboard  Replacement: paso 3, imagen 1 de 1
    • Using the small needle nose pliers, carefully remove the small yellow ribbons that are attached to the motherboard.

  4. Quantum Axis A23 Motherboard  Replacement: paso 4, imagen 1 de 2 Quantum Axis A23 Motherboard  Replacement: paso 4, imagen 2 de 2
    • Cut the red and black wires that connect the battery, screen, camera, and speakers to the motherboard.

  5. Quantum Axis A23 Motherboard  Replacement, Screwing the Motherboard Back On: paso 5, imagen 1 de 2 Quantum Axis A23 Motherboard  Replacement, Screwing the Motherboard Back On: paso 5, imagen 2 de 2
    • Take the the new motherboard and screw it in with the screws used on the previous motherboard, starting with the top right and bottom left corners.

    • Screw on the top left corner last

  6. Quantum Axis A23 Motherboard  Replacement: paso 6, imagen 1 de 1
    • Strip both the red and black wires in the middle with a wire stripper/cutter tool. Do this for all wires that were cut, as well as for the wires on your new motherboard.

  7. Quantum Axis A23 Motherboard  Replacement: paso 7, imagen 1 de 1
    • Take the red wire from the specified part and attach to the red wire on the motherboard, then twist the two ends together and wrap in electrical tape. Repeat this step for the black wires.

    • Do this for every part that was attached to the motherboard.

Conclusión

Snap the rear case back on to finish this repair.

Nicole

Miembro Desde 01/12/15

407 Reputación

4 Guías creadas

Equipo

USF Tampa, Team 1-5, Tanski Winter 2015 Miembro de USF Tampa, Team 1-5, Tanski Winter 2015

USFT-TANSKI-W15S1G5

3 Miembros

10 Guías creadas

0 comentarios

Agregar Comentario

Ver Estadísticas:

Ultimas 24 horas: 1

Ultimos 7 días: 1

Ultimos 30 días: 3

Todo El Tiempo: 355