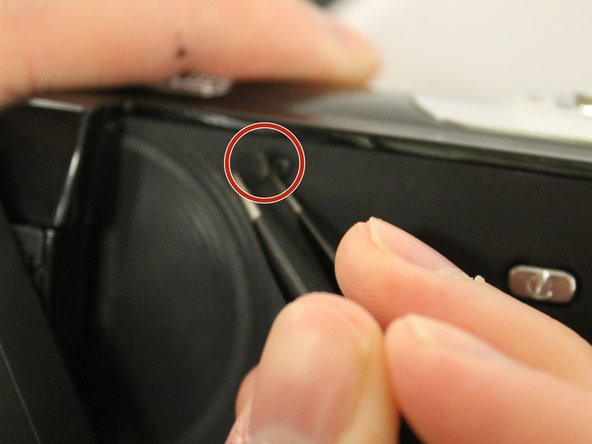
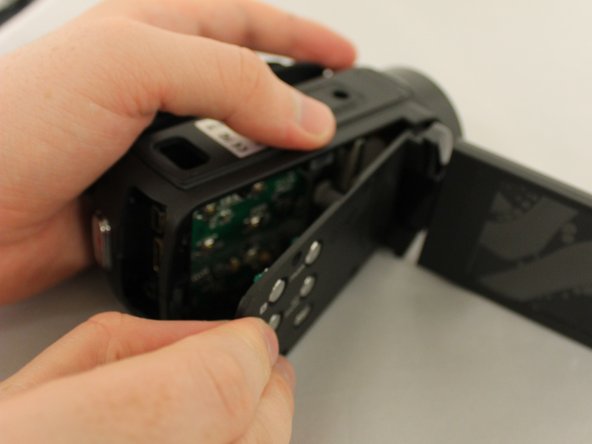
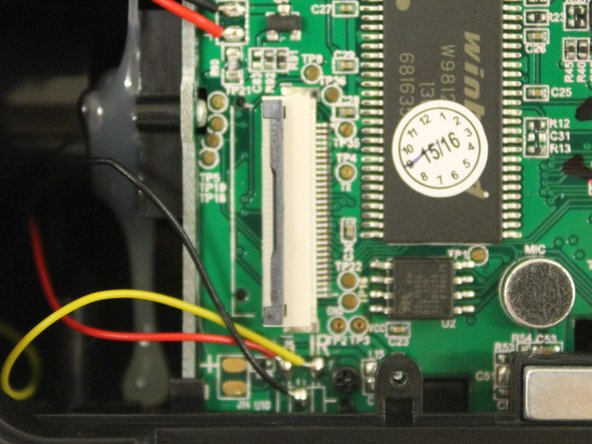
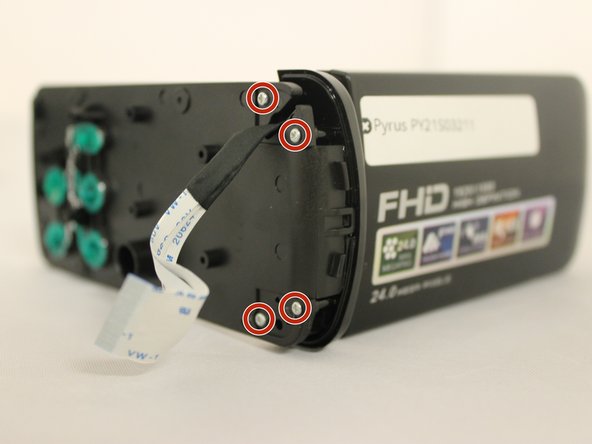
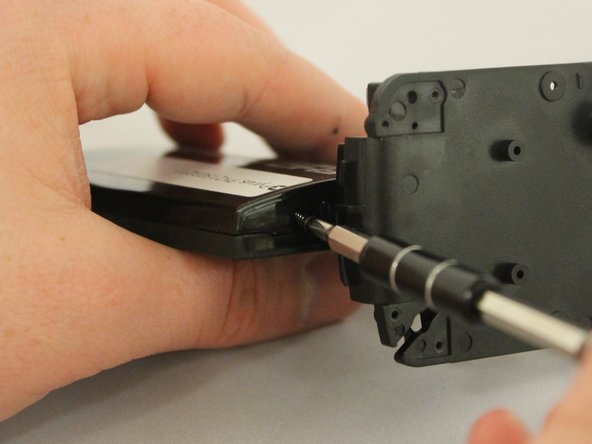
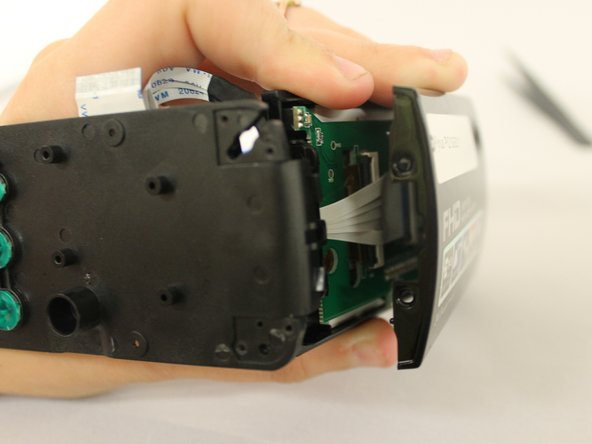
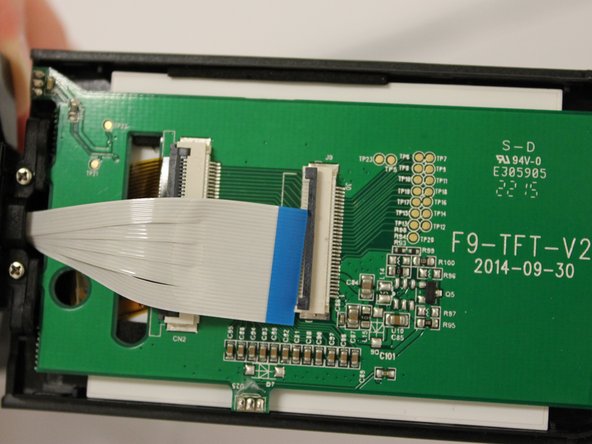
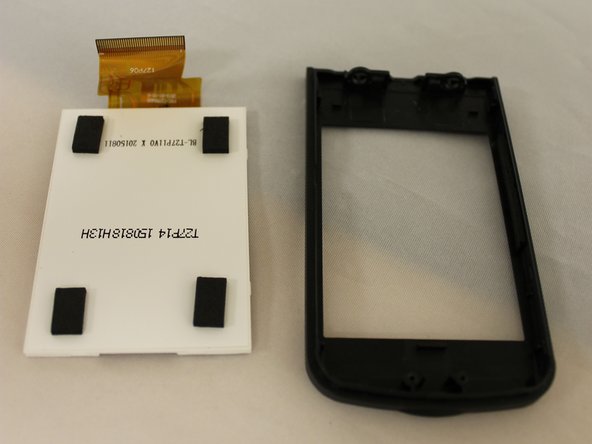
Saltar al contenido principal

Pyrus PY21S03211 Display Screen Replacement

Qué necesitas

  1. Pyrus PY21S03211 Display Screen Replacement, Display Screen: paso 1, imagen 1 de 1
    • Turn the video camera upside down so the bottom of the device is visible.

  2. Pyrus PY21S03211 Display Screen Replacement: paso 2, imagen 1 de 2 Pyrus PY21S03211 Display Screen Replacement: paso 2, imagen 2 de 2
    • Pull back the bottom tab to reveal the battery compartment.

  3. Pyrus PY21S03211 Display Screen Replacement: paso 3, imagen 1 de 1
    • Pull back tab that is holding in the battery in place and remove the battery from the device.

  4. Pyrus PY21S03211 Display Screen Replacement: paso 4, imagen 1 de 1
    • Open up the display screen.

  5. Pyrus PY21S03211 Display Screen Replacement: paso 5, imagen 1 de 3 Pyrus PY21S03211 Display Screen Replacement: paso 5, imagen 2 de 3 Pyrus PY21S03211 Display Screen Replacement: paso 5, imagen 3 de 3
    • Use tweezers to carefully peel off the circle stickers, revealing the 4mm screws.

  6. Pyrus PY21S03211 Display Screen Replacement: paso 6, imagen 1 de 2 Pyrus PY21S03211 Display Screen Replacement: paso 6, imagen 2 de 2
    • Use a 00 screwdriver to remove all six 4mm screws from the side of the device.

  7. Pyrus PY21S03211 Display Screen Replacement: paso 7, imagen 1 de 2 Pyrus PY21S03211 Display Screen Replacement: paso 7, imagen 2 de 2
    • Use a plastic pick to pry off the side face of the device and carefully remove the side face.

  8. Pyrus PY21S03211 Display Screen Replacement: paso 8, imagen 1 de 1
    • Carefully open the side face. Keep the side face close to the body of the device to avoid pulling on the white wires.

  9. Pyrus PY21S03211 Display Screen Replacement: paso 9, imagen 1 de 2 Pyrus PY21S03211 Display Screen Replacement: paso 9, imagen 2 de 2
    • To remove the side face entirely, find the large white connector and flip open the grey lip with tweezers. Gently remove white connector.

  10. Pyrus PY21S03211 Display Screen Replacement: paso 10, imagen 1 de 1
    • Put the device body to the side and keep the display screen side in front of you.

  11. Pyrus PY21S03211 Display Screen Replacement: paso 11, imagen 1 de 2 Pyrus PY21S03211 Display Screen Replacement: paso 11, imagen 2 de 2
    • Remove the four silver 4mm screw from the back side of the side face.

  12. Pyrus PY21S03211 Display Screen Replacement: paso 12, imagen 1 de 3 Pyrus PY21S03211 Display Screen Replacement: paso 12, imagen 2 de 3 Pyrus PY21S03211 Display Screen Replacement: paso 12, imagen 3 de 3
    • Use tweezers to pry the shiny black plastic corner piece from the side face.

  13. Pyrus PY21S03211 Display Screen Replacement: paso 13, imagen 1 de 2 Pyrus PY21S03211 Display Screen Replacement: paso 13, imagen 2 de 2
    • Twist the screen to the side to reveal two black 4mm screws.

  14. Pyrus PY21S03211 Display Screen Replacement: paso 14, imagen 1 de 2 Pyrus PY21S03211 Display Screen Replacement: paso 14, imagen 2 de 2
    • Remove screws from both sides of the screen.

  15. Pyrus PY21S03211 Display Screen Replacement: paso 15, imagen 1 de 2 Pyrus PY21S03211 Display Screen Replacement: paso 15, imagen 2 de 2
    • Use a plastic pick to pry off the backside of the screen.

  16. Pyrus PY21S03211 Display Screen Replacement: paso 16, imagen 1 de 2 Pyrus PY21S03211 Display Screen Replacement: paso 16, imagen 2 de 2
    • Find the large white connector and flip open the grey lip with tweezers. Gently remove the white connector.

  17. Pyrus PY21S03211 Display Screen Replacement: paso 17, imagen 1 de 1
    • Find two 4mm silver screws at the base of the screen and remove them.

  18. Pyrus PY21S03211 Display Screen Replacement: paso 18, imagen 1 de 1
    • Use tweezers to flip open the grey lip and gently remove the gold transparent connector.

  19. Pyrus PY21S03211 Display Screen Replacement: paso 19, imagen 1 de 1
    • Find two 4mm black screws at the top of the display screen and remove them.

  20. Pyrus PY21S03211 Display Screen Replacement: paso 20, imagen 1 de 2 Pyrus PY21S03211 Display Screen Replacement: paso 20, imagen 2 de 2
    • Remove green board.

  21. Pyrus PY21S03211 Display Screen Replacement: paso 21, imagen 1 de 3 Pyrus PY21S03211 Display Screen Replacement: paso 21, imagen 2 de 3 Pyrus PY21S03211 Display Screen Replacement: paso 21, imagen 3 de 3
    • Remove the white display screen with your hands.

  22. Pyrus PY21S03211 Display Screen Replacement: paso 22, imagen 1 de 1
    • Insert replacement screen.

Conclusión

To reassemble your device, follow these instructions in reverse order.

Una persona más ha completado esta guía.

0 comentarios

Agregar Comentario

Ver Estadísticas:

Ultimas 24 horas: 0

Ultimos 7 días: 1

Ultimos 30 días: 4

Todo El Tiempo: 270