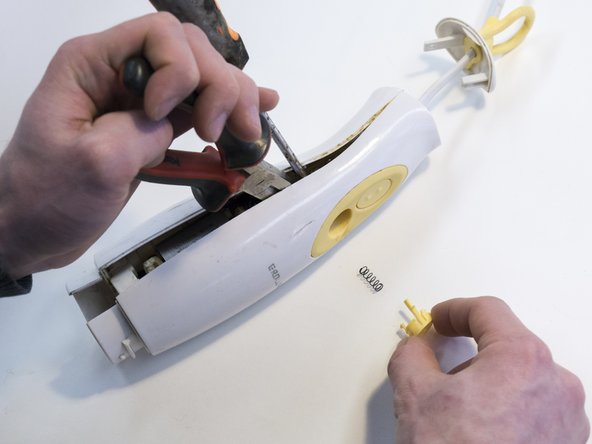
Saltar al contenido principal

ProLine HB25 Disassembly

Qué necesitas

  1. ProLine HB25 Disassembly, ProLine HB25 Disassembly: paso 1, imagen 1 de 1
    • Unscrew the screw on the back of the product.

  2. ProLine HB25 Disassembly: paso 2, imagen 1 de 2 ProLine HB25 Disassembly: paso 2, imagen 2 de 2
    • Pull out the backtab of the housing.

    • Push in the snapfits with, for instance, a screwdriver.

  3. ProLine HB25 Disassembly: paso 3, imagen 1 de 2 ProLine HB25 Disassembly: paso 3, imagen 2 de 2
    • Separate the housing with calibrated force.

    • Keep your fingers away from the housing and do not bend or break the housing.

    • Use a flathead screwdriver to push out the lower function button.

    • Remove the separating device.

  4. ProLine HB25 Disassembly: paso 4, imagen 1 de 1
    • Unscrew the hidden screw under the button.

  5. ProLine HB25 Disassembly: paso 5, imagen 1 de 2 ProLine HB25 Disassembly: paso 5, imagen 2 de 2
    • Open the housing.

    • Unscrew the circuit board.

    • Unscrew the wire lock.

  6. ProLine HB25 Disassembly: paso 6, imagen 1 de 2 ProLine HB25 Disassembly: paso 6, imagen 2 de 2
    • Push the housing of the button out of the housing.

  7. ProLine HB25 Disassembly: paso 7, imagen 1 de 2 ProLine HB25 Disassembly: paso 7, imagen 2 de 2
    • Push on the side of the housing of the button to push the button out of the housing.

    • The spring can jump away when you push out the button.

Conclusión

To reassemble your device, follow these instructions in reverse order.

Una persona más ha completado esta guía.

0 comentarios

Agregar Comentario

Ver Estadísticas:

Ultimas 24 horas: 2

Ultimos 7 días: 7

Ultimos 30 días: 16

Todo El Tiempo: 266