Saltar al contenido principal

PowerShot G7 X Mark II Top Cover Button Panel Replacement

Qué necesitas

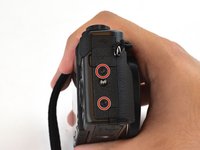
  1. PowerShot G7 X Mark II Top Cover Button Panel Replacement, Top Cover Button Panel: paso 1, imagen 1 de 2 PowerShot G7 X Mark II Top Cover Button Panel Replacement, Top Cover Button Panel: paso 1, imagen 2 de 2
    • Use a Phillips #000 screwdriver to remove four 4mm screws from the NFC panel cover on the bottom of the camera.

  2. PowerShot G7 X Mark II Top Cover Button Panel Replacement: paso 2, imagen 1 de 2 PowerShot G7 X Mark II Top Cover Button Panel Replacement: paso 2, imagen 2 de 2
    • Use a Phillips #000 screwdriver to remove five screws from under the LCD screen:

    • Three 2.4 mm screws

    • Two 3 mm screws

  3. PowerShot G7 X Mark II Top Cover Button Panel Replacement: paso 3, imagen 1 de 1
    • Use a Phillips #000 screwdriver to remove one 3mm screw on the left of the camera.

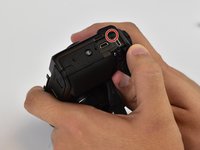
  4. PowerShot G7 X Mark II Top Cover Button Panel Replacement: paso 4, imagen 1 de 2 PowerShot G7 X Mark II Top Cover Button Panel Replacement: paso 4, imagen 2 de 2
    • Use a Phillips #000 screwdriver to remove one 3mm and one 4mm screw on the surface of the right face of the camera, and one under the USB/HDMI cover.

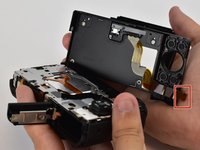
  5. PowerShot G7 X Mark II Top Cover Button Panel Replacement: paso 5, imagen 1 de 2 PowerShot G7 X Mark II Top Cover Button Panel Replacement: paso 5, imagen 2 de 2
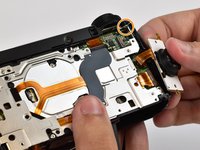
    • Carefully remove the back cover off of the camera by hand, minding the ribbon cable attached to the camera body. If the cover does not detach, use a spudger to pry it off.

    • Use the spudger tool to open the ZIF connector attaching the ribbon cable to the camera body.

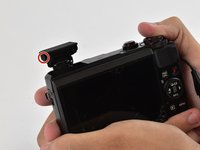
  6. PowerShot G7 X Mark II Top Cover Button Panel Replacement: paso 6, imagen 1 de 2 PowerShot G7 X Mark II Top Cover Button Panel Replacement: paso 6, imagen 2 de 2
    • Use a Phillips #000 screwdriver to remove two 3mm screws on the pop-up flash.

  7. PowerShot G7 X Mark II Top Cover Button Panel Replacement: paso 7, imagen 1 de 2 PowerShot G7 X Mark II Top Cover Button Panel Replacement: paso 7, imagen 2 de 2
    • Use a Phillips #000 screwdriver to remove two 2mm screws attaching the button panel to the camera body.

    • Use a Phillips #000 screwdriver to remove a 3mm screw from beneath the mode dial.

  8. PowerShot G7 X Mark II Top Cover Button Panel Replacement: paso 8, imagen 1 de 3 PowerShot G7 X Mark II Top Cover Button Panel Replacement: paso 8, imagen 2 de 3 PowerShot G7 X Mark II Top Cover Button Panel Replacement: paso 8, imagen 3 de 3
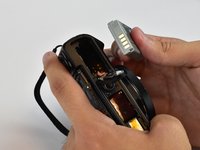
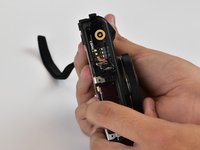
    • Open the battery compartment and remove the battery by flipping the small latch holding it in.

    • Use a Phillips #000 screwdriver to remove one 6mm screw in the bottom of the battery compartment.

  9. PowerShot G7 X Mark II Top Cover Button Panel Replacement: paso 9, imagen 1 de 2 PowerShot G7 X Mark II Top Cover Button Panel Replacement: paso 9, imagen 2 de 2
    • Pry the top cover button assembly off of the camera body by detaching clips around the base of it.

Conclusión

To reassemble your device, follow these instructions in reverse order.

3 personas más completaron esta guía.

Brandon

Miembro Desde 02/15/17

602 Reputación

4 Guías creadas

Equipo

USF Tampa, Team 12-3, Eyestone Spring 2017 Miembro de USF Tampa, Team 12-3, Eyestone Spring 2017

USFT-EYESTONE-S17S12G3

3 Miembros

4 Guías creadas

0 comentarios

Agregar Comentario

Ver Estadísticas:

Ultimas 24 horas: 1

Ultimos 7 días: 17

Ultimos 30 días: 45

Todo El Tiempo: 2,561