Saltar al contenido principal

Esta guía ha sufrido modificaciones. Revisa la última versión sin revisar.

PowerBook G4 Aluminum 17" 1.67 GHz (High-Res) RAM Replacement

Qué necesitas

  1. PowerBook G4 Aluminum 17" 1.67 GHz (High-Res) RAM Replacement, Battery: paso 1, imagen 1 de 2 PowerBook G4 Aluminum 17" 1.67 GHz (High-Res) RAM Replacement, Battery: paso 1, imagen 2 de 2
    • Use your thumbs to push the two battery retaining tabs away from the battery.

    • The battery should pop up enough to rotate it toward yourself and lift it out of the lower case.

  2. PowerBook G4 Aluminum 17" 1.67 GHz (High-Res) RAM Replacement, Memory Door: paso 2, imagen 1 de 1
    • Remove the three 2.3 mm Phillips screws securing the memory cover to the lower case.

  3. PowerBook G4 Aluminum 17" 1.67 GHz (High-Res) RAM Replacement: paso 3, imagen 1 de 2 PowerBook G4 Aluminum 17" 1.67 GHz (High-Res) RAM Replacement: paso 3, imagen 2 de 2
    • Lift the memory cover slightly and pull it toward yourself to remove it from the lower case.

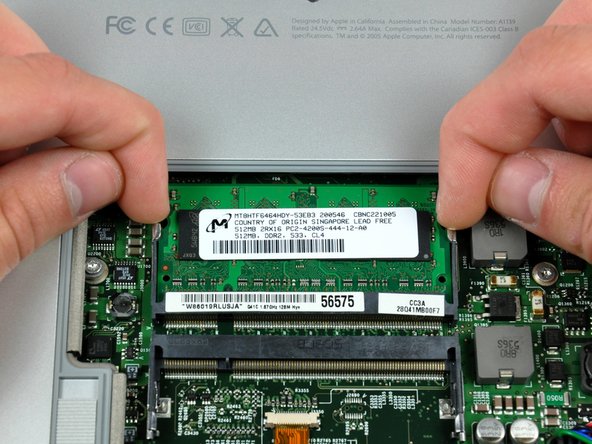
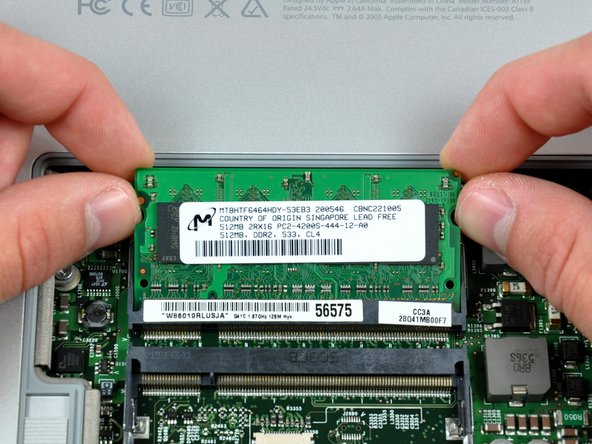
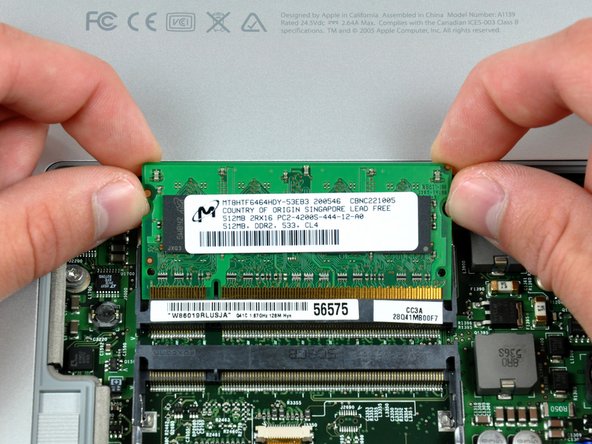
  4. PowerBook G4 Aluminum 17" 1.67 GHz (High-Res) RAM Replacement, RAM: paso 4, imagen 1 de 3 PowerBook G4 Aluminum 17" 1.67 GHz (High-Res) RAM Replacement, RAM: paso 4, imagen 2 de 3 PowerBook G4 Aluminum 17" 1.67 GHz (High-Res) RAM Replacement, RAM: paso 4, imagen 3 de 3
    • Use your fingertips to pull the two RAM arms away from the sides of the RAM chip. The chip should pop up slightly.

    • Pull the RAM chip away from its socket and remove it from the logic board.

    • Repeat this process for the other RAM chip, if present.

Conclusión

To reassemble your device, follow these instructions in reverse order.

24 personas más completaron esta guía.

Documentos Adjuntos

Un comentario

What is the maximum ram that I can bump up this system to?

Legendary Ocelot - Contestar

Agregar Comentario

Ver Estadísticas:

Ultimas 24 horas: 0

Ultimos 7 días: 2

Ultimos 30 días: 4

Todo El Tiempo: 8,323