Esta versión puede contener ediciones incorrectas. Cambie a la última instantánea verificada.
Qué necesitas
-
-
Usa una moneda para rodar el tornillo bloqueador de la batería 90 grados, en el sentido de las agujas del reloj.
-
Saca la batería de la computadora.
-
-
-
Saca los 10 tornillos siguientes:
-
Dos tornillos Phillips de 3 mm, del compartimento da la batería, en ambos los lados de los contactos de la batería.
-
Cuatro tornillos Philips de 3 mm, alrededor del compartimento de la memoria.
-
Cuatro tornillos Phillips de 16 mm, al lo largo de la bisagra.
-
-
-
Gira la computadora 90 grados en el sentido de las agujas del reloj, de forma que los puertos estén orientados hacia ti.
-
Saca los tres tornillos Phillips de 3 mm, a lo largo del borde de la caja inferior.
-
Cuando sustituyas estos tornillos, deberás instalarlos en la orden correcta. Empieza por el más cercano de la bisagra de la pantalla y sigue en dirección a la parte delantera del ordenador. Ten cuidado para no ponerlos en los dos agujeros de los lados del puerto de la salida de vídeo.
-
-
-
-
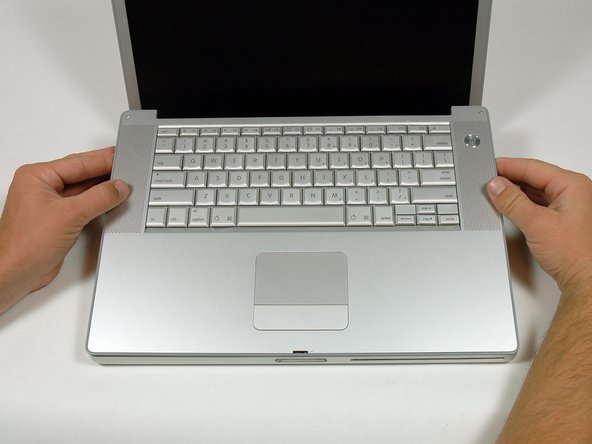
Sujeta las esquinas traseras de la caja superior y tira hacia arriba.
-
Levanta la parte posterior de la caja y trabaja con los dedos a los lados, liberando la caja a medida que avanzas. Una vez que hayas liberado los lados, es posible que debas mover la caja hacia arriba y hacia abajo para liberar el frente de la caja superior.
-
-
Este paso está sin traducir. Ayuda a traducirlo
-
Remove the three 6 mm long silver Phillips screws from the retaining bracket on the left side of the optical drive.
-
-
Este paso está sin traducir. Ayuda a traducirlo
-
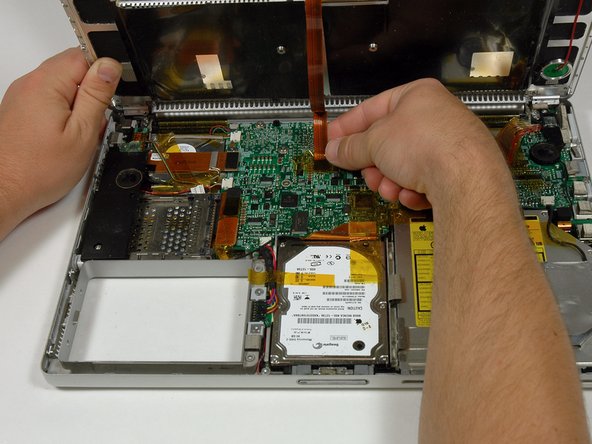
Disconnect the large orange hard drive cable from the logic board, removing tape as necessary.
-
-
Este paso está sin traducir. Ayuda a traducirlo
-
Lift the hard drive up by the right side and remove it from the computer.
-
-
Este paso está sin traducir. Ayuda a traducirlo
-
Remove the two silver Phillips screws and black rubber bumpers from either side of the hard drive (four sets of screws and bumpers total).
-
-
Este paso está sin traducir. Ayuda a traducirlo
-
Disconnect the hard drive cable from the hard drive using a spudger by gently loosening one side at a time. (Be careful not to pry to hard or you may bend the pins.) You may need to remove a piece of orange tape attaching the ribbon cable to the hard drive.
-


Cancelar: No complete esta guía.
82 personas más completaron esta guía.
Documentos Adjuntos

3 comentarios
I have a 15 inch powerbook g4 with 1,67ghz and I after installing 160gb ATA drive I only had 149,69 gb left before installing os and stuff. My question is: Does powerbooks have any hardware limitations that makes us unable to install more storage?
If you try to install an SSD via SATA-IDE-adaptor, please make sure it works before re-assembling the PowerBook - this saves you a lot of time. I did this four times in a row, just to see that it didn’t work out well. May be it’s the quality of the SSD, or of the adaptor. But note two things: use the “flat” version of the adaptor; and if Leopard’s disk-utility outputs and “Input/Output-Error”, try Tiger’s disk-utility for the first initializion of the SSD. Btw. the manual here is great! Thank you!