Saltar al contenido principal

Esta versión puede contener ediciones incorrectas. Cambiar a la última instantánea verificada.

Qué necesitas

  1. Este paso está sin traducir. Ayuda a traducirlo

    : paso 1, imagen 1 de 1
    • Turn the keyboard locking screw so that it is parallel to the space bar.

    • Pull the keyboard release tabs toward you and lift up on the keyboard until it pops free.

    • Lift the keyboard out by pulling it up and away from you. Rest the keyboard, face down, on top of the track pad.

  2. Este paso está sin traducir. Ayuda a traducirlo

    : paso 2, imagen 1 de 1
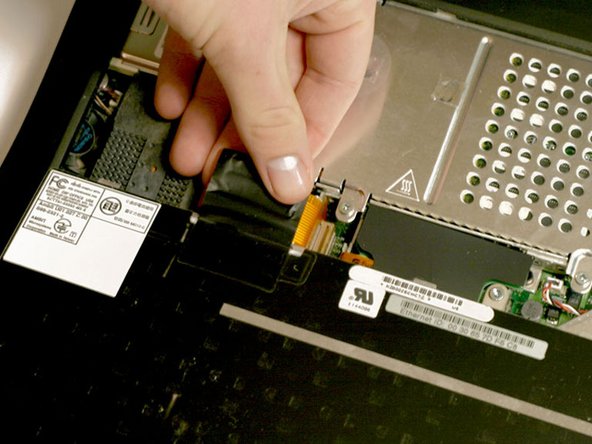
    • Pull the keyboard ribbon straight up from the logic board. Place the keyboard aside.

    • The connector may be tight. Gently rock the connector from side to side while pulling directly upward to free it. You can use this technique on many of the cards and cables you'll be disconnecting.

    • Make sure you have removed the laptop battery and CD/DVD modules from the expansion bays before proceeding.

  3. Este paso está sin traducir. Ayuda a traducirlo

    : paso 3, imagen 1 de 1
    • Your laptop should look approximately like this.

  4. Este paso está sin traducir. Ayuda a traducirlo

    : paso 4, imagen 1 de 1
    • Remove the two silver Phillips #1 screws that attach the heat shield to the internal metal framework.

    • Lift the heat shield up and pull it toward you.

  5. Este paso está sin traducir. Ayuda a traducirlo

    : paso 5, imagen 1 de 1
    • Your laptop should look approximately like this.

Linea de Meta

2 personas más completaron esta guía.

Documentos Adjuntos

iRobot

Miembro Desde 09/24/09

1 Reputación

636 Guías creadas

0 comentarios

Agregar Comentario

Ver Estadísticas:

Ultimas 24 horas: 0

Ultimos 7 días: 1

Ultimos 30 días: 3

Todo El Tiempo: 3,111