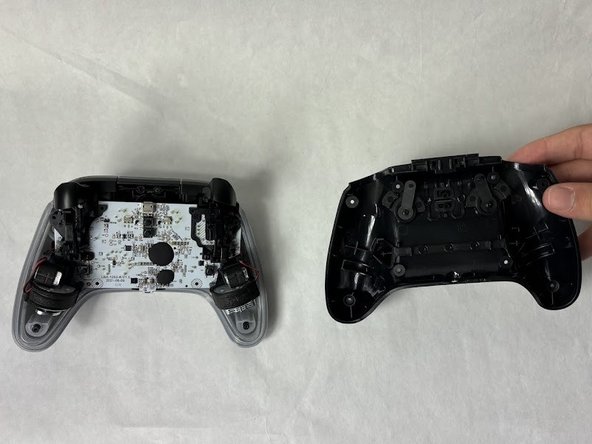
Saltar al contenido principal

PowerA Spectra Infinity Enhanced D-pad Replacement

Qué necesitas

  1. PowerA Spectra Infinity Enhanced D-pad Replacement, Motherboard: paso 1, imagen 1 de 2 PowerA Spectra Infinity Enhanced D-pad Replacement, Motherboard: paso 1, imagen 2 de 2
    • Flip the controller so the back is facing up.

  2. PowerA Spectra Infinity Enhanced D-pad Replacement: paso 2, imagen 1 de 1
    • Remove the eight 10 mm screws from the back of the controller using a Phillips #0 screwdriver.

  3. PowerA Spectra Infinity Enhanced D-pad Replacement: paso 3, imagen 1 de 2 PowerA Spectra Infinity Enhanced D-pad Replacement: paso 3, imagen 2 de 2
    • Unlock the trigger locks before removing the backplate.

    • This will make taking the plate off easier.

    • Use your fingers and carefully remove the backplate.

  4. PowerA Spectra Infinity Enhanced D-pad Replacement: paso 4, imagen 1 de 1
    • Remove the two 10 mm screws connecting the motherboard to the faceplate using a Phillips #0 screwdriver.

  5. PowerA Spectra Infinity Enhanced D-pad Replacement: paso 5, imagen 1 de 2 PowerA Spectra Infinity Enhanced D-pad Replacement: paso 5, imagen 2 de 2
    • Use your hand to separate the motherboard from the face plate.

  6. PowerA Spectra Infinity Enhanced D-pad Replacement, D-pad: paso 6, imagen 1 de 2 PowerA Spectra Infinity Enhanced D-pad Replacement, D-pad: paso 6, imagen 2 de 2
    • Remove the D-pad.

    • The buttons will fall out easily if you flip the faceplate over. You can raise the faceplate off the surface and push the D-Pad out from underneath.

Conclusión

To reassemble your device, follow these instructions in reverse order.

Una persona más ha completado esta guía.

Kevyn Jorge

Miembro Desde 03/22/24

955 Reputación

6 Guías creadas

Equipo

0 comentarios

Agregar Comentario

Ver Estadísticas:

Ultimas 24 horas: 0

Ultimos 7 días: 4

Ultimos 30 días: 13

Todo El Tiempo: 50