Saltar al contenido principal

Pop-Up Assembly Stopper Piece Replacement

Qué necesitas

  1. Pop-Up Assembly Stopper Piece Replacement, Pop-Up Stopper Piece: paso 1, imagen 1 de 2 Pop-Up Assembly Stopper Piece Replacement, Pop-Up Stopper Piece: paso 1, imagen 2 de 2
    • Place bucket directly under the sink below the pop-up assembly. Excess water may leak

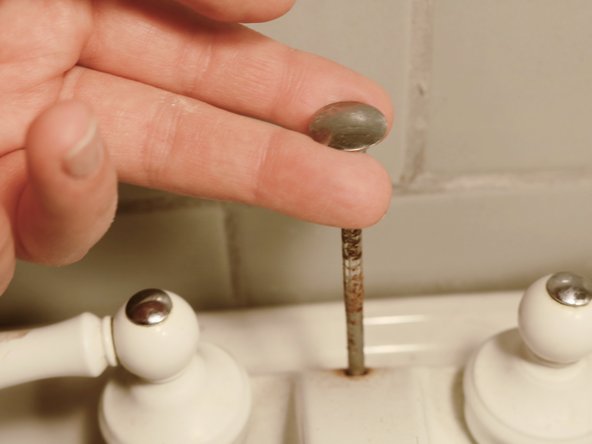
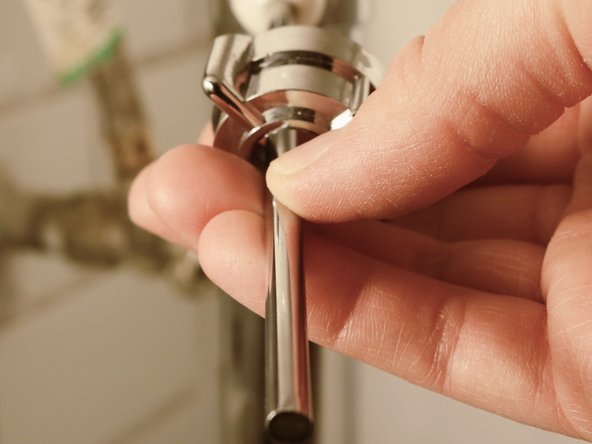
    • The pivot rod that is inserted within a hole in the pop-up extension bar. Move the pop-up extension bar away from the pivot rod.

  2. Pop-Up Assembly Stopper Piece Replacement: paso 2, imagen 1 de 1
    • Disconnect the pivot rod from the center pop-up extension.

  3. Pop-Up Assembly Stopper Piece Replacement: paso 3, imagen 1 de 2 Pop-Up Assembly Stopper Piece Replacement: paso 3, imagen 2 de 2
    • Lift up the center pop-up rod on the faucet until it is detached. The extension rod will pull up with it.

  4. Pop-Up Assembly Stopper Piece Replacement: paso 4, imagen 1 de 3 Pop-Up Assembly Stopper Piece Replacement: paso 4, imagen 2 de 3 Pop-Up Assembly Stopper Piece Replacement: paso 4, imagen 3 de 3
    • Below the sink is the pivot nut. Turn the pivot nut counterclockwise until it is completely loose and remove from the pivot rod.

  5. Pop-Up Assembly Stopper Piece Replacement: paso 5, imagen 1 de 2 Pop-Up Assembly Stopper Piece Replacement: paso 5, imagen 2 de 2
    • Pull the pivot rod out to expose the ball. Remove the whole pivot rod fixture.

  6. Pop-Up Assembly Stopper Piece Replacement: paso 6, imagen 1 de 2 Pop-Up Assembly Stopper Piece Replacement: paso 6, imagen 2 de 2
    • In the sink, the pop-up stopper will be loose.

    • Pull up on the pop-up stopper to separate it from the main pop-up assembly.

Conclusión

To reassemble your device, follow these instructions in reverse order.

Una persona más ha completado esta guía.

0 comentarios

Agregar Comentario

Ver Estadísticas:

Ultimas 24 horas: 1

Ultimos 7 días: 9

Ultimos 30 días: 48

Todo El Tiempo: 1,451