Saltar al contenido principal

Poin2 Chromebook 11 Charging Port Replacement

Qué necesitas

  1. Poin2 Chromebook 11 Charging Port Replacement, Battery: paso 1, imagen 1 de 2 Poin2 Chromebook 11 Charging Port Replacement, Battery: paso 1, imagen 2 de 2
    • Power down the Poin2 Chromebook 11 and disconnect the power adapter.

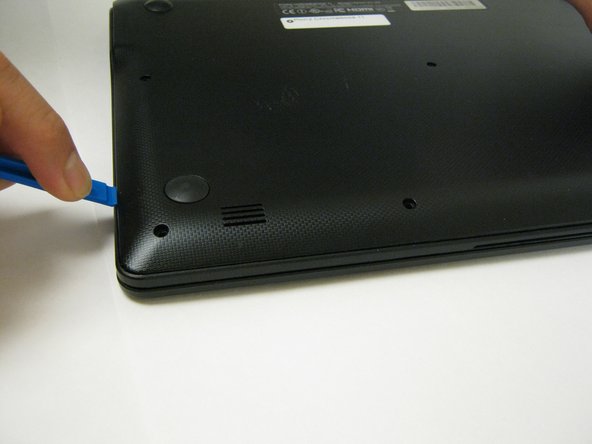
    • Close the Chromebook and position it with the base facing up.

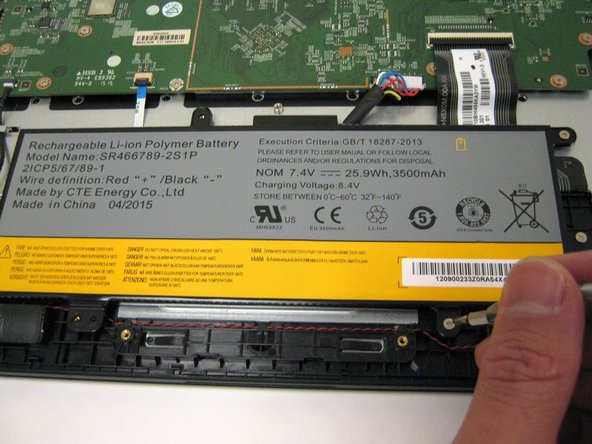
    • Use a #0 Phillips screwdriver to unscrew the ten 7mm screws that hold the base to the rest of the frame

    • Poin2 Chromebook 11 does not have screws under its rubber feet at the base.

  2. Poin2 Chromebook 11 Charging Port Replacement: paso 2, imagen 1 de 3 Poin2 Chromebook 11 Charging Port Replacement: paso 2, imagen 2 de 3 Poin2 Chromebook 11 Charging Port Replacement: paso 2, imagen 3 de 3
    • Insert a 1cm-wide plastic opening tool between the base and top frame.

    • Applying pressure up and down with the tool may be necessary. When you hear a "click," this indicates the separation of the frame.

    • Pry (up and down) around the entire border of the Chromebook to separate.

    • Use your hands to gently lift the base away from the frame.

  3. Poin2 Chromebook 11 Charging Port Replacement: paso 3, imagen 1 de 3 Poin2 Chromebook 11 Charging Port Replacement: paso 3, imagen 2 de 3 Poin2 Chromebook 11 Charging Port Replacement: paso 3, imagen 3 de 3
    • Disconnect the white 8-wire battery connector from the motherboard using a spudger to push the two L-shaped clips out of the port.

    • The connector is a tight fit and requires careful pressure for release.

  4. Poin2 Chromebook 11 Charging Port Replacement: paso 4, imagen 1 de 2 Poin2 Chromebook 11 Charging Port Replacement: paso 4, imagen 2 de 2
    • Remove the six 4mm screws using a Phillips #0 screwdriver.

  5. Poin2 Chromebook 11 Charging Port Replacement: paso 5, imagen 1 de 1
    • Lift the battery from the frame.

  6. Poin2 Chromebook 11 Charging Port Replacement, Charging Port: paso 6, imagen 1 de 2 Poin2 Chromebook 11 Charging Port Replacement, Charging Port: paso 6, imagen 2 de 2
    • The changing port is located on the upper-right corner of the computer.

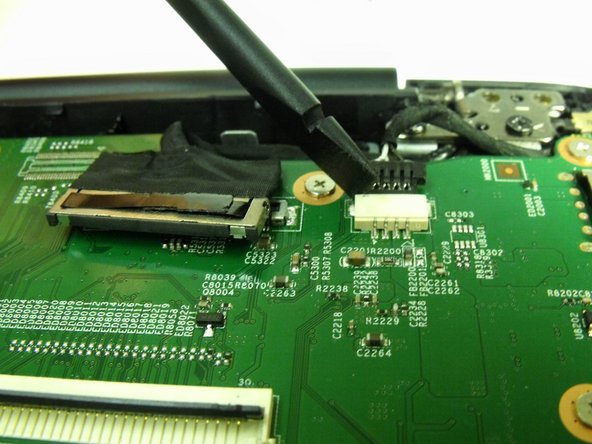
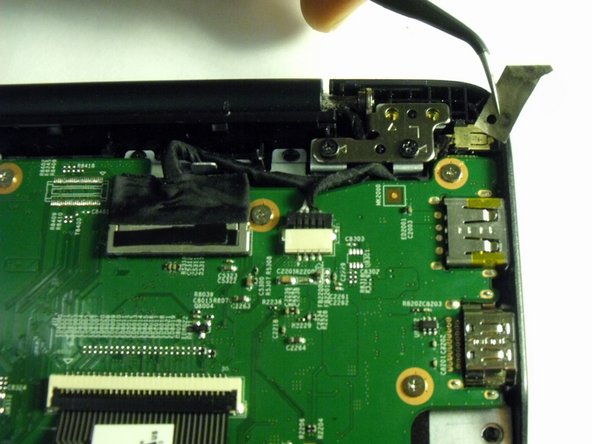
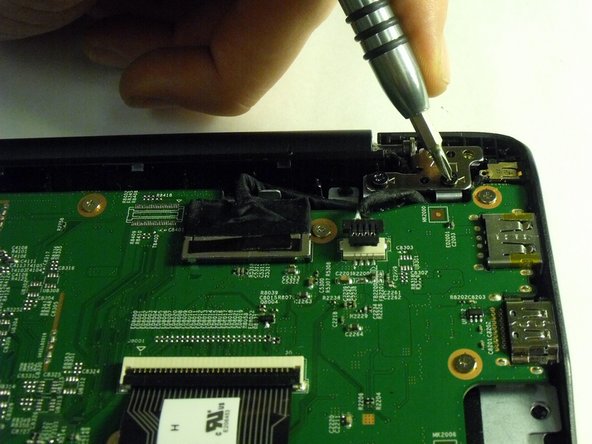
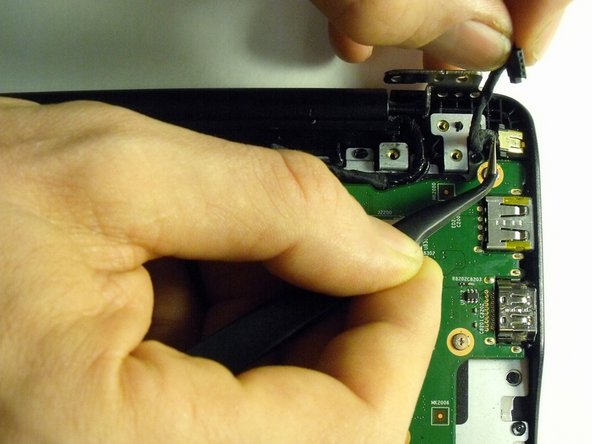
    • Disconnect the charging port from the motherboard using a spudger to push the 4-wire connector out from the port.

  7. Poin2 Chromebook 11 Charging Port Replacement: paso 7, imagen 1 de 2 Poin2 Chromebook 11 Charging Port Replacement: paso 7, imagen 2 de 2
    • Remove silver tape covering hinge.

  8. Poin2 Chromebook 11 Charging Port Replacement: paso 8, imagen 1 de 2 Poin2 Chromebook 11 Charging Port Replacement: paso 8, imagen 2 de 2
    • The metal hinge at the top right corner must be lifted to access the charging port.

    • Use a Phillips #0 screwdriver and remove the two 7mm screws from the hinge.

  9. Poin2 Chromebook 11 Charging Port Replacement: paso 9, imagen 1 de 1
    • Pry the metal hinge up, until it sits perpendicular to the motherboard.

    • The metal hinge is a tight fit and requires careful strength when lifting.

  10. Poin2 Chromebook 11 Charging Port Replacement: paso 10, imagen 1 de 2 Poin2 Chromebook 11 Charging Port Replacement: paso 10, imagen 2 de 2
    • Use tweezers to gently pull the charging port out of the frame.

Conclusión

To reassemble your device, follow these instructions in reverse order.

4 personas más completaron esta guía.

2 comentarios

Great, Now where can I find this part to fix my laptop???

marrowii - Contestar

where do I buy the new port???

rhena9 - Contestar

Agregar Comentario

Ver Estadísticas:

Ultimas 24 horas: 0

Ultimos 7 días: 1

Ultimos 30 días: 6

Todo El Tiempo: 6,990