Esta guía ha sufrido modificaciones. Revisa la última versión sin revisar.
Introducción
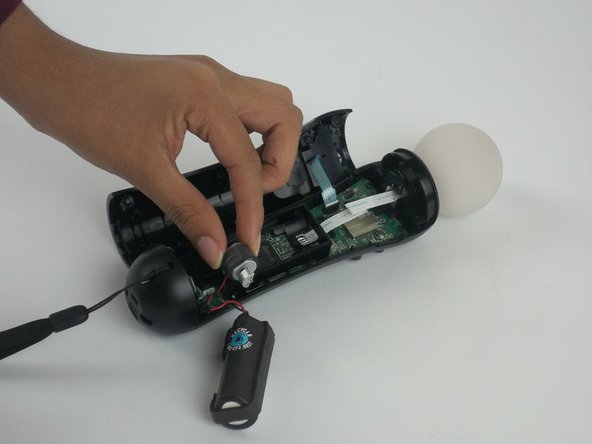
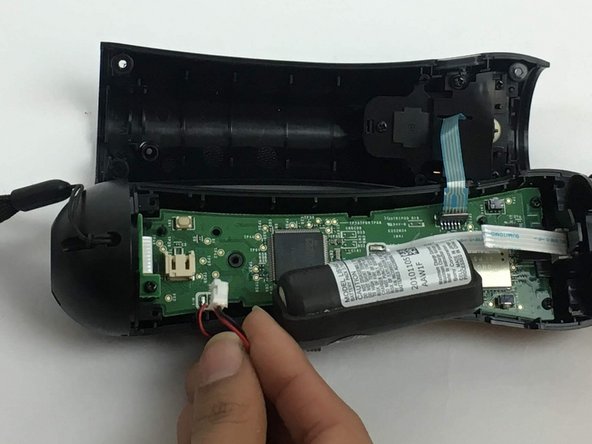
This guide will show the steps to dismantle the move controller and remove the battery in order to have it replaced.
Qué necesitas
-
-
Using a Phillips #0 screwdriver, remove the four 10mm screws from the corners of the trigger button.
-
-


To reassemble your device, follow these instructions in reverse order.
To reassemble your device, follow these instructions in reverse order.
Cancelar: No complete esta guía.
8 personas más completaron esta guía.
Equipo

USF Tampa, Team 3-3, Passmore Fall 2016 Miembro de USF Tampa, Team 3-3, Passmore Fall 2016
USFT-PASSMORE-F16S3G3
4 Miembros
8 Guías creadas
4 comentarios
When putting the plastic battery rig back in on my second time doing this, I bent one of the little plastic pins that fits into a hole in the PCB. Definitely want to be careful with that. To make it a bit easier, I unscrewed the bottom port PCB part of the way so I could take the bottom plastic housing and put the plastic battery rig in straight. It made it a lot easier.
Worked great! Thanks for this. I did not need to take out the black battery / motor piece. Tweezers worked great to remove and install the battery cable
Any recommended online / physical store to buy new batteries for this because ifixit doesn’t have them?