Saltar al contenido principal

Pioneer Elite Smart Speaker F4 Subwoofer Replacement

Qué necesitas

  1. Pioneer Elite Smart Speaker F4  Subwoofer Replacement, Fabric Casing: paso 1, imagen 1 de 1
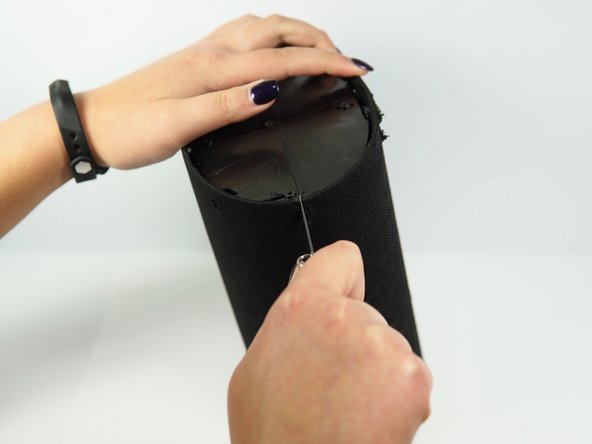
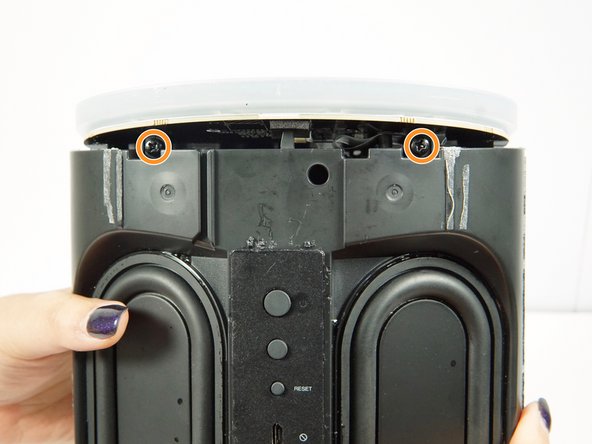
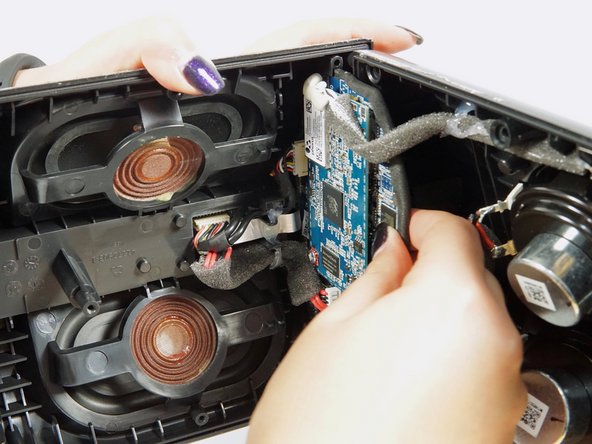
    • Flip the speaker upside down with the back panel of plugs pointed away from you.

  2. Pioneer Elite Smart Speaker F4  Subwoofer Replacement: paso 2, imagen 1 de 2 Pioneer Elite Smart Speaker F4  Subwoofer Replacement: paso 2, imagen 2 de 2
    • Use the metal spudger to pry off the rubber bottom cover. It will be glued onto the bottom of the speaker.

    • Work the rubber cover off by slowly going all the way around with the metal spudger, applying as much force as needed.

    • Since the cover is glued, a heat gun at low temperature or a hair dryer may be useful to speed up the process. However it is not required in this step.

  3. Pioneer Elite Smart Speaker F4  Subwoofer Replacement: paso 3, imagen 1 de 1
    • Scrape most of the glue away to reveal the five flathead screws - four around the outside, and one in the middle.

  4. Pioneer Elite Smart Speaker F4  Subwoofer Replacement: paso 4, imagen 1 de 1
    • Remove the five 6 mm screws with a Phillips #2 screwdriver.

  5. Pioneer Elite Smart Speaker F4  Subwoofer Replacement: paso 5, imagen 1 de 1
    • Lift off the metal plate. It will be surprisingly heavy and it is approximately 1cm thick.

  6. Pioneer Elite Smart Speaker F4  Subwoofer Replacement: paso 6, imagen 1 de 3 Pioneer Elite Smart Speaker F4  Subwoofer Replacement: paso 6, imagen 2 de 3 Pioneer Elite Smart Speaker F4  Subwoofer Replacement: paso 6, imagen 3 de 3
    • This step requires permanently damaging the casing of your device.

    • Turn the speaker counter-clockwise 90 degrees.

    • Use a knife to cut along the left seam all the way down the length of the device.

  7. Pioneer Elite Smart Speaker F4  Subwoofer Replacement: paso 7, imagen 1 de 2 Pioneer Elite Smart Speaker F4  Subwoofer Replacement: paso 7, imagen 2 de 2
    • The casing should be easily removed by prying and lifting it off.

    • If the casing gets caught on the back panel of plugs, use the metal spudger to lift the casing away from the panel, working all the way around. Pay special attention to the bottom, where it may be stuck with glue.

  8. Pioneer Elite Smart Speaker F4  Subwoofer Replacement: paso 8, imagen 1 de 3 Pioneer Elite Smart Speaker F4  Subwoofer Replacement: paso 8, imagen 2 de 3 Pioneer Elite Smart Speaker F4  Subwoofer Replacement: paso 8, imagen 3 de 3
    • Flip device 180 degrees so the light ring/button panel is on top with the 'Elite' facing you.

    • Remove one 6 mm screw with a Phillips #2 screwdriver.

    • Spin the device so the opposite side is facing you.

    • Remove the two 6 mm screws with a Phillips #2 screwdriver.

  9. Pioneer Elite Smart Speaker F4  Subwoofer Replacement: paso 9, imagen 1 de 2 Pioneer Elite Smart Speaker F4  Subwoofer Replacement: paso 9, imagen 2 de 2
    • Carefully remove the top panel, light ring, button panel, and the corresponding board.

    • Do not pull too hard, as there is a strip of wiring connected to the part below that could tear if pulled too hard or too far away.

  10. Pioneer Elite Smart Speaker F4  Subwoofer Replacement, Motherboard: paso 10, imagen 1 de 3 Pioneer Elite Smart Speaker F4  Subwoofer Replacement, Motherboard: paso 10, imagen 2 de 3 Pioneer Elite Smart Speaker F4  Subwoofer Replacement, Motherboard: paso 10, imagen 3 de 3
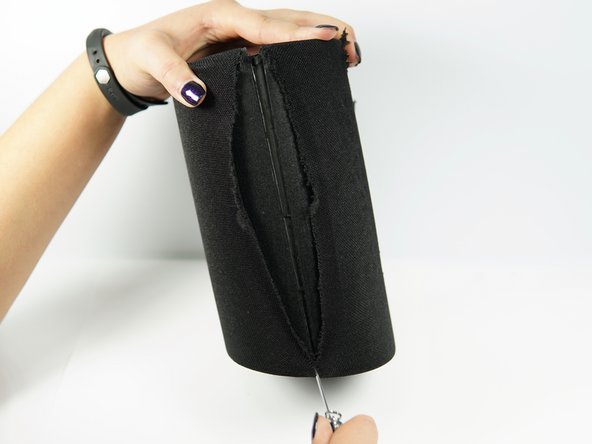
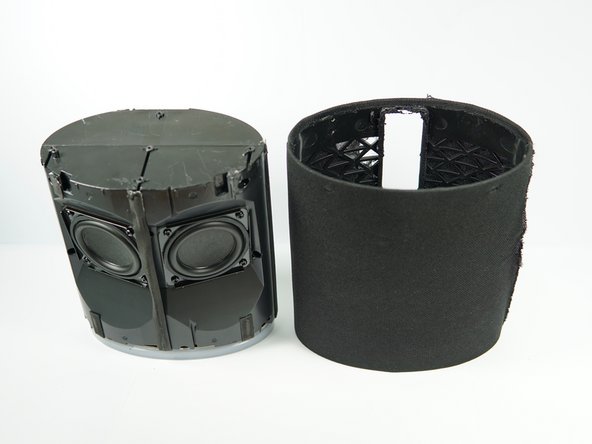
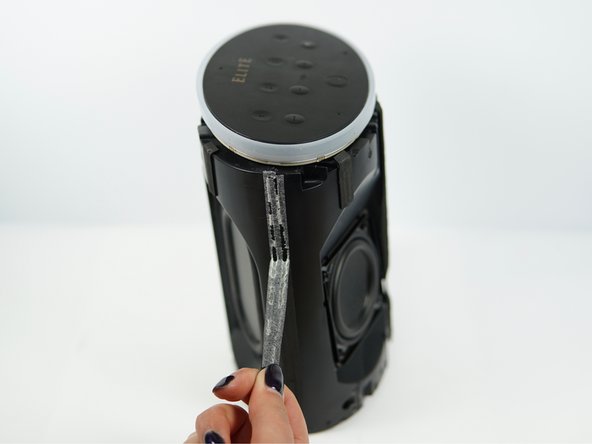
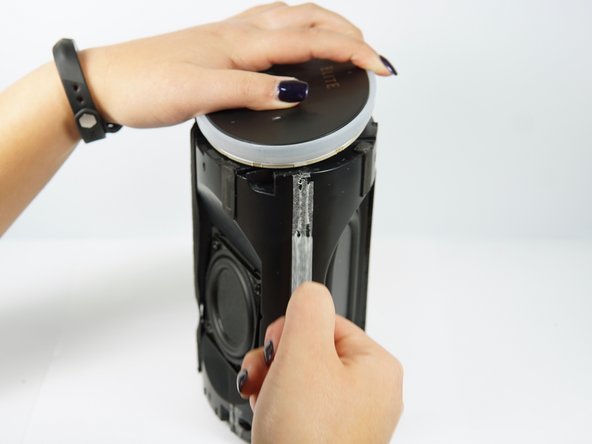
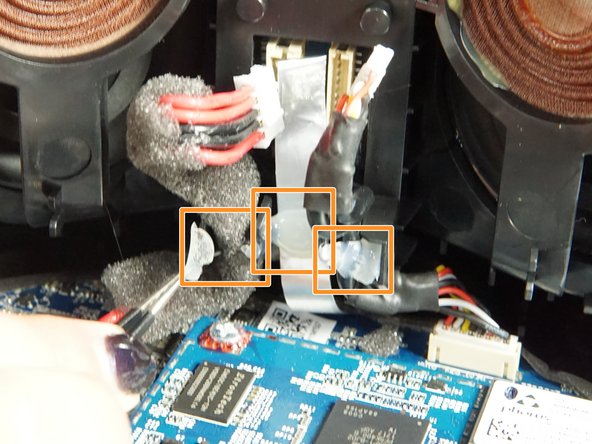
    • Peel off all rubber strips along sides, middle front and middle back of the device.

  11. Pioneer Elite Smart Speaker F4  Subwoofer Replacement: paso 11, imagen 1 de 1
    • Remove the eight 6 mm screws using the Phillips #2 screwdriver.

  12. Pioneer Elite Smart Speaker F4  Subwoofer Replacement: paso 12, imagen 1 de 1
    • Pry apart the two sides carefully. The halves will not be able to separate completely because of wires and the motherboard.

  13. Pioneer Elite Smart Speaker F4  Subwoofer Replacement: paso 13, imagen 1 de 2 Pioneer Elite Smart Speaker F4  Subwoofer Replacement: paso 13, imagen 2 de 2
    • Slide the motherboard out using your hands.

  14. Pioneer Elite Smart Speaker F4  Subwoofer Replacement: paso 14, imagen 1 de 2 Pioneer Elite Smart Speaker F4  Subwoofer Replacement: paso 14, imagen 2 de 2
    • Slide out ribbon-like wire at the bottom of the speaker using your hands.

  15. Pioneer Elite Smart Speaker F4  Subwoofer Replacement: paso 15, imagen 1 de 1
    • Remove two of the wire connectors with your hands or with tweezers.

  16. Pioneer Elite Smart Speaker F4  Subwoofer Replacement: paso 16, imagen 1 de 3 Pioneer Elite Smart Speaker F4  Subwoofer Replacement: paso 16, imagen 2 de 3 Pioneer Elite Smart Speaker F4  Subwoofer Replacement: paso 16, imagen 3 de 3
    • Remove the two wire connectors using tweezers or your fingers. Be careful not to damage the plastic.

    • Remove the 3 pieces of hot glue using tweezers. Don't worry about ripping the foam covering the cords.

    • Remove the ribbon wire by pulling on it with tweezers.

    • Removing this may permanently damage the connector.

  17. Pioneer Elite Smart Speaker F4  Subwoofer Replacement: paso 17, imagen 1 de 1
    • Peel away the off white glue and disconnect the wires from the motherboard.

    • Remove the motherboard from the device.

    • Disconnecting the wires from the motherboard may require desoldering them.

  18. Pioneer Elite Smart Speaker F4  Subwoofer Replacement, Subwoofers: paso 18, imagen 1 de 1
  19. Pioneer Elite Smart Speaker F4  Subwoofer Replacement: paso 19, imagen 1 de 2 Pioneer Elite Smart Speaker F4  Subwoofer Replacement: paso 19, imagen 2 de 2
    • Remove the eight 6 mm screws with a Phillips #2 screwdriver.

    • Lift the subwoofers out and remove them from the device.

Conclusión

To reassemble your device, follow these instructions in reverse order.

Una persona más ha completado esta guía.

Isaiah Abrea

Miembro Desde 04/19/18

163 Reputación

2 Guías creadas

Equipo

Cal Poly, Team S24-G10, Maness Spring 2018 Miembro de Cal Poly, Team S24-G10, Maness Spring 2018

CPSU-MANESS-S18S24G10

3 Miembros

5 Guías creadas

0 comentarios

Agregar Comentario

Ver Estadísticas:

Ultimas 24 horas: 0

Ultimos 7 días: 0

Ultimos 30 días: 1

Todo El Tiempo: 451