Saltar al contenido principal

Photive Rain Battery Replacement

Qué necesitas

  1. Photive Rain Battery Replacement, Back Panel: paso 1, imagen 1 de 1
    • Turn the speaker off before disassembling.

    • Remove the suction cup from its groove by twisting and turning it.

  2. Photive Rain Battery Replacement: paso 2, imagen 1 de 1
    • Remove the four 8.5 mm screws from the back panel of the speaker by using the Phillips #1 Screwdriver.

    • Remove back panel

  3. Photive Rain Battery Replacement, Battery: paso 3, imagen 1 de 2 Photive Rain Battery Replacement, Battery: paso 3, imagen 2 de 2
    • Remove the plastic cover in front of the battery slot.

    • Unscrew all the 8.5mm screws that hold the cover to the slot.

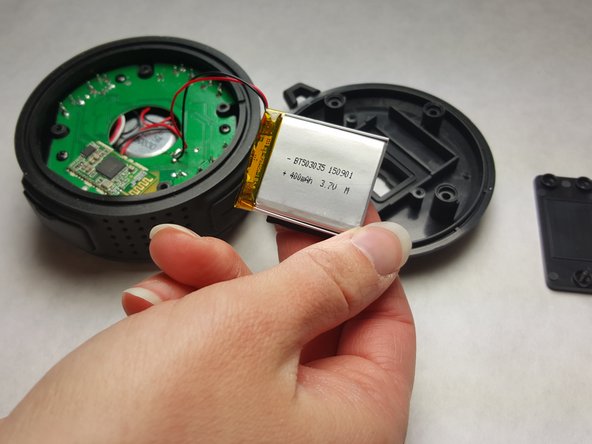
    • Separate the battery from the back panel as shown in photograph 3.

    • Caution: manipulation of the device while the battery is still connected to the motherboard may result in electric shock.

  4. Photive Rain Battery Replacement: paso 4, imagen 1 de 1
    • Remove the battery from the motherboard.

    • Use a soldering pen to remove the solder connecting the battery wires to the motherboard.

    • Click here to access the iFixit Soldering Guide. This will provide a safe and instructive manual on the usage of soldering pens.

Conclusión

To reassemble your device, follow these instructions in reverse order.

2 personas más completaron esta guía.

abcdef ghijk

Miembro Desde 02/15/16

723 Reputación

4 Guías creadas

Equipo

IUPUI, Team 1-4, Harley Spring 2016 Miembro de IUPUI, Team 1-4, Harley Spring 2016

IUPUI-HARLEY-S16S1G4

3 Miembros

4 Guías creadas

0 comentarios

Agregar Comentario

Ver Estadísticas:

Ultimas 24 horas: 0

Ultimos 7 días: 0

Ultimos 30 días: 8

Todo El Tiempo: 499