Esta versión puede contener ediciones incorrectas. Cambiar a la última instantánea verificada.
Qué necesitas
-
Este paso está sin traducir. Ayuda a traducirlo
-
Remove four 7.5 mm Phillips screws on the both sides (2 on each side).
-
Remove five 7.5 mm Phillips screws on the back of the player.
-
-
Este paso está sin traducir. Ayuda a traducirlo
-
Lift the top panel from the back and remove. It should come off without being forced. There is a lip near the front so you many need to slide the top panel back slightly to remove it.
-
-
-
Este paso está sin traducir. Ayuda a traducirlo
-
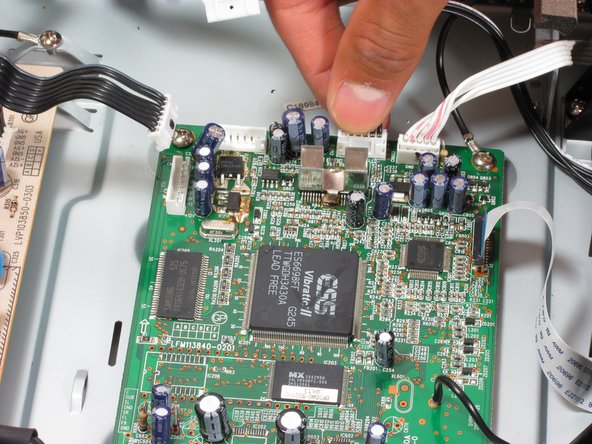
Locate the first three ribbon wires.
-
Remove the ribbon wires by grasping firmly as near to the plastic head as possible and pulling.
-
-
Este paso está sin traducir. Ayuda a traducirlo
-
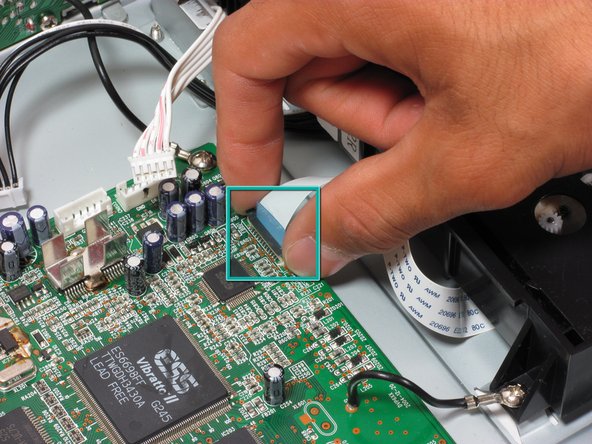
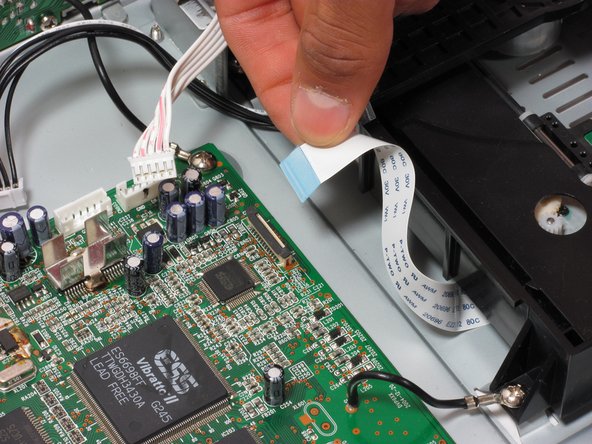
Remove the fourth ribbon wire as in step 2.
-
Remove the fifth ribbon wire by grasping both sides of the black clip and pulling up. When reinserting, pull black clip up, insert the ribbon wire, and push the black clip back down.
-
-
Este paso está sin traducir. Ayuda a traducirlo
-
Remove the following screws:
-
7.5 mm Phillips screws (2) that secure the motherboard to the bottom panel. The screw on the top right will also be attached to a grounding wire, it is okay to remove this screw.
-
Remove the 7.5 mm Phillips screw on the bottom right that attaches the grounding wire to the disc tray.
-
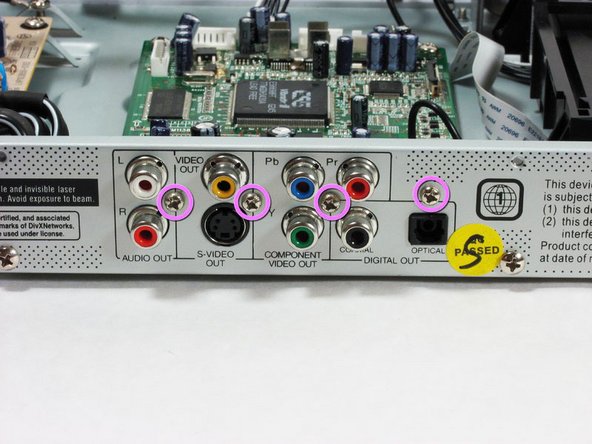
7.5 mm Phillips screws (4) on outside of player near input/output plugs.
-
-
Este paso está sin traducir. Ayuda a traducirlo
-
Remove the motherboard by pulling it back and then up gently.
-
The input/output plugs should slide out easily from the holes in the back panel.
-
Cancelar: No complete esta guía.
6 personas más completaron esta guía.


