Saltar al contenido principal

Philips DVP5992-F7 Screen Replacement

Qué necesitas

  1. Philips DVP5992-F7 Screen Replacement, Screen: paso 1, imagen 1 de 3 Philips DVP5992-F7 Screen Replacement, Screen: paso 1, imagen 2 de 3 Philips DVP5992-F7 Screen Replacement, Screen: paso 1, imagen 3 de 3
    • Remove the three 6.4 mm Phillips #1 screws on the back of the device with a Phillips head screwdriver.

    • Remove the 6.4 mm Phillips #1 screws on each side of the device.

  2. Philips DVP5992-F7 Screen Replacement: paso 2, imagen 1 de 2 Philips DVP5992-F7 Screen Replacement: paso 2, imagen 2 de 2
    • Remove the top plate of the DVD by firmly grasping the player on both sides.

    • Shift the top plate towards the backside of the player.

    • Lift the back half of the top plate up to remove it from the player.

  3. Philips DVP5992-F7 Screen Replacement: paso 3, imagen 1 de 3 Philips DVP5992-F7 Screen Replacement: paso 3, imagen 2 de 3 Philips DVP5992-F7 Screen Replacement: paso 3, imagen 3 de 3
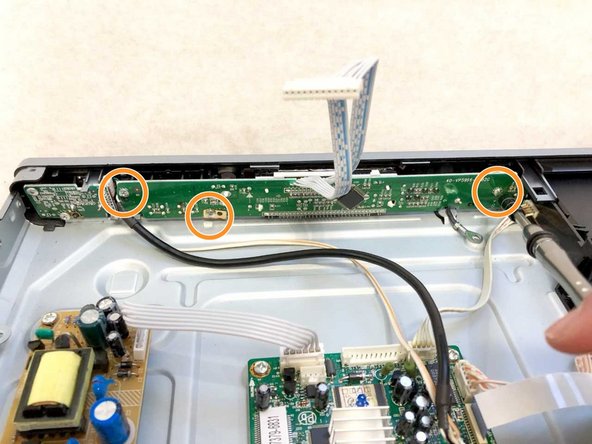
    • Unplug the bundled cable connector that attaches the screen to the motherboard.

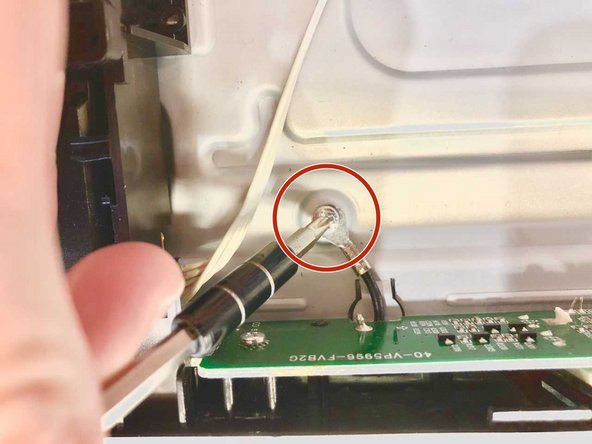
    • Remove the 3.175 mm Phillips #1 screw that connects the screen's ground wire to the shell of the DVD player.

    • Remove the three 6.35 mm Phillips #1 screws that attach the screen to the front cover of the DVD player.

  4. Philips DVP5992-F7 Screen Replacement: paso 4, imagen 1 de 2 Philips DVP5992-F7 Screen Replacement: paso 4, imagen 2 de 2
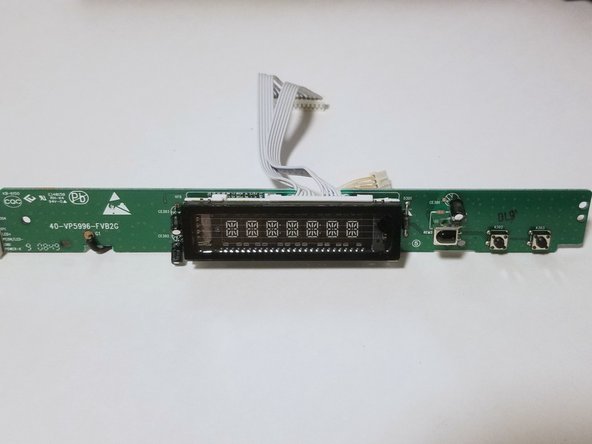
    • Slowly pull the screen backwards starting with the side farthest from the disc tray.

    • Unplug the bundled cable connector that is located close to the disc tray as you pull the screen out of the DVD player.

Conclusión

To reassemble your device, follow these instructions in reverse order.

0 comentarios

Agregar Comentario

Ver Estadísticas:

Ultimas 24 horas: 1

Ultimos 7 días: 1

Ultimos 30 días: 4

Todo El Tiempo: 221