Esta versión puede contener ediciones incorrectas. Cambie a la última instantánea verificada.
Qué necesitas
-
Este paso está sin traducir. Ayuda a traducirlo
-
Remove the three 6.4 mm Phillips #1 screws on the back of the device with a Phillips head screwdriver.
-
Remove the 6.4 mm Phillips #1 screws on each side of the device.
-
-
Este paso está sin traducir. Ayuda a traducirlo
-
Remove the top plate of the DVD by firmly grasping the player on both sides.
-
Shift the top plate towards the backside of the player.
-
Lift the back half of the top plate up to remove it from the player.
-
-
-
Este paso está sin traducir. Ayuda a traducirlo
-
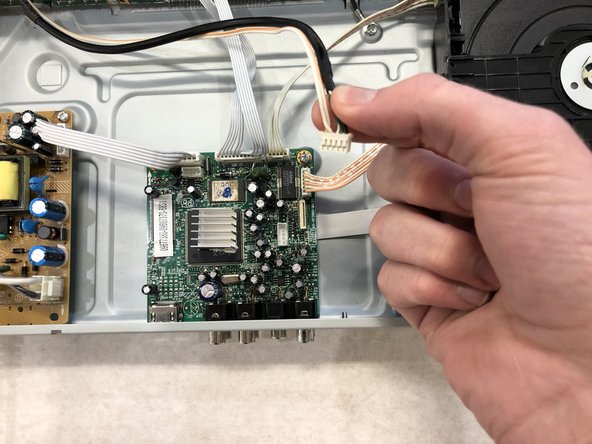
Unplug the one ribbon wire and the five bundled cable connectors that are plugged into the motherboard.
-
-
Este paso está sin traducir. Ayuda a traducirlo
-
Remove the three 4.76 mm #1 Phillips head screws located on the back of the DVD player.
-
-
Este paso está sin traducir. Ayuda a traducirlo
-
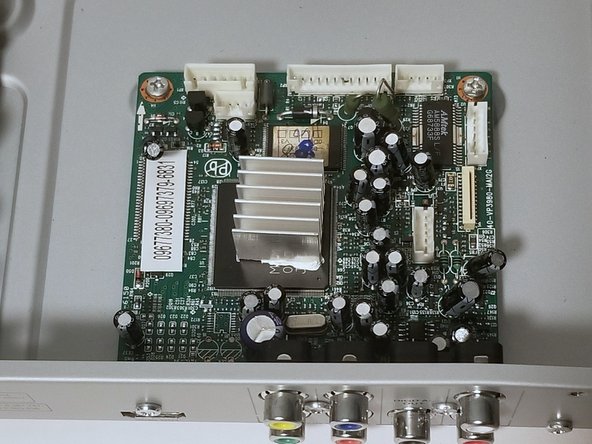
Remove the two 7.94 mm #1 Phillips head screws from the motherboard.
-


Cancelar: No complete esta guía.
Una persona más ha completado esta guía.
Equipo

Western Carolina University, Team S1-G6, Virtue Fall 2018 Miembro de Western Carolina University, Team S1-G6, Virtue Fall 2018
WCU-VIRTUE-F18S1G6
3 Miembros
9 Guías creadas