Introducción
Removal of battery for replacement.
Qué necesitas
-
-
Use the metal spudger to carefully pull apart the screen cover from the case.
-
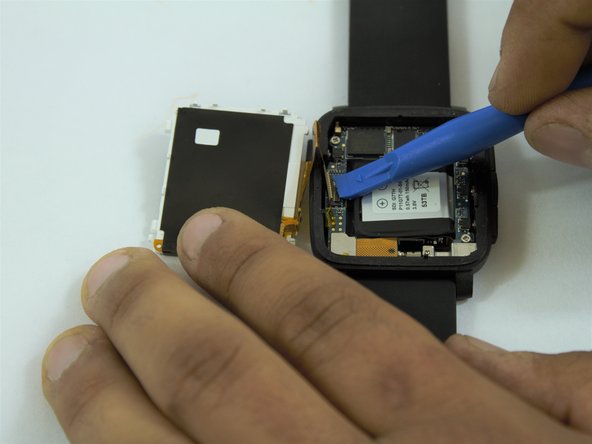
Replace the metal spudger with a plastic opening tool to hold the cover open.
Just a note whilst removing the cover/screen - on my Pebble Time Steel, the LCD seemed to actually be attached to the glass, so when the adhesive around the outside seperated, I disconnected the ribbon cable and removed both as one piece - if you can, this definitely helps keep the end result a bit tidier!
-
-
-
-
Once screen is lifted, insert plastic opening tool between the screen connector and circuit board.
-
Disconnect the screen from the circuit board.
-
-
-
After removing the circuit board, the battery is located in the middle of the case.
-


To reassemble your device, follow these instructions in reverse order.
To reassemble your device, follow these instructions in reverse order.
Cancelar: No complete esta guía.
32 personas más completaron esta guía.
Equipo

USF Tampa, Team 1-3, Sullivan Spring 2017 Miembro de USF Tampa, Team 1-3, Sullivan Spring 2017
USFT-SULLIVAN-S17S1G3
4 Miembros
7 Guías creadas
11 comentarios
Where did you purchase the replacement battery?
Got mine on Amazon
kwojdak -
What is everyone using for sticky tape to hold the bezel/crystal on that will ensure the pebble is still waterproof?
Attempted this using RTV Silicon, and it is %#*@ difficult to not get it EVERYWHERE! I got some on my LCD, now I’m looking for another Pebble. Just use a little superglue on the outside and don’t figure on it being waterproof anymore - I guess.
Amazing tutorial, i just completed it and everything went fine! I wanted to mention that i used the T-7000 glue to hold both the replacement battery and the screen back in place, hopefully restoring to some degree the water resistance feature of the watch.
Failed. The spudger slipped inside and damaged the screen. Kept trying for the heck of it, removing the screws is also very difficult, as they are tiny and the screwdriver easily damages the head, to the point where they won’t turn anymore. All in all a !&&* of a job, very high likelihood of failure, more trouble than it is worth.
Attempted and failed due to screws getting stripped and not budging.
This is trickier than it sounds. Add to the tool list a pair of tweezers (for placing screws), a tiny flat blade screwdriver (for prying and pressing), and a knife blade (for prying the case apart). A pair of magnifying glasses is a help, too. The Phillips screwdriver for the screws and plastic pry tools came with my Amazon battery: https://www.amazon.com/dp/B07XLVC6J4?psc.... Cost was around $15.
The small yellow ribbon connectors came off easily but were fussy to get back on, especially the folded one for the LED screen. Clean any fingerprints/debris off the LED screen and the inside lens of the cover and turn the watch on before replacing the cover to make sure all the connections are in place.
I used some black silicone cement around the lip of the cover, but also ran into problems with it getting everywhere. The top didn’t snap into place, so I clamped the top and case together while the silicone cured. We’ll see if it stays. If not, I'll try superglue like another commenter.
I was wondering if I would be able to do this as my DIY skills are crap, but surprisingly all went well. Take time and make sure you have the correct tools.
Hey folks! Awesome guide, just for those who are using this to replace a battery in a Pebble Time Steel (or even a regular time), I've found there's some useful info in this reddit thread here: https://www.reddit.com/r/pebble/comments..., especially with battery sizes etc.