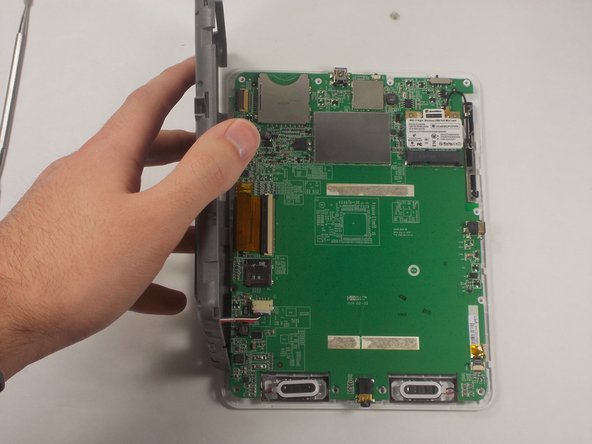
Saltar al contenido principal

Pandigital Novel PRD07T10WWH7 Battery Replacement

Qué necesitas

  1. Pandigital Novel PRD07T10WWH7 Battery Replacement, Battery: paso 1, imagen 1 de 2 Pandigital Novel PRD07T10WWH7 Battery Replacement, Battery: paso 1, imagen 2 de 2
    • Remove the back panel by sliding it downwards and pushing in slightly.

  2. Pandigital Novel PRD07T10WWH7 Battery Replacement: paso 2, imagen 1 de 2 Pandigital Novel PRD07T10WWH7 Battery Replacement: paso 2, imagen 2 de 2
    • Pry off the second white panel, removing two clips underneath.

    • Start from the middle, and then work on the sides. The sides may be difficult to remove, so try to focus on one side and work your way around.

  3. Pandigital Novel PRD07T10WWH7 Battery Replacement: paso 3, imagen 1 de 1
    • Using a Phillips #0 screwdriver, remove the 12 4mm screws on the outer area of the gray area exposed by removing the back panels.

  4. Pandigital Novel PRD07T10WWH7 Battery Replacement: paso 4, imagen 1 de 2 Pandigital Novel PRD07T10WWH7 Battery Replacement: paso 4, imagen 2 de 2
    • Carefully pry the back of the device from the front panel and motherboard. There are a series of clips holding them together that need to be separated.

  5. Pandigital Novel PRD07T10WWH7 Battery Replacement: paso 5, imagen 1 de 2 Pandigital Novel PRD07T10WWH7 Battery Replacement: paso 5, imagen 2 de 2
    • Now, lift up the gray piece, unplug the battery connector, and the battery can be removed from the case.

Conclusión

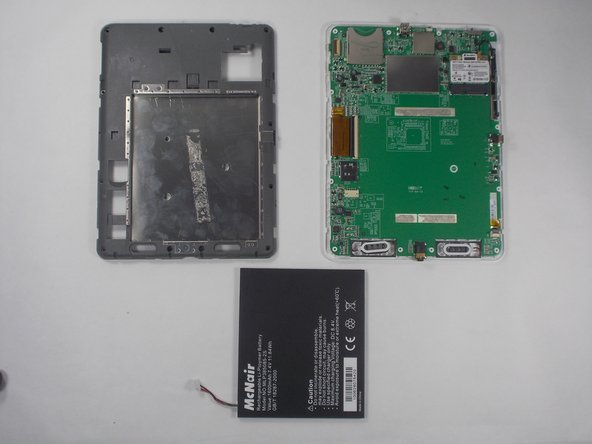
To reassemble your device, follow these instructions in reverse order.

Una persona más ha completado esta guía.

Carl Weber

Miembro Desde 10/21/16

328 Reputación

2 Guías creadas

Equipo

UMass Dartmouth, Team 3-7, Isaacson Fall 2016 Miembro de UMass Dartmouth, Team 3-7, Isaacson Fall 2016

UMASSD-ISAACSON-F16S3G7

3 Miembros

10 Guías creadas

0 comentarios

Agregar Comentario

Ver Estadísticas:

Ultimas 24 horas: 2

Ultimos 7 días: 4

Ultimos 30 días: 7

Todo El Tiempo: 1,234