Introducción
This is a fairly simple camera to take apart, just requiring a little care and patience. Most major components are very straightforward to replace and other components can be accessed quite easily too.
You will need a small cross-head screwdriver, and if you need to remove the sensor this will require a Torx screwdriver. A plastic spudger or opening tool is also useful to have.
Qué necesitas
-
-
Remove 2 screws on the right hand side of the case.
-
Remove 2 screws on the left hand side of the case.
-
-
-
Remove 2 screws on the bottom of the case, adjacent to the tripod mount. Note that these screws are slightly shorter than the previous ones and so should be kept separate.
-
Ease off the case back. You can help it off by inserting a spudger in the crack on all sides to ease it, especially either side of any points where it seems reluctant to come.
-
-
-
-
Gently lift the locking bar on the LCD ribbon, then ease the ribbon out of the socket.
-
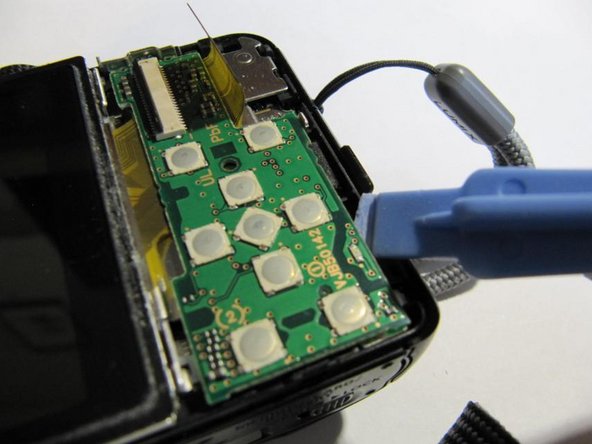
Lift the buttons board by inserting a spudger under the bottom right hand edge. This will detach it from a connector beneath.
-
-
-
Release a clip on the left hand side of the LCD and hence lift the LCD out.
-


To reassemble your device, follow these instructions in reverse order.
To reassemble your device, follow these instructions in reverse order.
Cancelar: No complete esta guía.
2 personas más completaron esta guía.

Equipo

2 comentarios
Theres a few missing steps. The old LCD screen will need removing from the container that holds it in and the new replacement LCD screen will need to be fitted inside it. Also, there are 2 connections on the LCD ribbon. One goes in as described. On the old screen carefully pull apart the 2nd connection between the screen and the camera. The new LCD screen will then need 2 dabs of solder on the 2nd connection between the new screens ribbon cable and the one within the camera. Its pretty straightforward but the screen will not work without both connectors fitted properly.