Saltar al contenido principal

Panasonic KX-TG6641 Earpiece Replacement

Qué necesitas

  1. Panasonic KX-TG6641 Earpiece Replacement, Battery: paso 1, imagen 1 de 2 Panasonic KX-TG6641 Earpiece Replacement, Battery: paso 1, imagen 2 de 2
    • Remove the battery cover by sliding the cover piece down

  2. Panasonic KX-TG6641 Earpiece Replacement: paso 2, imagen 1 de 2 Panasonic KX-TG6641 Earpiece Replacement: paso 2, imagen 2 de 2
    • Remove the two AAA batteries.

  3. Panasonic KX-TG6641 Earpiece Replacement, Earpiece: paso 3, imagen 1 de 1
    • In order to remove the back of the phone, unscrew the two screws at the bottom corners on the back of the phone.

  4. Panasonic KX-TG6641 Earpiece Replacement: paso 4, imagen 1 de 2 Panasonic KX-TG6641 Earpiece Replacement: paso 4, imagen 2 de 2
    • In order to remove the back of the phone, pry the back open by inserting the iFixit Opening tool in the space between the front and back of the phone.

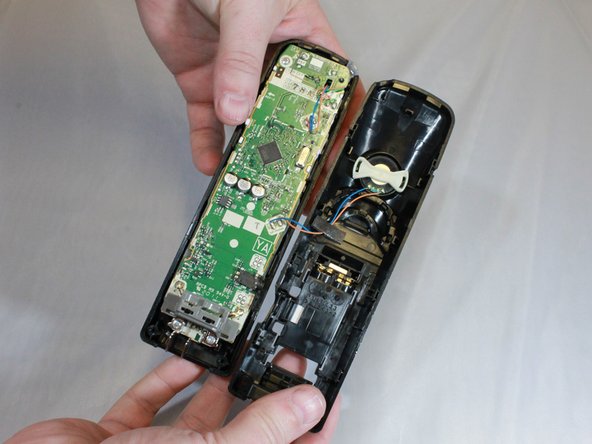
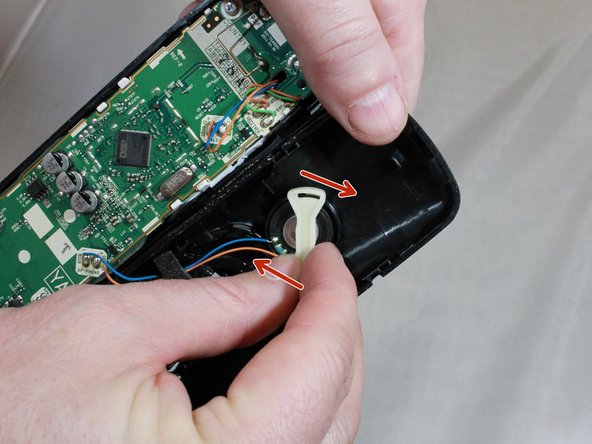
  5. Panasonic KX-TG6641 Earpiece Replacement: paso 5, imagen 1 de 2 Panasonic KX-TG6641 Earpiece Replacement: paso 5, imagen 2 de 2
    • Remove the earpiece cover by twisting the plastic earpiece clockwise to unlock.

  6. Panasonic KX-TG6641 Earpiece Replacement: paso 6, imagen 1 de 1
    • Replace earpiece by heating wires with soldering iron.

    • Solder wires back to earpiece after installing the replacement earpiece.

Conclusión

To reassemble your device, follow these instructions in reverse order.

Una persona más ha completado esta guía.

0 comentarios

Agregar Comentario

Ver Estadísticas:

Ultimas 24 horas: 0

Ultimos 7 días: 0

Ultimos 30 días: 1

Todo El Tiempo: 271