Saltar al contenido principal

Packard Bell 4X4 Desktop Optical Drive Replacement

Qué necesitas

  1. Packard Bell 4X4 Desktop Optical Drive Replacement, Top Cover: paso 1, imagen 1 de 1
    • Using a Phillips screwdriver, remove the three Phillips head screws (circled in red) from the back of the computer.

  2. Packard Bell 4X4 Desktop Optical Drive Replacement: paso 2, imagen 1 de 1
    • With both hands on each side of the case, slide the top cover toward you. Lift it off the computer.

  3. Packard Bell 4X4 Desktop Optical Drive Replacement: paso 3, imagen 1 de 1
    • The top cover is removed.

  4. Packard Bell 4X4 Desktop Optical Drive Replacement, Drive Cage: paso 4, imagen 1 de 1
    • Remove the two Philips head screws with your Philips screwdriver. You may have to lubricate these screws as they can be very difficult to remove.

  5. Packard Bell 4X4 Desktop Optical Drive Replacement: paso 5, imagen 1 de 1
    • Remove the 1 Philips head screw from the left hand side of the case if there is one. Again, you may need to lubricate this screw.

  6. Packard Bell 4X4 Desktop Optical Drive Replacement: paso 6, imagen 1 de 1
    • Once the screws are removed, disconnect all cables from the optical drive, hard drive and floppy drive.

  7. Packard Bell 4X4 Desktop Optical Drive Replacement: paso 7, imagen 1 de 1
    • Slide the drive cage back. An easy way to do this is the push on the optical drive from the front.

  8. Packard Bell 4X4 Desktop Optical Drive Replacement: paso 8, imagen 1 de 1
    • Lift the drive cage up and out of the computer.

  9. Packard Bell 4X4 Desktop Optical Drive Replacement, Optical Drive: paso 9, imagen 1 de 1
    • Remove the 1 Philips head screw with your Phillips screwdriver. There should not be a screw in the right hole.

  10. Packard Bell 4X4 Desktop Optical Drive Replacement: paso 10, imagen 1 de 2 Packard Bell 4X4 Desktop Optical Drive Replacement: paso 10, imagen 2 de 2
    • Slide the optical drive forward and lift it up from the right side, the side closest to the floppy drive.

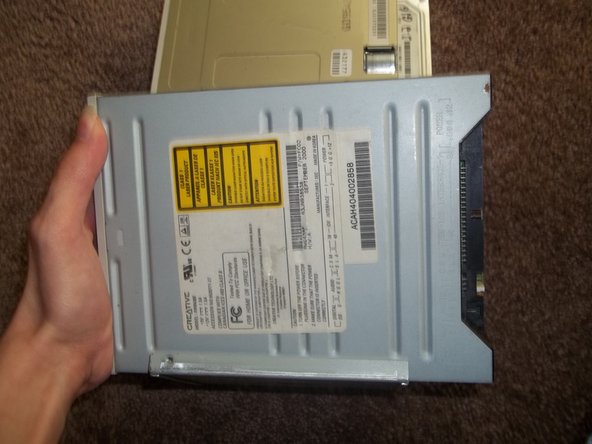
  11. Packard Bell 4X4 Desktop Optical Drive Replacement: paso 11, imagen 1 de 1
    • Remove the 2 Philips head screws with your Philips screwdriver. Put these screws onto your new optical drive.

Conclusión

To reassemble your device, follow these instructions in reverse order.

Una persona más ha completado esta guía.

Brandon S

Miembro Desde 09/04/10

490 Reputación

3 Guías creadas

Equipo

Packard Bell Planet Miembro de Packard Bell Planet

Community

1 Miembro

6 Guías creadas

0 comentarios

Agregar Comentario

Ver Estadísticas:

Ultimas 24 horas: 0

Ultimos 7 días: 0

Ultimos 30 días: 8

Todo El Tiempo: 969