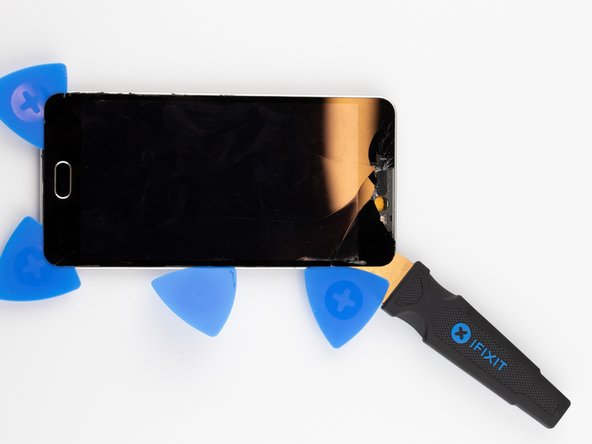
Saltar al contenido principal

Orbic Wonder Screen Replacement

Qué necesitas

  1. Orbic Wonder Screen Replacement, Battery: paso 1, imagen 1 de 3 Orbic Wonder Screen Replacement, Battery: paso 1, imagen 2 de 3 Orbic Wonder Screen Replacement, Battery: paso 1, imagen 3 de 3
    • Remove two 2mm TR9 Torx screws from the bottoms of the device.

  2. Orbic Wonder Screen Replacement: paso 2, imagen 1 de 3 Orbic Wonder Screen Replacement: paso 2, imagen 2 de 3 Orbic Wonder Screen Replacement: paso 2, imagen 3 de 3
    • There is a border between the black phone backing and the silver screen.

    • Place the Jimmy in this border, and cautiously torque it back and forth to part the two halves.

    • When the halves are parted correctly, the gap should look like this.

    • Be careful to avoid damaging any connecting circuitry between the two halves.

  3. Orbic Wonder Screen Replacement: paso 3, imagen 1 de 3 Orbic Wonder Screen Replacement: paso 3, imagen 2 de 3 Orbic Wonder Screen Replacement: paso 3, imagen 3 de 3
    Herramienta utilizada en este paso:
    Anti-Static Wrist Strap
    $7.95
    Comprar
    • Before continuing, tighten the anti-static wrist strap around your wrist and connect the alligator clips to a metal portion of the phone.

    • On the upper right side, there is a black ribbon cable in the shape of an “L”. Remove the single 1 mm Phillips #000 screw on the left side of the ribbon cable.

  4. Orbic Wonder Screen Replacement: paso 4, imagen 1 de 3 Orbic Wonder Screen Replacement: paso 4, imagen 2 de 3 Orbic Wonder Screen Replacement: paso 4, imagen 3 de 3
    • Use a pair of angled tweezers to carefully remove the metal casing of the ribbon cable.

    • Use a pair of angled tweezers to detach the black ribbon cable. This is done to unplug the battery.

  5. Orbic Wonder Screen Replacement: paso 5, imagen 1 de 3 Orbic Wonder Screen Replacement: paso 5, imagen 2 de 3 Orbic Wonder Screen Replacement: paso 5, imagen 3 de 3
    • There is a black flap on the bottom of the battery.

    • Using your fingers, pinch this flap and carefully pull the battery up and out of the phone.

  6. Orbic Wonder Screen Replacement, Speaker: paso 6, imagen 1 de 3 Orbic Wonder Screen Replacement, Speaker: paso 6, imagen 2 de 3 Orbic Wonder Screen Replacement, Speaker: paso 6, imagen 3 de 3
    Herramienta utilizada en este paso:
    Anti-Static Wrist Strap
    $7.95
    Comprar
    • Remove the anti-static wrist strap.

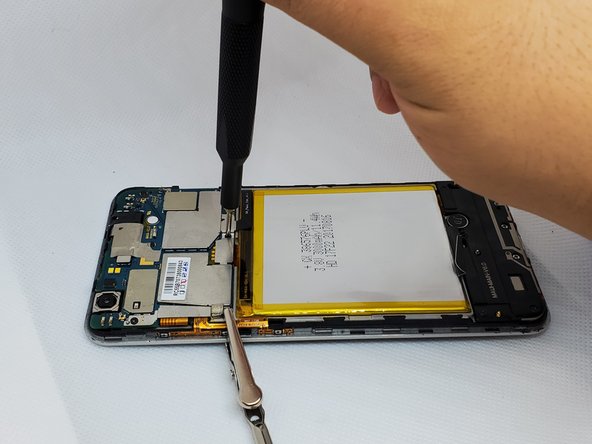
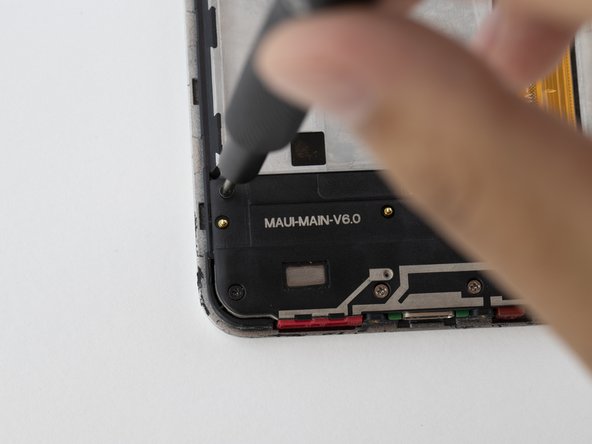
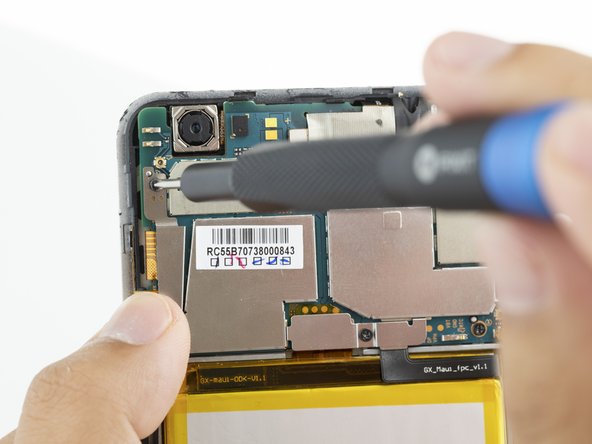
    • Use the Phillips #000 screwdriver to remove the five black 2 mm screws.

    • Use the Phillips #000 screwdriver to remove the two grey 2 mm screws.

  7. Orbic Wonder Screen Replacement: paso 7, imagen 1 de 2 Orbic Wonder Screen Replacement: paso 7, imagen 2 de 2
    • Use a pair of angled tweezers to remove the speaker housing.

  8. Orbic Wonder Screen Replacement, Charging Port Circuit Board: paso 8, imagen 1 de 3 Orbic Wonder Screen Replacement, Charging Port Circuit Board: paso 8, imagen 2 de 3 Orbic Wonder Screen Replacement, Charging Port Circuit Board: paso 8, imagen 3 de 3
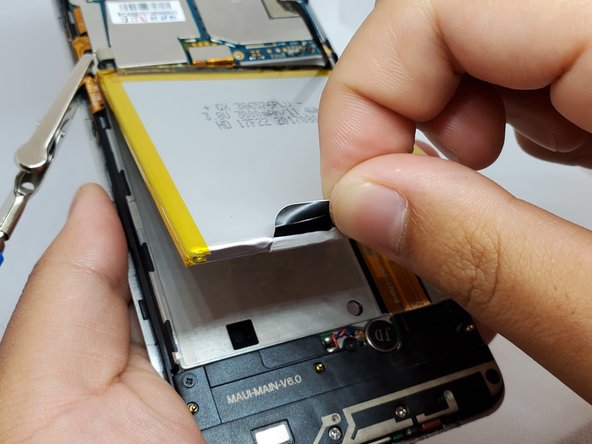
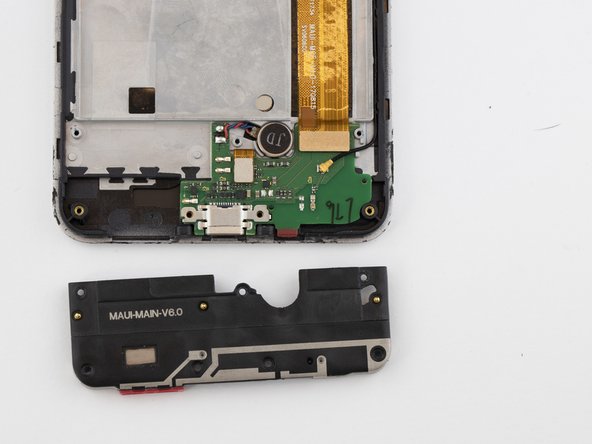
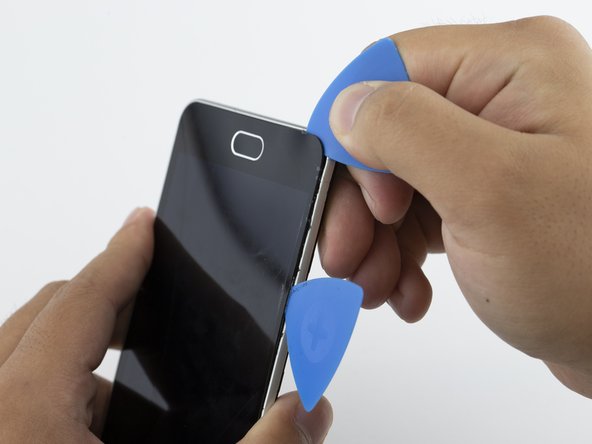
    • Detach the metal casing at the bottom of the phone.

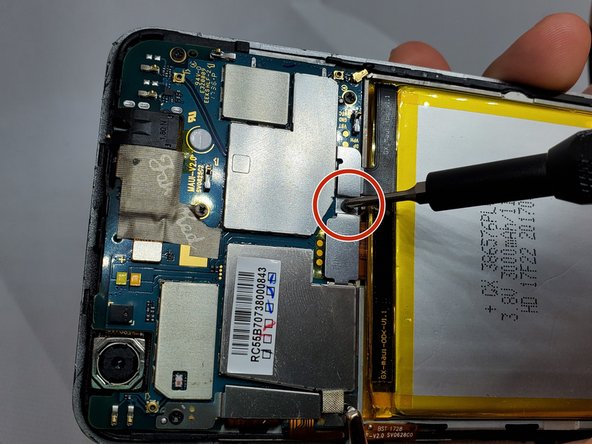
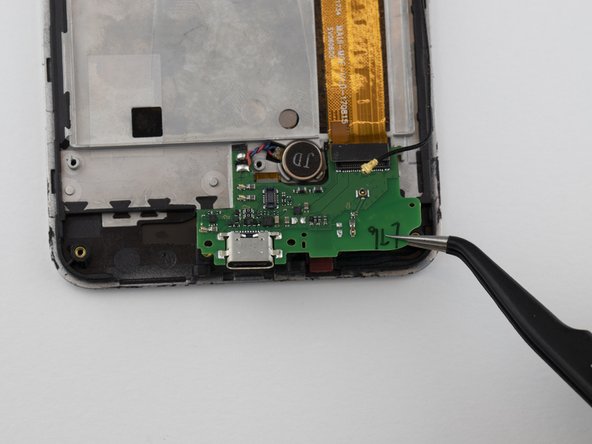
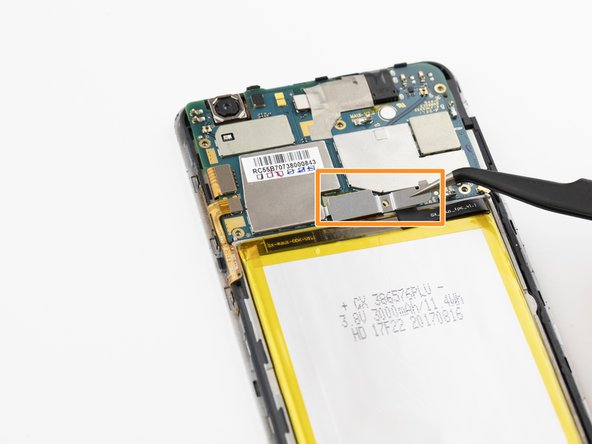
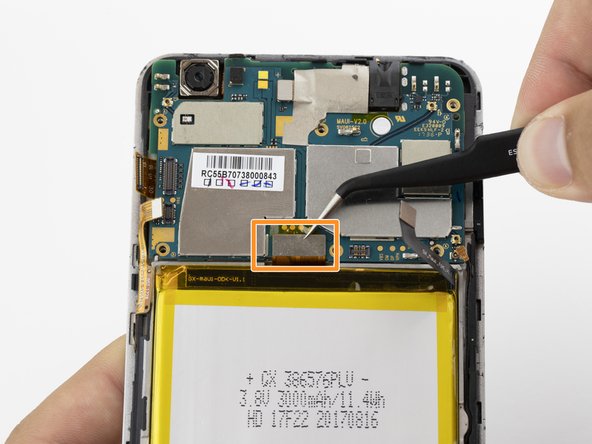
    • Unplug the cable connector.

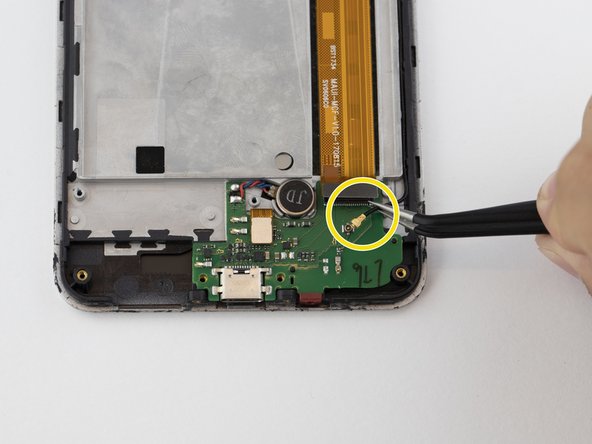
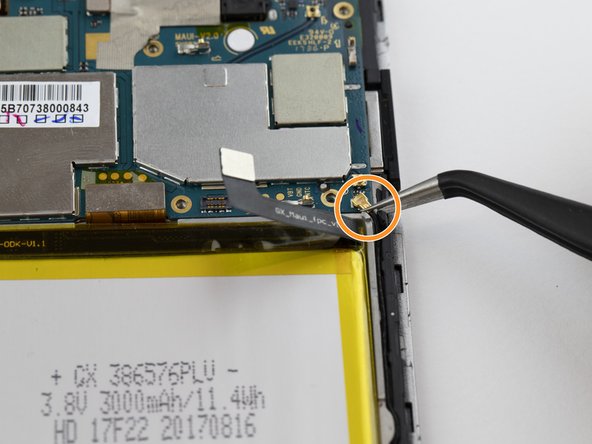
    • Use a pair of angled tweezers to unplug the black wire.

  9. Orbic Wonder Screen Replacement: paso 9, imagen 1 de 3 Orbic Wonder Screen Replacement: paso 9, imagen 2 de 3 Orbic Wonder Screen Replacement: paso 9, imagen 3 de 3
    • Using a pair of angled tweezers, disconnect the connector chip.

    • With the angled tweezers, gently lift (but do not remove) the green circuit board from the phone.

  10. Orbic Wonder Screen Replacement: paso 10, imagen 1 de 2 Orbic Wonder Screen Replacement: paso 10, imagen 2 de 2
    • Using a pair of angled tweezers, disconnect the attachment to the microphone labeled "JD," and completely remove the circuit board.

  11. Orbic Wonder Screen Replacement, Screen: paso 11, imagen 1 de 2 Orbic Wonder Screen Replacement, Screen: paso 11, imagen 2 de 2
    • Remove the six 2mm Phillips #000 screws from the motherboard.

  12. Orbic Wonder Screen Replacement: paso 12, imagen 1 de 2 Orbic Wonder Screen Replacement: paso 12, imagen 2 de 2
    • Use a pair of tweezers to remove the leftmost metal protector.

    • Repeat this process for the other metal protector directly above the battery.

  13. Orbic Wonder Screen Replacement: paso 13, imagen 1 de 3 Orbic Wonder Screen Replacement: paso 13, imagen 2 de 3 Orbic Wonder Screen Replacement: paso 13, imagen 3 de 3
    • Disconnect the "L" shaped plug connecting the battery to the circuit board.

    • Carefully disconnect the small gold connecting wire.

    • Disconnect the rectangular piece.

    • Each of these steps are very delicate. Use a pair of tweezers to avoid causing damage.

  14. Orbic Wonder Screen Replacement: paso 14, imagen 1 de 2 Orbic Wonder Screen Replacement: paso 14, imagen 2 de 2
    • Unplug the power button connector.

    • Unplug the circuit connector above the battery.

    • These are very delicate and important connections. Be sure to use a pair of tweezers to avoid causing damage.

  15. Orbic Wonder Screen Replacement: paso 15, imagen 1 de 2 Orbic Wonder Screen Replacement: paso 15, imagen 2 de 2
    • Carefully remove the protective sticker. This will expose the camera and its connector.

  16. Orbic Wonder Screen Replacement: paso 16, imagen 1 de 2 Orbic Wonder Screen Replacement: paso 16, imagen 2 de 2
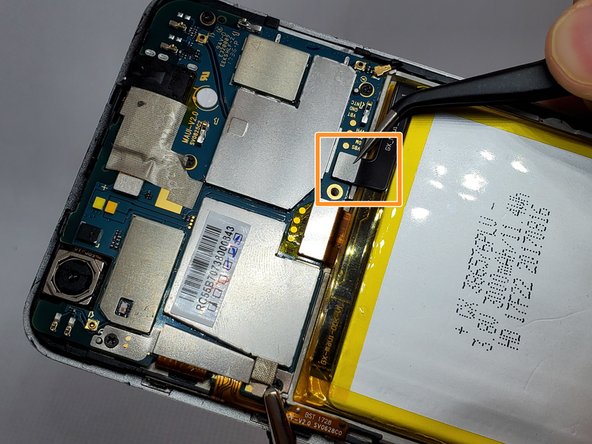
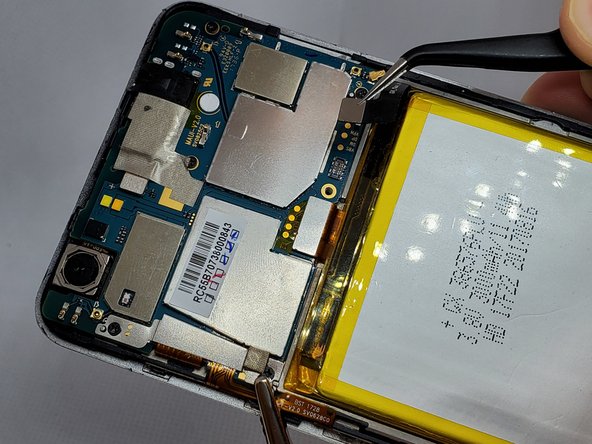
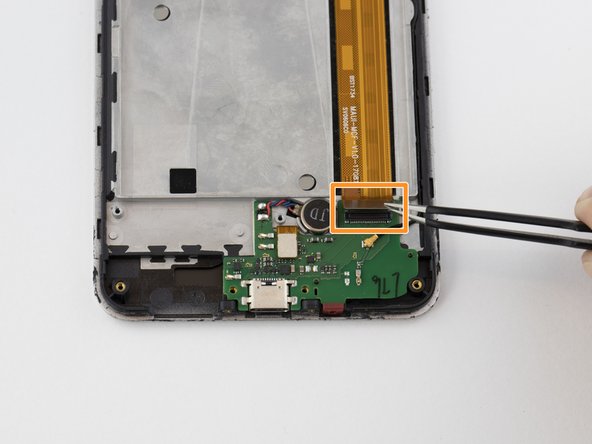
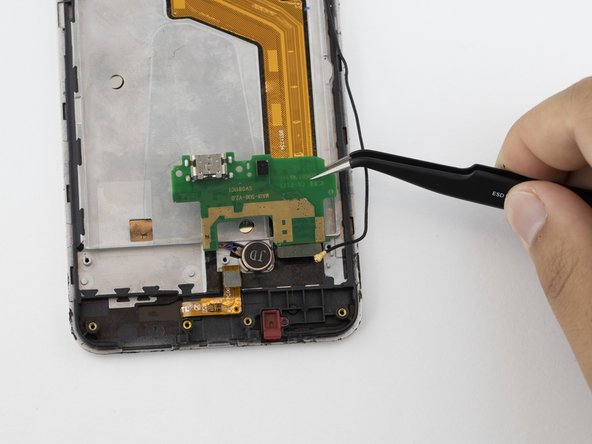
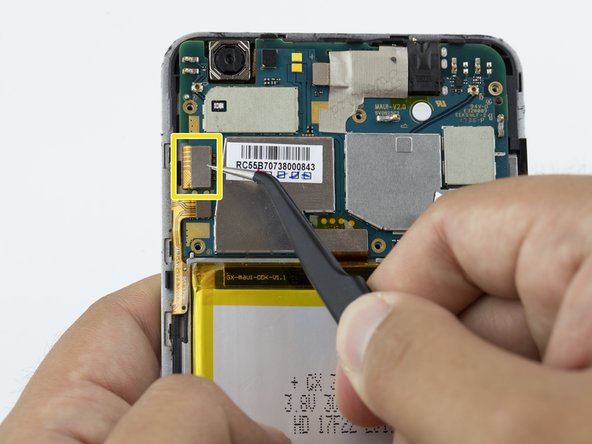
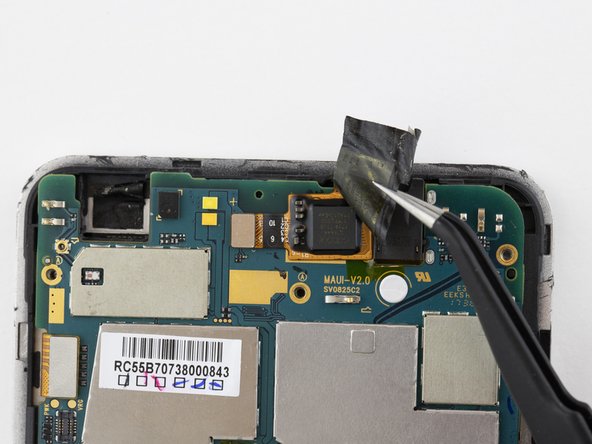
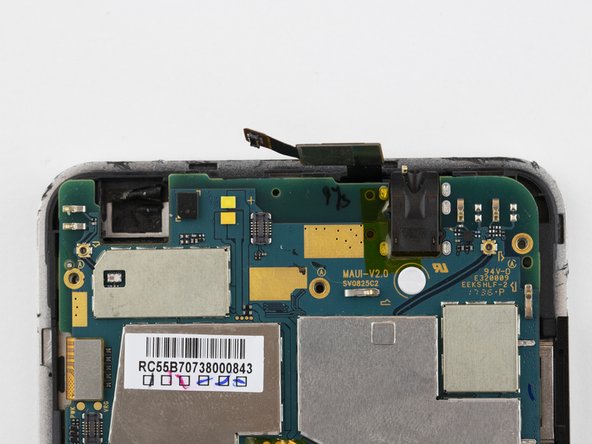
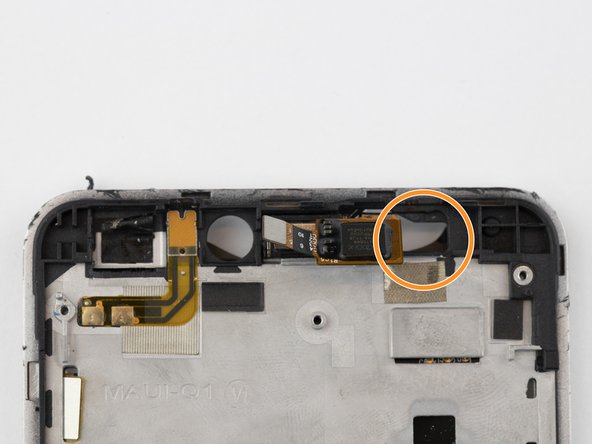
    • Disconnect the camera connector.

    This picture does not show the rearview camera connector on the back of the mainboard. It also does not show the correct way to reconnect it. I’ve tried to switch a mainboard over to another phone and I can’t seem to reconnect that review camera connector which is also for the flashlight. it’s very hard to reconnect especially when there’s a clip in front of it to attach the cover. you can’t see if it’s connected or not.

    Gary Fink - Contestar

  17. Orbic Wonder Screen Replacement: paso 17, imagen 1 de 1
    • The circuit board should now be loose. Disconnect it, and remove it from the phone housing.

  18. Orbic Wonder Screen Replacement: paso 18, imagen 1 de 3 Orbic Wonder Screen Replacement: paso 18, imagen 2 de 3 Orbic Wonder Screen Replacement: paso 18, imagen 3 de 3
    • Using the iOpener, heat the screen's edges to loosen the adhesive holding the screen in place.

    • This will make the phone very warm. Gloves may be necessary depending on the level of heat required.

    • Using the Jimmy and opening picks, gently pry the screen from the phone housing.

  19. Orbic Wonder Screen Replacement: paso 19, imagen 1 de 2 Orbic Wonder Screen Replacement: paso 19, imagen 2 de 2
    • Push the gold lower screen connector wire through the hole.

    • Do the same to the gold upper screen connector wire.

  20. Orbic Wonder Screen Replacement: paso 20, imagen 1 de 3 Orbic Wonder Screen Replacement: paso 20, imagen 2 de 3 Orbic Wonder Screen Replacement: paso 20, imagen 3 de 3
    • Using your hands, separate the screen from the rest of the phone, ensuring that the connector wires go through the openings without ripping.

    • The screen is completely detached from the rest of the phone.

Conclusión

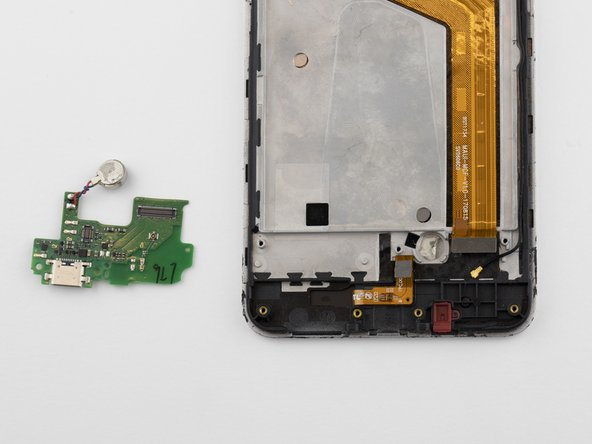
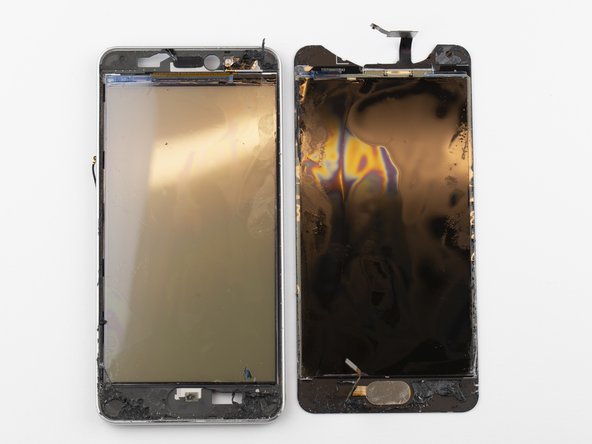
To reassemble your device, follow these instructions in reverse order.

Una persona más ha completado esta guía.

2 comentarios

how can and or can I swap media files from orbic wonder “with damaged screen “ to a gaxalxy a01

Ron Harrell - Contestar

My orbic was over amped.7 volts burned something out.it turns on but nothing works.and the screen is light grey.how do i repair this plz thank you. 209crazo

209 Crazo - Contestar

Agregar Comentario

Ver Estadísticas:

Ultimas 24 horas: 4

Ultimos 7 días: 12

Ultimos 30 días: 46

Todo El Tiempo: 3,047