Introducción
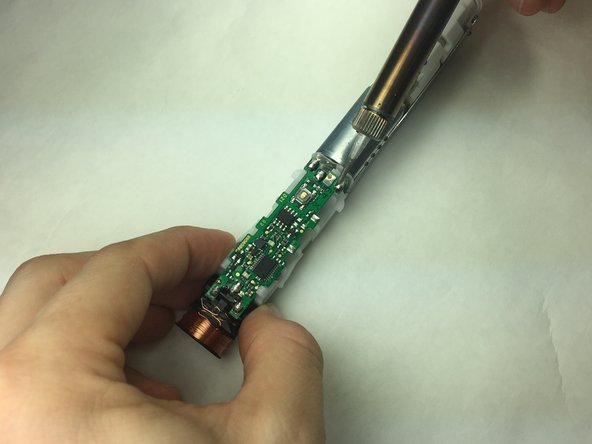
Battery Replacement guide for Oral-B White Pro 1000 rechargeable electric toothbrush due to faulty battery. This guide illustrates the disassembly of the Oral-B White Pro 1000 electric toothbrush. Use caution not to short the positive (+) and negative (-) terminals when handling the battery. This guide also requires the use of a soldering tool which reaches high temperatures. Refer to this helpful guide for some soldering and desoldering tips.
Qué necesitas


To reassemble your device, follow these instructions in reverse order.
To reassemble your device, follow these instructions in reverse order.
Cancelar: No complete esta guía.
21 personas más completaron esta guía.
Equipo

IUPUI, Team S5-G4, Baechle Fall 2017 Miembro de IUPUI, Team S5-G4, Baechle Fall 2017
IUPUI-BAECHLE-F17S5G4
3 Miembros
6 Guías creadas
14 comentarios
This guide also works for Oral-B genius 9000. Thank You!! On mine, the coil wires was losen. Just soldered it back and works fine again.
Same with mine: coil was loose. I guessed it because the red blinking light would not react (turn off) by putting the toothbrush on the charger. (checked also a second charger, never through away older parts, using as spare…) ;)
Karsten -
This guide also works for Oral B PRO 2950N. Thank you so much!
I had the same issue, the coil was broken on one side, and it doesn't charge. Adding a little bit of solder to weld the broken end was enough for making it charge again
What type of battery is that? It's not listed under “parts.”
I’ve wrote it in another comment as well, but in case you didn’t see it: As far as I know, these are 4/5 AA batteries with about 1200 mAh and U-shaped solder tails. So the size of the battery is roughly 42x14mm . But as mentioned in the comments, regular AA size batteries worked in my case as well, just had to cut the spacers in the battery retainer. AA batteries are cheaper to get obviously and most likely they’ll have more capacity as well.
benn_i -