Saltar al contenido principal

Oppo X9000 Earpiece Speaker Replacement

Qué necesitas

  1. Oppo X9000 Earpiece Speaker Replacement, Removing the Back Cover: paso 1, imagen 1 de 2 Oppo X9000 Earpiece Speaker Replacement, Removing the Back Cover: paso 1, imagen 2 de 2
    • Turn the phone over so that you are facing the back side of the phone.

    • With your fingers, pry the back cover up starting from the top of the phone near the headphone jack and camera.

    • Completely remove the back cover by moving down the sides and bottom with your fingers.

  2. Oppo X9000 Earpiece Speaker Replacement, Removing the Battery: paso 2, imagen 1 de 1
    • With your finger, remove the battery from the phone by gently lifting the top-right corner nearest to the camera.

  3. Oppo X9000 Earpiece Speaker Replacement, Remove the Back Panel Screws: paso 3, imagen 1 de 2 Oppo X9000 Earpiece Speaker Replacement, Remove the Back Panel Screws: paso 3, imagen 2 de 2
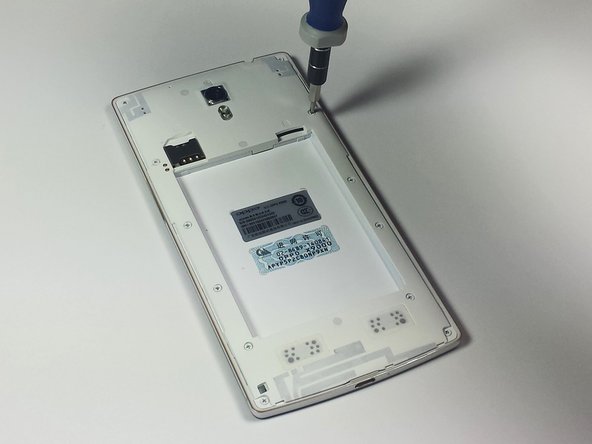
    • Remove the twelve exposed 3.6 mm Phillips screws on the rear of the phone using the 3.6 mm Phillips screwdriver.

    • Store all the screws in a safe place where you will not lose them.

  4. Oppo X9000 Earpiece Speaker Replacement, Remove the Rubber Stoppers: paso 4, imagen 1 de 2 Oppo X9000 Earpiece Speaker Replacement, Remove the Rubber Stoppers: paso 4, imagen 2 de 2
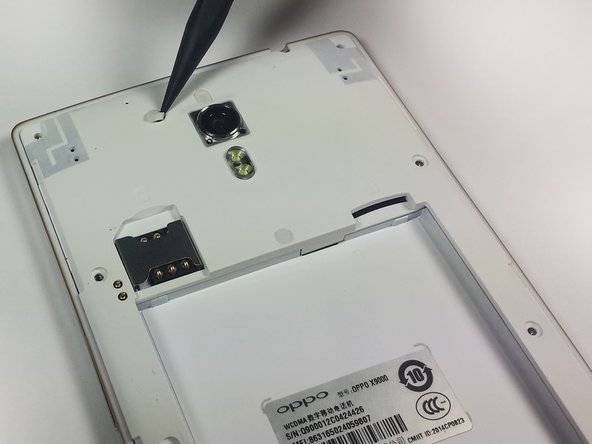
    • Remove the three circular rubber screw covers on the back of the phone by slipping the spudger into the border between the rubber cover and the chassis. In one motion, pry the stopper out of the hole. This can take some force.

  5. Oppo X9000 Earpiece Speaker Replacement, Remove the Newly Exposed Screws: paso 5, imagen 1 de 1
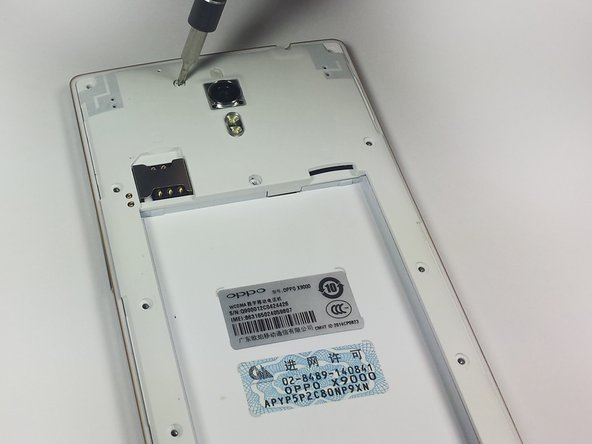
    • With the 3.6 mm Phillips screwdriver, remove the three newly exposed 3.6mm Phillips screws.

  6. Oppo X9000 Earpiece Speaker Replacement, Lift off the Back Panel: paso 6, imagen 1 de 2 Oppo X9000 Earpiece Speaker Replacement, Lift off the Back Panel: paso 6, imagen 2 de 2
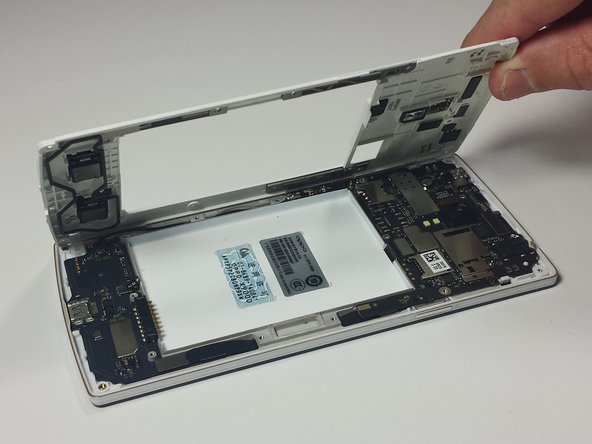
    • Insert the plastic opening tool underneath the chassis near the power button and pry the chassis from the phone. This should take a little force.

  7. Oppo X9000 Earpiece Speaker Replacement, Remove the Power Button Bracket: paso 7, imagen 1 de 1
    • Use the sharp end of the spudger to pry the power button bracket from the side of the rear case.

  8. Oppo X9000 Earpiece Speaker Replacement, Let the Button Fall Out: paso 8, imagen 1 de 1
    • Rotate the phone onto its side so that the power button falls out with ease.

    • Make sure not to lose the power button.

  9. Oppo X9000 Earpiece Speaker Replacement, Remove the Volme Button Bracket: paso 9, imagen 1 de 1
    • Use the sharp end of the spudger to pry the volume button bracket from the side of the rear case.

  10. Oppo X9000 Earpiece Speaker Replacement, Let the Button Fall Out: paso 10, imagen 1 de 1
    • Rotate the phone onto its side so that the volume button falls out with ease.

    • Make sure not to lose the volume button.

  11. Oppo X9000 Earpiece Speaker Replacement, Remove the Black Screws: paso 11, imagen 1 de 2 Oppo X9000 Earpiece Speaker Replacement, Remove the Black Screws: paso 11, imagen 2 de 2
    • The motherboard is split into two different chips. The large chip is located above where the battery rests and the smaller chip is located below it.

    • Remove the three 3.6 mm Phillip's screws on the motherboard.

    • A small silver piece of metal is connected to the lowest screw and may fall off. This metal holds the WiFi antenna in place and should not be lost; although the phone operates just fine without it.

  12. Oppo X9000 Earpiece Speaker Replacement, Disconnect the Motherboard: paso 12, imagen 1 de 3 Oppo X9000 Earpiece Speaker Replacement, Disconnect the Motherboard: paso 12, imagen 2 de 3 Oppo X9000 Earpiece Speaker Replacement, Disconnect the Motherboard: paso 12, imagen 3 de 3
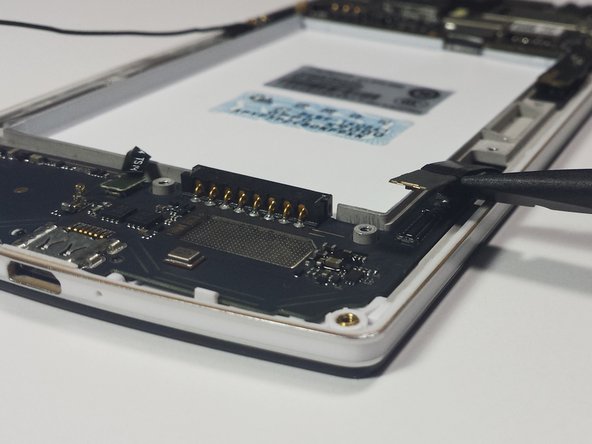
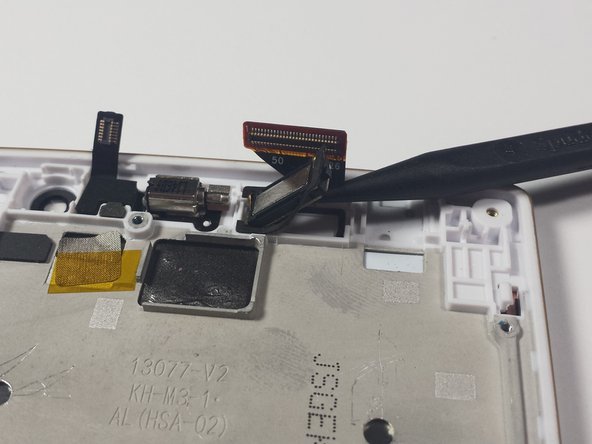
    • Using the flat end of the spudger, pry the four tape connectors straight up out of their respective motherboard sockets.

  13. Oppo X9000 Earpiece Speaker Replacement: paso 13, imagen 1 de 2 Oppo X9000 Earpiece Speaker Replacement: paso 13, imagen 2 de 2
    • This connection is a little bit more tricky to remove. Follow these directions carefully to avoid damaging the device.

    • On the right side, there are two motherboard connections hidden underneath the motherboard. For these, insert the spudger in between the motherboard and the connection and rotate the spudger in a rocking motion until the two cables are disconnected from the motherboard.

  14. Oppo X9000 Earpiece Speaker Replacement: paso 14, imagen 1 de 2 Oppo X9000 Earpiece Speaker Replacement: paso 14, imagen 2 de 2
    • Like the last step, this connection is tricky to remove. Please pay close attention to the guide to avoid damaging your device.

    • On the bottom right only one connection is visible, however an additional connection is hidden underneath the first. To safely disconnect both, first unplug the visible connection then lift its tape up to expose the second socket. Similarly disconnect the second tape.

  15. Oppo X9000 Earpiece Speaker Replacement, Disconnect the WiFi Antenna: paso 15, imagen 1 de 2 Oppo X9000 Earpiece Speaker Replacement, Disconnect the WiFi Antenna: paso 15, imagen 2 de 2
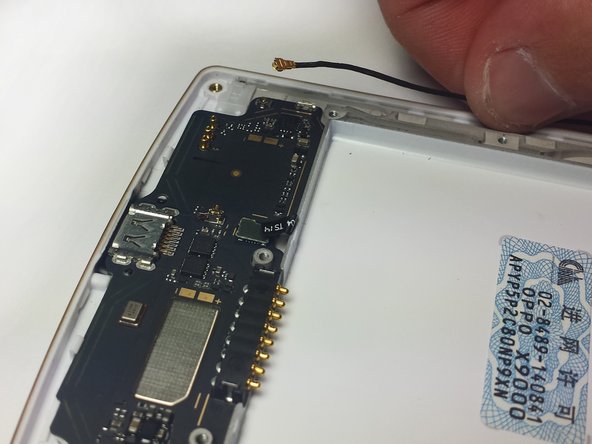
    • With your fingers, gently pull upwards on the WiFi antenna near the connection on the smaller motherboard until the antenna is no longer connected to the bottom motherboard.

  16. Oppo X9000 Earpiece Speaker Replacement, Remove the Small Motherboard: paso 16, imagen 1 de 1
    • Use the spudger to carefully pry the small motherboard off of the phone.

    • Start from the sides of the lower motherboard closest to the charging port. Carefully pry the motherboard off until it is no longer connected to the phone.

  17. Oppo X9000 Earpiece Speaker Replacement, Remove the Big Motherboard: paso 17, imagen 1 de 1
    • Use the spudger to carefully pry the bigger motherboard off of the phone.

    • Start from the top of the large motherboard. Carefully pry the motherboard off until it is no longer connected to the phone.

  18. Oppo X9000 Earpiece Speaker Replacement, Remove the Earpiece Speaker: paso 18, imagen 1 de 2 Oppo X9000 Earpiece Speaker Replacement, Remove the Earpiece Speaker: paso 18, imagen 2 de 2
    • Use the spudger to pry the earpiece speaker out of the phone.

    • The earpiece speaker has a rubber lining. If the rubber lining falls off of the earpiece speaker, simply place it back on the earpiece speaker.

Conclusión

To reassemble your device, follow these instructions in reverse order.

2 personas más completaron esta guía.

James Kragh

Miembro Desde 10/14/14

1,602 Reputación

5 Guías creadas

Equipo

Cal Poly, Team 4-45, Amido Fall 2014 Miembro de Cal Poly, Team 4-45, Amido Fall 2014

CPSU-AMIDO-F14S4G45

5 Miembros

11 Guías creadas

0 comentarios

Agregar Comentario

Ver Estadísticas:

Ultimas 24 horas: 0

Ultimos 7 días: 4

Ultimos 30 días: 4

Todo El Tiempo: 1,844