Introducción
This guide will help you replace the flash on your camera. Your flash will need to be replaced if it is not working. Replacing the flash will allow you to take pictures when it is dark or there is dim lighting.
Qué necesitas
-
-
Turn the camera so that you are facing the bottom of the camera.
-
Using a Phillips 00 screwdriver, unscrew the three 3.9mm screws on the bottom of the camera.
-
Using a spudger, pry off the plating on the bottom of the camera.
-
-
-
Turn the camera so that you are facing the top of the camera.
-
Using a Phillips 00 screwdriver, unscrew the three 3.9mm screws located on the top of the camera.
-
Using a spudger, pry off the plating on the top of the camera.
-
-
-
Turn the camera so the LCD is facing upwards.
-
Using a Phillips 00 screwdriver, unscrew the two 3.9mm screws located on the left side of the device.
-
-
-
Using a Phillips 00 screwdriver, unscrew the 3.9mm screw located next to the black "Olympus" face plate.
-
Using a T6 Torx screwdriver, unscrew the two 3.5mm screws located on the black "Olympus" face plate.
-
Using a spudger, gently pry off the black "Olympus" face plate.
-
-
-
-
Using a Phillips 00 screwdriver, unscrew the two 3.9mm screws to the right of the cursor pad on the U-shaped frame.
-
Turn the device over so the front of the camera is facing you.
-
Using a Phillips 00 screwdriver, unscrew the two 3.9mm screws on the end casing.
-
Using a spudger, pry off the end casing.
-
-
-
Turn the camera so the blue face plate is visible.
-
Using a Phillips 00 screwdriver, unscrew the two 3mm screws on the blue plate.
-
Using a Phillips 00 screwdriver, unscrew the 3.9mm screw located at the bottom of the camera straight down from the flash.
-
Using a spudger, gently pry off the blue face plate.
-
-
-
Using a Phillips 00 screwdriver, unscrew the 9mm screws on the top of the camera to the right of the flash.
-
-
-
Using tweezers, gently pull the ribbon cables to disconnect them from the motherboard.
-
Using your hands, grab the panel to remove it.
-
Set the back panel aside.
-
-
-
Using the Phillips #00 Screwdriver, unscrew the four 3.9mm screws from the center metal panel.
-
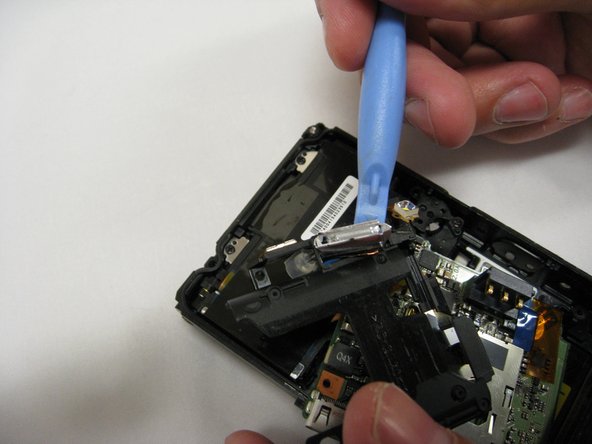
Using the tweezers, pull the metal panel to remove it from the motherboard.
-
Using the tweezers, disconnect the ribbon cable from the motherboard.
-
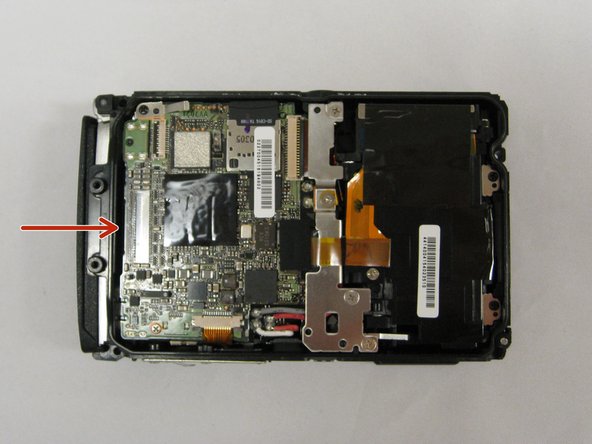
Using the Phillips #00 Screwdriver, unscrew the two 3.9mm screws on the top left and bottom left of the motherboard.
-
Using the tweezers, disconnect the ribbon cable from the bottom left of the motherboard.
-
Using the spudger, gently pry the motherboard from the casing.
-
-
-
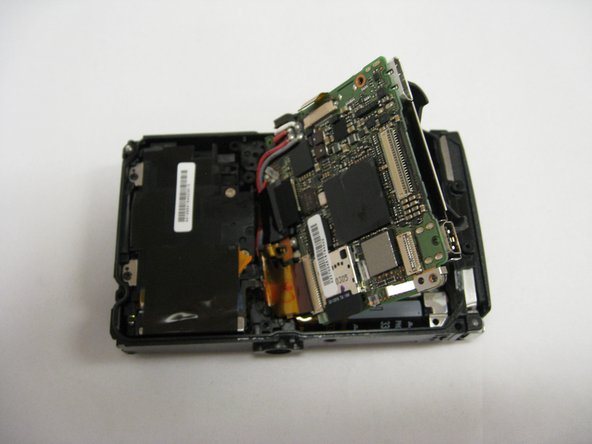
Using your hands, separate the black frame from the motherboard.
-
Using your hands, separate the metal plate from between the flash casing and the motherboard.
-
-
-
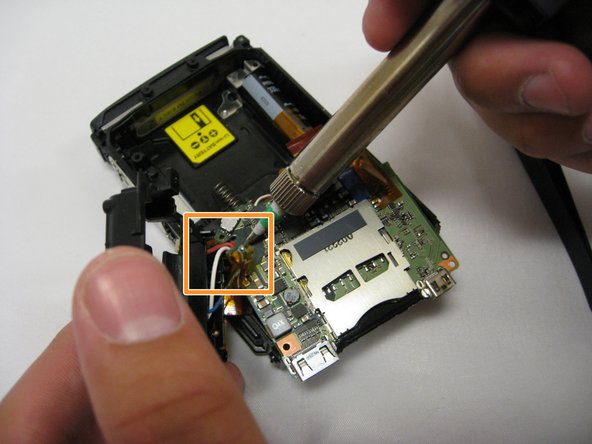
Using the tweezers, grab and pull the yellow tape off the blue and white wires.
-
Using the soldering station, desolder the blue wire from the back of the motherboard.
-
Using the spudger, carefully pry the capacitor from the flash casing.
-


To reassemble your device, follow these instructions in reverse order.
To reassemble your device, follow these instructions in reverse order.

Equipo

Eastern Washington University, Team 2-6, Matresse Spring 2015 Miembro de Eastern Washington University, Team 2-6, Matresse Spring 2015
EWU-MATRESSE-S15S2G6
4 Miembros
12 Guías creadas