Saltar al contenido principal

Olympus Pen E-PL7 LCD Screen Replacement

Qué necesitas

  1. Olympus Pen E-PL7 LCD Screen Replacement, Battery: paso 1, imagen 1 de 2 Olympus Pen E-PL7 LCD Screen Replacement, Battery: paso 1, imagen 2 de 2
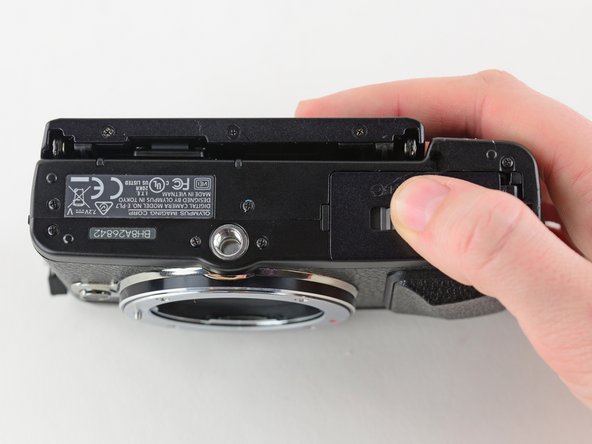
    • Turn the camera upside down.

    • Push the grey tab to the right to open the battery compartment.

    • Pull out the battery.

    • The battery is not shown in these photos.

  2. Olympus Pen E-PL7 LCD Screen Replacement, LCD Screen: paso 2, imagen 1 de 1
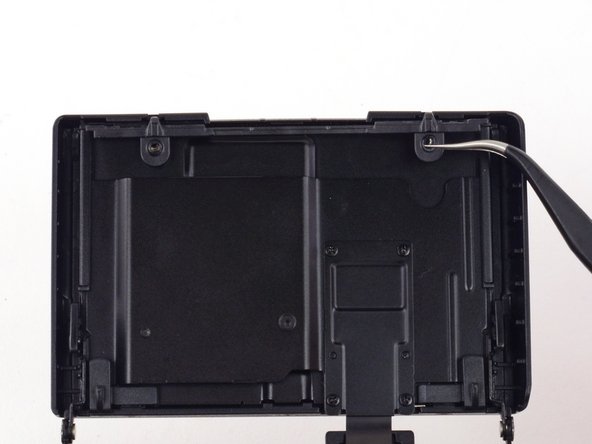
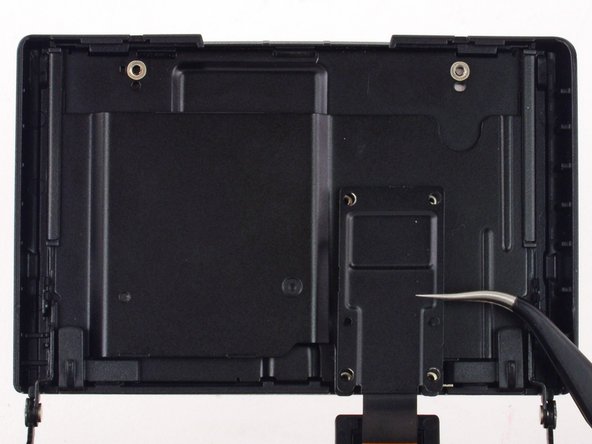
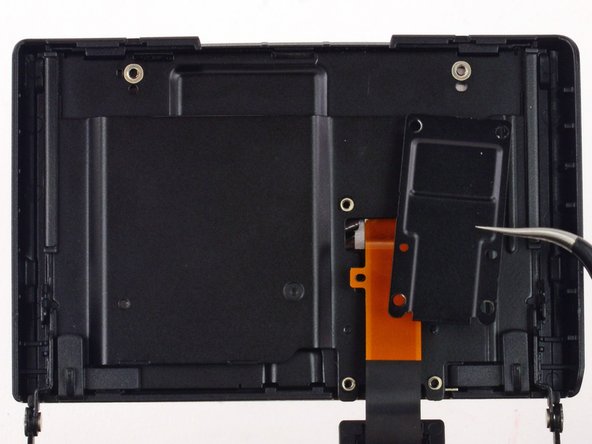
    • Use a Phillips #00 screwdriver to remove the three 2.3 mm screws from the base of the LCD screen.

  3. Olympus Pen E-PL7 LCD Screen Replacement: paso 3, imagen 1 de 2 Olympus Pen E-PL7 LCD Screen Replacement: paso 3, imagen 2 de 2
    • Fully extend the LCD assembly.

  4. Olympus Pen E-PL7 LCD Screen Replacement: paso 4, imagen 1 de 3 Olympus Pen E-PL7 LCD Screen Replacement: paso 4, imagen 2 de 3 Olympus Pen E-PL7 LCD Screen Replacement: paso 4, imagen 3 de 3
    • Remove the two 2.2 mm Phillips screws located on the back of the LCD screen.

    • Use tweezers to remove the top LCD bracket.

  5. Olympus Pen E-PL7 LCD Screen Replacement: paso 5, imagen 1 de 3 Olympus Pen E-PL7 LCD Screen Replacement: paso 5, imagen 2 de 3 Olympus Pen E-PL7 LCD Screen Replacement: paso 5, imagen 3 de 3
    • Use a Phillips #00 screwdriver to remove the four 1.4 mm screws from the back of the LCD screen.

    • Remove the LCD ribbon cable with a pair of tweezers.

    • The cover may fall off after the screws have been removed.

  6. Olympus Pen E-PL7 LCD Screen Replacement: paso 6, imagen 1 de 3 Olympus Pen E-PL7 LCD Screen Replacement: paso 6, imagen 2 de 3 Olympus Pen E-PL7 LCD Screen Replacement: paso 6, imagen 3 de 3
    • Carefully lift the LCD screen up and away from the assembly.

    • Do not attempt to fully remove the screen, as it is attached to the assembly by a ribbon cable.

  7. Olympus Pen E-PL7 LCD Screen Replacement: paso 7, imagen 1 de 2 Olympus Pen E-PL7 LCD Screen Replacement: paso 7, imagen 2 de 2
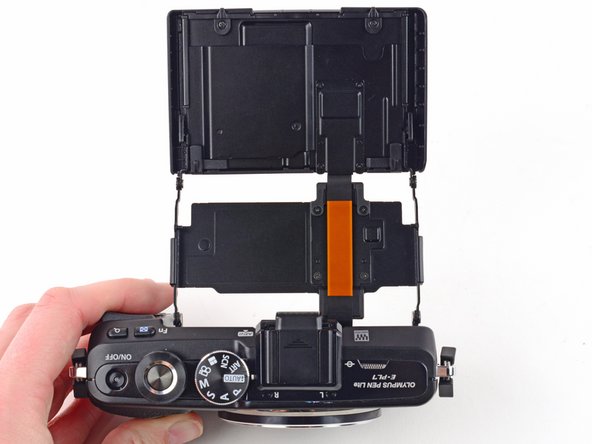
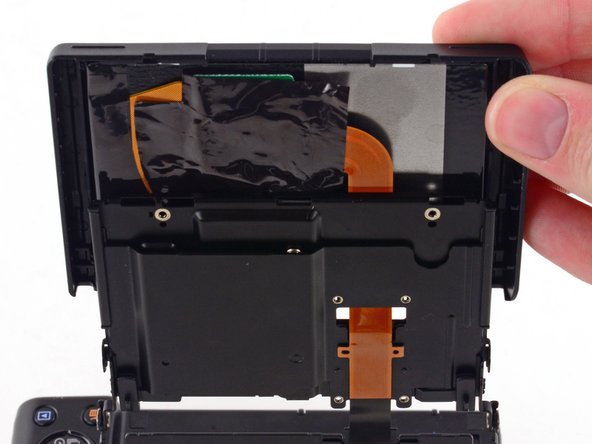
    • Use tweezers to peel back the plastic cover.

    Be very careful i destroyed the wrong cables in that step.

    christoph hütt - Contestar

  8. Olympus Pen E-PL7 LCD Screen Replacement: paso 8, imagen 1 de 3 Olympus Pen E-PL7 LCD Screen Replacement: paso 8, imagen 2 de 3 Olympus Pen E-PL7 LCD Screen Replacement: paso 8, imagen 3 de 3
    • Use a spudger to flip back the black bar on the LCD Ribbon ZIF connector.

  9. Olympus Pen E-PL7 LCD Screen Replacement: paso 9, imagen 1 de 2 Olympus Pen E-PL7 LCD Screen Replacement: paso 9, imagen 2 de 2
    • Gently pull the ribbon cable out with tweezers.

  10. Olympus Pen E-PL7 LCD Screen Replacement: paso 10, imagen 1 de 1
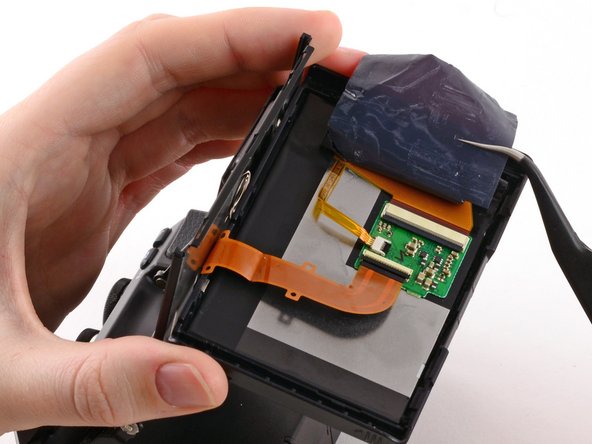
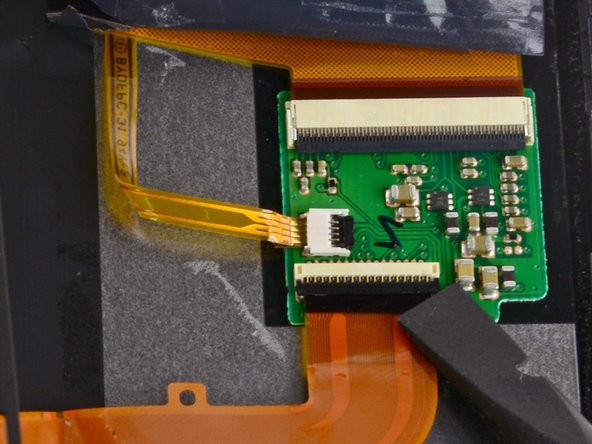
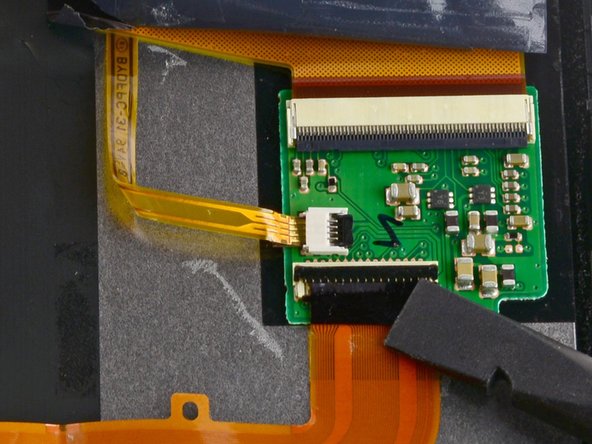
    • Remove the LCD Screen.

    Thank you so much. Just fixed my cam!

    Ingo - Contestar

    There is more to it than shown here. You must remove the circuit board from the back of the old LCD screen, unplug those ribbon cables, transfer the circuit board to the new screen, and plug in the cables.

    Steve Reynolds - Contestar

Conclusión

To reassemble your device, follow these instructions in reverse order.

6 personas más completaron esta guía.

Kelsea Weber

Miembro Desde 11/12/15

19,857 Reputación

32 Guías creadas

Equipo

iFixit Miembro de iFixit

Staff

135 Miembros

16,732 Guías creadas

7 comentarios

Magnifico

Great Work!!

apuntotres - Contestar

Where can I buy a replacement LCD screen?

Joshua Almeida - Contestar

You don't show the final part taking the glass away from outer and the board, as the screen replacements don't come with connector board

josollis - Contestar

@josollis: Thanks for the hint! I got the missing info from the E-P5 LCD exchange instructions (on ifixit).

Stephan Fagerer - Contestar

I have reassembled the unit after replacing the broken Ribbon, however my LCD images are inverted in normal mode not selfie mode. Do anyone know why ?

Thanks in advance

ah to lee - Contestar

Same problem, stuck in selfie mode. Upside down display in normal mode. Hope somebody could help. Thanks!

Rick Velasquez - Contestar

Je rencontre le même problème d'image inversé. Pas trouvé de solution ailleurs pour le moment...

Olivier Piebourg - Contestar

Agregar Comentario

Ver Estadísticas:

Ultimas 24 horas: 2

Ultimos 7 días: 21

Ultimos 30 días: 69

Todo El Tiempo: 9,816