Introducción
This guide may help in the process of replacing the LCD Screen on the Olympus C-765.
Over time, the LCD Screen may become damaged, which can cause a disconnect between the displayed image and the photographs being taken.
The guide will show the steps necessary for replacement, including disconnecting ribbon cables.
Take care before beginning by first disconnecting any external power source from the device and ensuring that it is powered off.
Qué necesitas
-
-
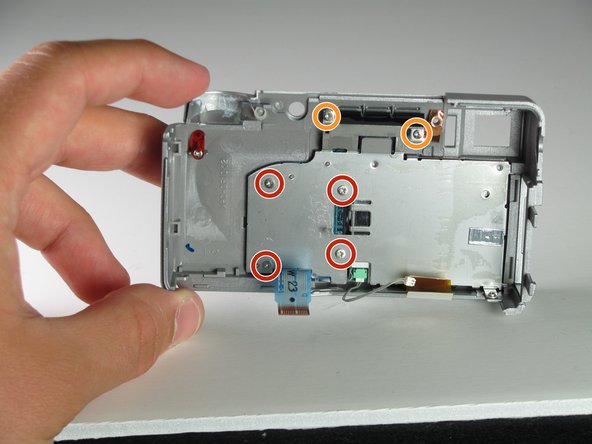
Remove all the screws using your Phillips #00 holding the back plate in place. This includes:
-
On the Back: Unscrew the 4mm screw to the right of the viewfinder.
-
On the Bottom:
-
Unscrew the 3mm screw in the top left corner.
-
Unscrew the four 3mm screws under the battery cover.
-
On the Right Side: Unscrew the one 3mm screw holding the right-side panel.
-
On the Left Side: Unscrew the two 2mm screws holding the left-side panel.
-
-


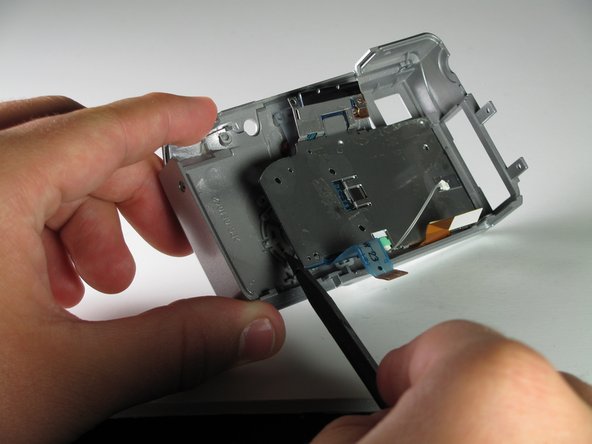
To reassemble your device, follow these instructions in reverse order.
To reassemble your device, follow these instructions in reverse order.
Cancelar: No complete esta guía.
2 personas más completaron esta guía.
Equipo

Cal Poly, Team 12-33, Maness Spring 2011 Miembro de Cal Poly, Team 12-33, Maness Spring 2011
CPSU-MANESS-S11S12G33
3 Miembros
7 Guías creadas