Saltar al contenido principal

Nvidia Shield Pro Android TV Controller Rumble Motor Replacement

Qué necesitas

  1. Nvidia Shield Pro Android TV Controller Rumble Motor Replacement, Bluetooth Controller Thumbsticks: paso 1, imagen 1 de 3 Nvidia Shield Pro Android TV Controller Rumble Motor Replacement, Bluetooth Controller Thumbsticks: paso 1, imagen 2 de 3 Nvidia Shield Pro Android TV Controller Rumble Motor Replacement, Bluetooth Controller Thumbsticks: paso 1, imagen 3 de 3
    • Remove the six T6 Torx screws from the back of the controller.

  2. Nvidia Shield Pro Android TV Controller Rumble Motor Replacement: paso 2, imagen 1 de 1
    • Gently pry open the top frame of the cover with a plastic opening tool.

  3. Nvidia Shield Pro Android TV Controller Rumble Motor Replacement: paso 3, imagen 1 de 2 Nvidia Shield Pro Android TV Controller Rumble Motor Replacement: paso 3, imagen 2 de 2
    • Gently pull the wire connector directly out of its socket, separating the two halves of the controller.

  4. Nvidia Shield Pro Android TV Controller Rumble Motor Replacement: paso 4, imagen 1 de 2 Nvidia Shield Pro Android TV Controller Rumble Motor Replacement: paso 4, imagen 2 de 2
    • Remove the two T6 Torx screws.

  5. Nvidia Shield Pro Android TV Controller Rumble Motor Replacement: paso 5, imagen 1 de 2 Nvidia Shield Pro Android TV Controller Rumble Motor Replacement: paso 5, imagen 2 de 2
    • Remove the guard piece that secures the thumb-sticks to the controller.

    • Apply vertical pressure with two fingers to carefully pop off the thumb-stick(s) in need of repair.

    • Replace it by sliding a new thumb-stick onto the plastic post that secured the old one.

  6. Nvidia Shield Pro Android TV Controller Rumble Motor Replacement, Controller Rumble Motor: paso 6, imagen 1 de 3 Nvidia Shield Pro Android TV Controller Rumble Motor Replacement, Controller Rumble Motor: paso 6, imagen 2 de 3 Nvidia Shield Pro Android TV Controller Rumble Motor Replacement, Controller Rumble Motor: paso 6, imagen 3 de 3
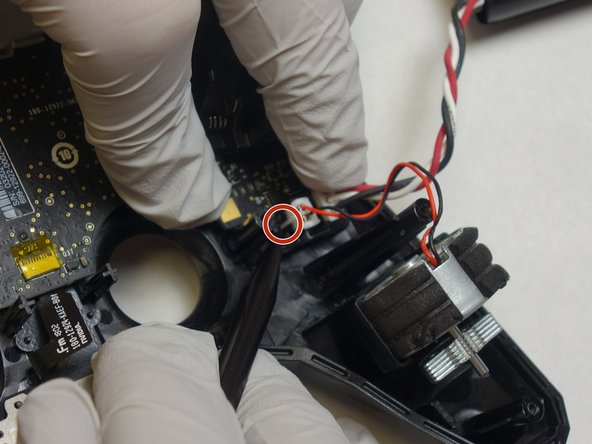
    • Grip the plugs as close to their ports as possible and pull them directly up and out.

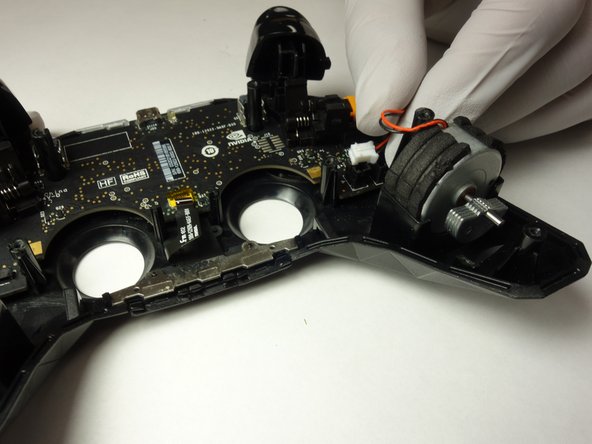
    • Lift the rumble motors up and out of the chassis.

Conclusión

To reassemble your device, follow these instructions in reverse order.

0 comentarios

Agregar Comentario

Ver Estadísticas:

Ultimas 24 horas: 0

Ultimos 7 días: 0

Ultimos 30 días: 1

Todo El Tiempo: 142