Saltar al contenido principal

Nokia X Display Assembly Replacement

Qué necesitas

  1. Nokia X Display Assembly Replacement, Battery: paso 1, imagen 1 de 1
    • The first step is to remove the back cover off of the phone. To do this, place both your thumbs on the two top corners of the device and simply pop it off.

  2. Nokia X Display Assembly Replacement: paso 2, imagen 1 de 1
    • To remove the battery, simply use your finger to pry the battery out of its slot.

  3. Nokia X Display Assembly Replacement: paso 3, imagen 1 de 1
    • Inserting a new battery is as simple as lining up the gold connectors and sliding the battery in text-side down.

  4. Nokia X Display Assembly Replacement, Display Assembly: paso 4, imagen 1 de 2 Nokia X Display Assembly Replacement, Display Assembly: paso 4, imagen 2 de 2
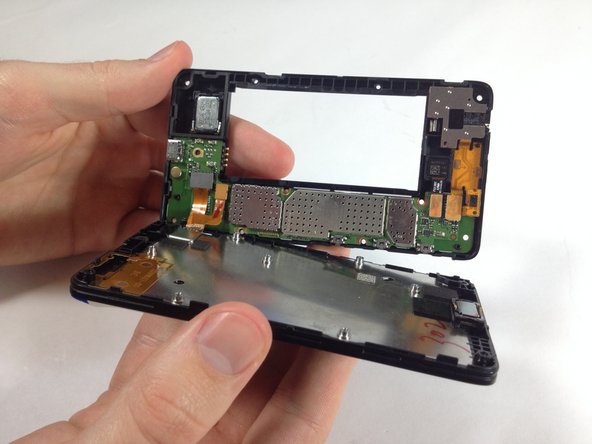
    • Remove the four 5.33mm T5 Torx screws which are located in the corners of the phone.

    • Remove the seven 4.00mm T5 Torx screws that line the phone between the corners.

  5. Nokia X Display Assembly Replacement: paso 5, imagen 1 de 2 Nokia X Display Assembly Replacement: paso 5, imagen 2 de 2
    • To remove the screen from the motherboard, you will need to apply some force until you feel it snap off. If the connectors unhook themselves, don't worry.

  6. Nokia X Display Assembly Replacement: paso 6, imagen 1 de 1
    • If the connectors are still attached, simply unhook them by lifting the top of the connector with your finger.

Conclusión

To reassemble your device, follow these instructions in reverse order.

29 personas más completaron esta guía.

Avery Dorsey

Miembro Desde 01/21/15

1,894 Reputación

4 Guías creadas

Equipo

USF Tampa, Team 6-1, Brown Winter 2015 Miembro de USF Tampa, Team 6-1, Brown Winter 2015

USFT-BROWN-W15S6G1

3 Miembros

8 Guías creadas

0 comentarios

Agregar Comentario

Ver Estadísticas:

Ultimas 24 horas: 0

Ultimos 7 días: 6

Ultimos 30 días: 15

Todo El Tiempo: 5,635