Esta versión puede contener ediciones incorrectas. Cambiar a la última instantánea verificada.
Qué necesitas
-
Este paso está sin traducir. Ayuda a traducirlo
-
Insert the pick between the glass to separate the glass from the device. You can also use the suction cups to help lift the glass.
-
-
Este paso está sin traducir. Ayuda a traducirlo
-
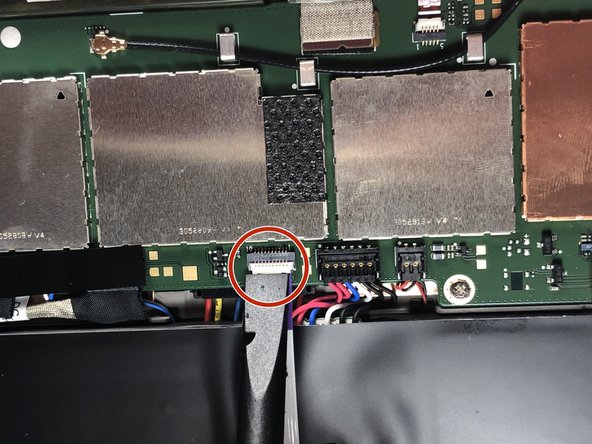
Pull the ribbon cable out from the connection port on the board.
-
Move on the step 4 to remove the ribbon connection from the screen.
-
-
Este paso está sin traducir. Ayuda a traducirlo
-
Use the plastic pry tool to remove both of the connections.
-
-
-
Este paso está sin traducir. Ayuda a traducirlo
-
Set aside the screen and the display assembly for repair.
-
-
Este paso está sin traducir. Ayuda a traducirlo
-
Use a plastic pry tool to remove the battery connector from the logic board.
-
-
Este paso está sin traducir. Ayuda a traducirlo
-
Theres four screws that attach the battery to the chassis. Use a PH0 Phillips head screwdriver to loosen the screw.
-
-
Este paso está sin traducir. Ayuda a traducirlo
-
Take a plastic pry to to pry out the battery from its casing.
-
Using two tool different plastic pry to can help give you leverage on areas that are hard to get up.
-
-
Este paso está sin traducir. Ayuda a traducirlo
-
Take a pry tool and remove the connection.
-
Take a pry tool and push away the charing connector from its housing.
-


Cancelar: No complete esta guía.
Una persona más ha completado esta guía.

Equipo

Gateway, Team S1-G4, Luster Fall 2018 Miembro de Gateway, Team S1-G4, Luster Fall 2018
GCC-LUSTER-F18S1G4
5 Miembros
5 Guías creadas