Introducción
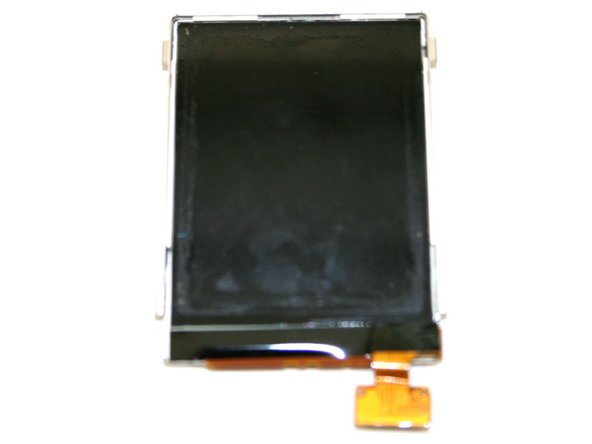
Use this guide to replace either your external LCD or the larger main LCD. If one is broken, both need to be replaced as it is one unit.
Qué necesitas
-
-
Remove the back cover of your cell phone by applying slight pressure with your thumb and pushing up towards the top of the phone.
-
Lift off back cover.
-
-
-
Unscrew two T5 torx screws easily visible on the back side of the cell phone
-
Screws: 7.8mm
-
Once screw are removed, the phone will separate easily into two pieces connected by a flexible wire strip.
-
-
-
-
Use an iPod opening tool to gently pry open the back case as indicated in the picture.
-
Work your way down the side of the phone starting from the top down to the bottom. (Use multiple prying tools if necessary)
-
REPEAT on both sides, and be careful not to stab the circuitry with the tools.
-
-
-
Gently pull the phone apart and the flexible wire should detach from its connection as shown.
-
If not, lift up on the black tab within the left box in the picture.
-
With the front half of the phone, push the keypad towards the removed portion of the phone.
-
To clean, use a damp cloth with water.
-
-
-
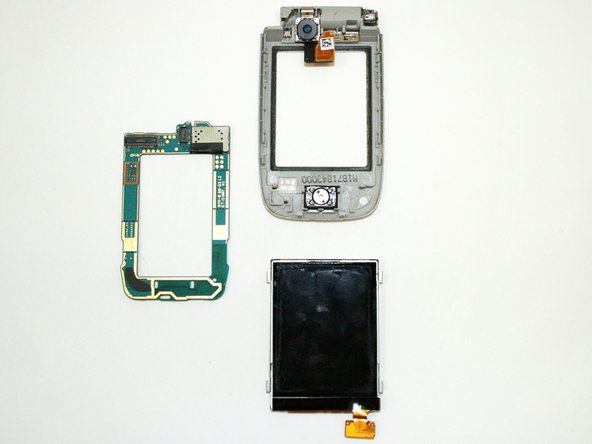
Using an iPod opening tool, pry open the case that houses the LCD screens by inserting it at the bottom as shown.
-
Run the tool all along the edge between the darker front case and silver back.
-
-
-
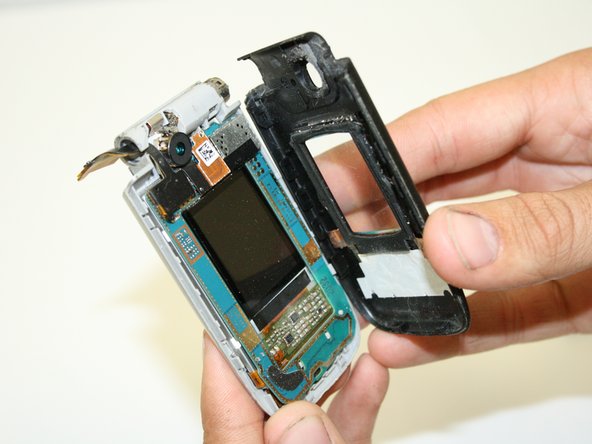
Remove the first flex-wire connection by inserting your thumbnail directly underneath the connection as shown. Will pry off easily.
-
Remove the two other flex-wire connections at the top and bottom of the LCD logic board. Pry up on the respective connections as shown.
-
Square LCD logic board will detach now.
-


To reassemble your device, follow these instructions in reverse order.
To reassemble your device, follow these instructions in reverse order.
Cancelar: No complete esta guía.
Una persona más ha completado esta guía.

Equipo

Cal Poly, Team 23-82, Johann Spring 2010 Miembro de Cal Poly, Team 23-82, Johann Spring 2010
CPSU-JOHANN-S10S23G82
4 Miembros
5 Guías creadas