Esta guía ha sufrido modificaciones. Revisa la última versión sin revisar.
Introducción
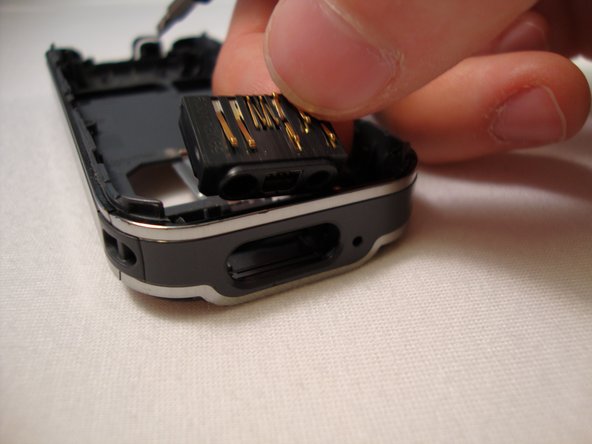
Replacing the charger connector.
Qué necesitas
-
-
Press down on the grip on the back of the phone and slide the rear housing down towards the bottom of the phone.
-
-
-
-
Insert your two fingers under the two tabs found at the top of the phone underneath the black casing, then pull the casing up and slide it out slowly.
-


To reassemble your device, follow these instructions in reverse order.
To reassemble your device, follow these instructions in reverse order.
Cancelar: No complete esta guía.
Una persona más ha completado esta guía.

Equipo

Cal Poly, Team 23-63, Johann Spring 2010 Miembro de Cal Poly, Team 23-63, Johann Spring 2010
CPSU-JOHANN-S10S23G63
3 Miembros
17 Guías creadas