Saltar al contenido principal

Nokia 515 Front cover and keypad replacement

Qué necesitas

  1. Nokia 515 Front cover and keypad replacement, Front cover and keypad: paso 1, imagen 1 de 1
    • Remove the back cover with your fingers or with the eject tool which is included by Nokia.

    • Don't forget to turn off your device!

  2. Nokia 515 Front cover and keypad replacement: paso 2, imagen 1 de 1
    • Remove the battery, the microSD card and the SIM card.

  3. Nokia 515 Front cover and keypad replacement: paso 3, imagen 1 de 1
    • Remove the 2 screws with the T4 screwdriver.

    • Please store the screws on a safe place! I already lost a screw!

  4. Nokia 515 Front cover and keypad replacement: paso 4, imagen 1 de 2 Nokia 515 Front cover and keypad replacement: paso 4, imagen 2 de 2
    • Take the metal spudger and pry it firmly under the plastic hinges.

    • Although you want to replace the cover, be very careful by doing it! You could harm yourself with the metal spudger.

    • You could also use your fingers instead of the spudger to do it!

  5. Nokia 515 Front cover and keypad replacement, Remove the keypad: paso 5, imagen 1 de 3 Nokia 515 Front cover and keypad replacement, Remove the keypad: paso 5, imagen 2 de 3 Nokia 515 Front cover and keypad replacement, Remove the keypad: paso 5, imagen 3 de 3
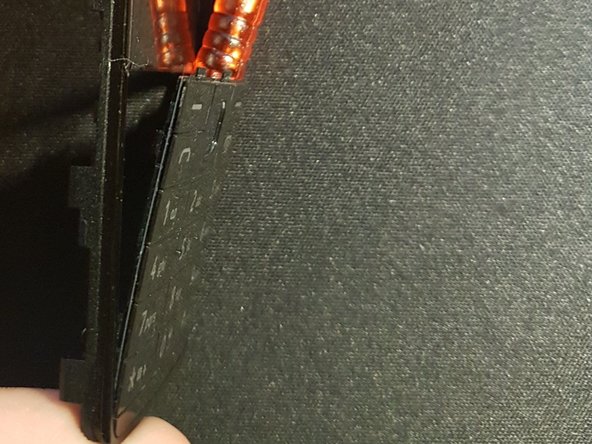
    • To remove the keypad, you should use the spudger to push the top clamps down a little bit while pressing your fingers against the inside of the keypad.

    • The keypad should be loose at the top.

    • To remove the bottom, just use a little bit of force to pull it off the front panel.

    • Just use a little bit of force.

  6. Nokia 515 Front cover and keypad replacement: paso 6, imagen 1 de 1
    • To assemble the new keypad, start at the upper half of the keyboard.

  7. Nokia 515 Front cover and keypad replacement: paso 7, imagen 1 de 3 Nokia 515 Front cover and keypad replacement: paso 7, imagen 2 de 3 Nokia 515 Front cover and keypad replacement: paso 7, imagen 3 de 3
    • To reassemble the front, just click it in place (you hear a clicking noise).

    • Now screw the T4 screws back into the holes.

    • Now you put the microSD card, the SIM card and the battery back into your device.

    • Now you can turn on your device.

Conclusión

You did it!

3 personas más completaron esta guía.

Un agradecimiento especial a estos traductores:

de en

100%

¡ Leon nos está ayudando a reparar el mundo! ¿Quieres contribuir?
Empezar a traducir ›

Leon

Miembro Desde 03/28/19

376 Reputación

1 Guía escrita

0 comentarios

Agregar Comentario

Ver Estadísticas:

Ultimas 24 horas: 0

Ultimos 7 días: 5

Ultimos 30 días: 25

Todo El Tiempo: 798