Introducción
Utiliza esta guía para sustituir los botones del pad direccional de tu Nintendo Wii U GamePad.
Qué necesitas
-
-
Retira los diez tornillos Tri-wing Y1 de 8,9 mm ocultos bajo las pegatinas cuadradas.
-
Levanta la placa posterior.
-
-
-
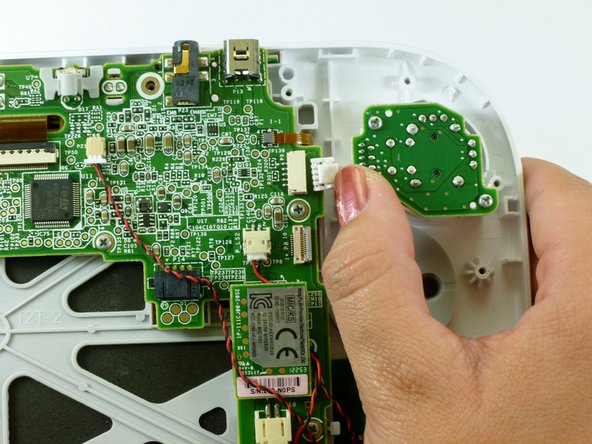
Desenchufa el conector que conecta la placa posterior a la placa base.
-
Retira la placa posterior.
You don't have to remove just be careful
I tried to remove like at least 6 times but I wasn’t able to. Using tweezer, my nails, long nose pliers. There could be a lock but I gave up since I’m afraid if I put more force I might accidentally pull the wires. I’m able to remove the left and right analog stick with the back plate plugged, as mentioned, just be careful.
-
-
-
Quita los botones de los hombros izquierdo y derecho de las esquinas superiores.
-
Retira los botones de disparo ZR y ZL levantándolos y deslizándolos hacia fuera.
-
-
-
-
Retira los dos tornillos Tri-wing Y0 de 9,0 mm.
-
Levanta el stick analógico.
Easy peasy. Thanks!
Hi there, I tried to replace the joystick following these instructions but I couldn't remove the connector cable from the old joystick as it is wired into the board. Does anyone know what the connector is called so I can buy one please!
@Spider Gin The joystick and the tiny little control board (the pcb between the red circles in the picture of step 9) are purchased together (or at least that’s how I got mine). The only thing you need to disconnect on the analog stick assembly is the connector shown at the end of the thumb in the picture on step 8. If you are trying to disconnect the stick itself from the control board you are not looking at the right instructions for that.
It seems to me that Nintendo changed the design after a while some had the wires on a connector some were soldered in. I can't find much information about this. Going to have to disassemble what I have to find out what I need
The volume slider came out when I turned the assembly upside down to retrieve a dropped screw. You need to pay attention when putting it back in to make sure you line up the groove on the slider with the tiny little square bump that fits into the groove and allows you to actually control the volume. It’s easy to get it aligned if you know that’s what you trying to do, but at first I didn’t even realize what it was.
Anyway—it worked, thank you!
-
-
-
Levanta y retira la cubierta de goma de la almohadilla direccional.
-
Retira los botones del pad direccional.
-


Para volver a montar el dispositivo, sige estas instrucciones en orden inverso.
Para volver a montar el dispositivo, sige estas instrucciones en orden inverso.
Cancelar: No complete esta guía.
11 personas más completaron esta guía.
Un agradecimiento especial a estos traductores:
100%

¡ Carlos López (España - Spain) nos está ayudando a reparar el mundo! ¿Quieres contribuir?
Empezar a traducir ›

Equipo

Cal Poly, Team 17-20, Forte Winter 2013 Miembro de Cal Poly, Team 17-20, Forte Winter 2013
CPSU-FORTE-W13S17G20
5 Miembros
38 Guías creadas
how do i replace the whole front and back casing?
enbodylin - Contestar
bruh the ifix it screwdriver dont reach down the whole way
Michael - Contestar
I feel like it’s important to mention how deep some of these holes are. Your screwdriver might not reach. Mine sure didn’t.
greatshadowdude - Contestar
I had to shove some tissue into the screwdriver bit holder to get it to reach
Andrew Walker - Contestar