Introducción
This guide will teach you how to remove the existing GameCube motherboard and replace it with a new one.
Qué necesitas
-
-
Turn over the Gamecube so that the bottom side is facing up.
-
Use the 4.5 mm Gamebit screwdriver to remove all four screws.
-
-
-
With the bottom side of the GameCube facing upward and the screws removed, carefully pull the outer shell of the unit away from the top half.
-
Move the GameCube so that the inside is facing upwards.
This can also be done whilst being in the normal upright position after all 4 of the 4.5mm Gamebit screws have been removed. Pull the top of the shell directly upwards and it should slide off easily.
Less chance of snagging any wires or parts.
-
-
-
Gently press down on the clips located on either side of the back panel.
-
Carefully remove the back panel from the GameCube.
A second picture clearly showing which direction to pull the back panel away from the unit would be nice.
-
-
-
Unclip the controller ports at the front of the unit.
well... what happens if accidentally i disconnected it?
presumably nothing major. The CMOS battery is attached to the controller ports, so the most i'd expect is that the gamecube loses it's date/time setting. As long as you reset that before jumping into animal crossing or something, you should be fine. I'm currently doing a teardown of my gamecube, and if something does prove to have gone wrong, i'll report back.
sigoshi -
okay, i finished putting it back together. gamecube works fine and surprisingly still remembers what year it is. boots into smash bros and shows memory card contents fine.
sigoshi -
-
-
-
-
Use a Phillips #2 screwdriver to remove the two screws on the back of the control port.
-
Carefully separate the gray outer casing of the control port and the circuit board.
must do this?
That step is not needed for the laser replacement.
Love ur labeling and legends. Good on ya
Not a necessary step
-
-
-
The left side of the unit contains the cooling fan and its housing.
-
Carefully remove the two screws attaching the cooling fan housing to the unit.
Why can't the fan wire be detached?
It can, but you might not want to
-
-
-
The optical drive is secured to a metal plate.
-
Using a Phillips #2 screwdriver, unscrew the twelve screws that are around the outer edge of the optical drive.
Are these 12 screws the exact same kind like the 2 that were on the fan?
Yes! As far as I can tell anyway. Makes sense, too since opposite the fan you have five of the same holes as well.
-
-
-
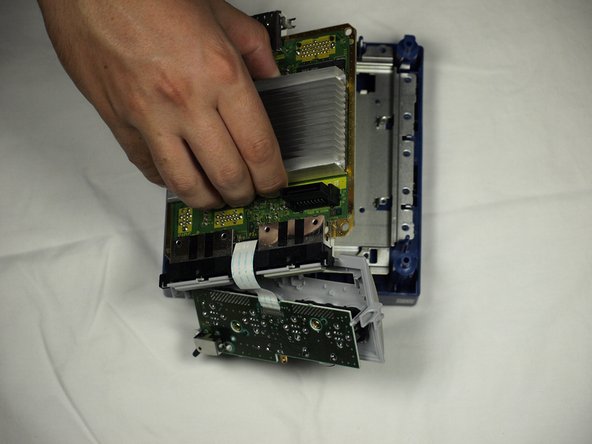
Carefully separate the optical drive assembly from the rest of the GameCube unit.
-
The optical drive assembly is secured to the motherboard underneath by a slot; some force may be required to carefully free the assembly.
-
The metal plate and the actual optical drive will remain attached.
-
-
-
With the Optical Drive Assembly removed, your GameCube should now look like this.
-
Remove the 6 screws (circled in orange) on the heat sink using a #1 Phillips screwdriver.
-


To reassemble your device, follow these instructions in reverse order.
To reassemble your device, follow these instructions in reverse order.
Cancelar: No complete esta guía.
12 personas más completaron esta guía.

Equipo

Cal Poly, Team 6-2, Maness Fall 2009 Miembro de Cal Poly, Team 6-2, Maness Fall 2009
CPSU-MANESS-F09S6G2
4 Miembros
44 Guías creadas
3 comentarios
What happens if you disconnect that cable (localizated on Step 4)?
Its soldered to the front-board and the connector is on the main-board under the disc assembly, trying to remove it will break it.
I have been having trouble with my cube shorting out when I insert a memory card into slot A. What is the best way to get at it see if this is the case, and what should I be looking for?
Many thanks