Saltar al contenido principal

Ninja Professional Blender BL660 Blender Base Replacement

Qué necesitas

  1. Ninja Professional Blender BL660 Blender Base Replacement, Blender Base: paso 1, imagen 1 de 2 Ninja Professional Blender BL660 Blender Base Replacement, Blender Base: paso 1, imagen 2 de 2
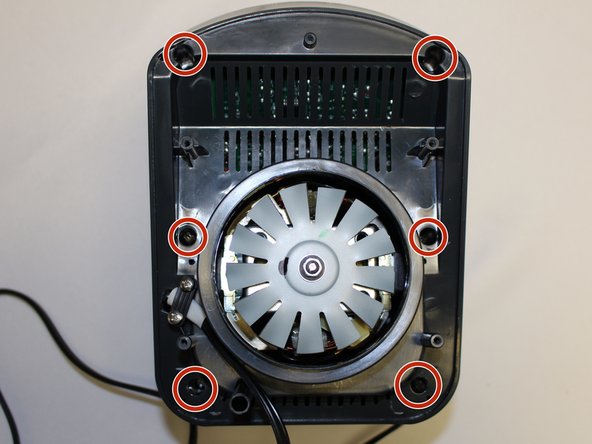
    • Using the Phillips #1 screwdriver, remove the 5 screws (13mm long, 6mm wide) holding the outer base.

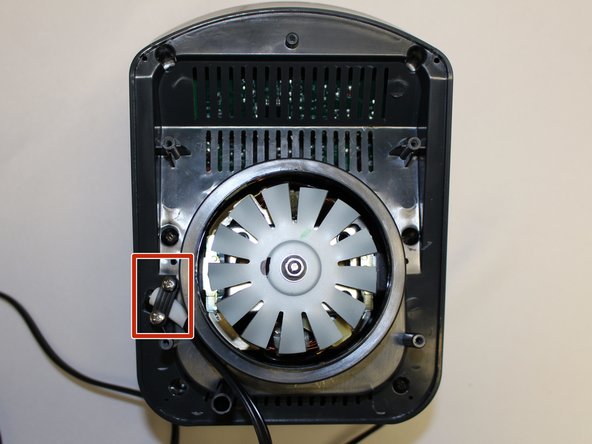
    • Lift the base up to remove it.

  2. Ninja Professional Blender BL660 Blender Base Replacement: paso 2, imagen 1 de 2 Ninja Professional Blender BL660 Blender Base Replacement: paso 2, imagen 2 de 2
    • Remove the midsection by pulling it up. If the section is stuck, use the iFixit plastic opening tool to pry it off.

    • Pull the power cord through the mid-section opening.

  3. Ninja Professional Blender BL660 Blender Base Replacement: paso 3, imagen 1 de 2 Ninja Professional Blender BL660 Blender Base Replacement: paso 3, imagen 2 de 2
    • Using the Phillips #1 screwdriver, remove the 6 screws (13 mm long, 6 mm wide).

  4. Ninja Professional Blender BL660 Blender Base Replacement: paso 4, imagen 1 de 2 Ninja Professional Blender BL660 Blender Base Replacement: paso 4, imagen 2 de 2
    • Using the Phillips #1 screwdriver, remove the two screws (5 mm long, 3 mm wide) holding the power cord onto the motor cover.

  5. Ninja Professional Blender BL660 Blender Base Replacement: paso 5, imagen 1 de 2 Ninja Professional Blender BL660 Blender Base Replacement: paso 5, imagen 2 de 2
    • Using the iFixit plastic opening tool, pry the motor cover off the general housing. Once it is loose, lift it up to remove it off the base.

    • Slide the cover all the way to the end of the power cord.

    • Please note that the power cord does not completely come off the cover.

Conclusión

To reassemble your device, follow these instructions in reverse order.

0 comentarios

Agregar Comentario

Ver Estadísticas:

Ultimas 24 horas: 3

Ultimos 7 días: 17

Ultimos 30 días: 66

Todo El Tiempo: 2,767