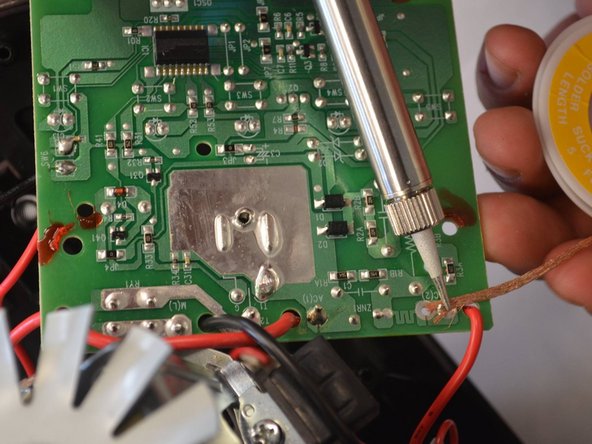
Saltar al contenido principal

Ninja NJ600 Button Replacement

Qué necesitas

  1. Ninja NJ600 Button Replacement, Blender Base Cover: paso 1, imagen 1 de 2 Ninja NJ600 Button Replacement, Blender Base Cover: paso 1, imagen 2 de 2
    • Remove the five screws (13mm long, 6mm head diameter) using a Phillips #2 screwdriver.

  2. Ninja NJ600 Button Replacement: paso 2, imagen 1 de 2 Ninja NJ600 Button Replacement: paso 2, imagen 2 de 2
    • Without removing any screws, you can pull the 2nd layer free from the base. Do this now and set it down gently next to the base.

    • The power cord runs through a hole in the side of this layer. Squeeze the cord and pull it through the hole to separate the layer from the cord.

  3. Ninja NJ600 Button Replacement: paso 3, imagen 1 de 3 Ninja NJ600 Button Replacement: paso 3, imagen 2 de 3 Ninja NJ600 Button Replacement: paso 3, imagen 3 de 3
    • Using the Phillips #2 screwdriver, remove these six screws (13mm long, 6mm head diameter). Then carefully remove this layer, and rest it next to the blender base.

    • Be careful not to damage the two wires that are keeping this third layer attached to the base.

  4. Ninja NJ600 Button Replacement, Circuit Board: paso 4, imagen 1 de 1
    • Remove these four screws (10mm long, 5mm head diameter) using a Phillips #2 screwdriver.

    • Be careful not to scratch the circuit board with the screwdriver.

  5. Ninja NJ600 Button Replacement: paso 5, imagen 1 de 1
    • Using a pair of scissors or wire cutters, cut the zip tie holding these wires.

    • This will give the circuit board more range of motion.

  6. Ninja NJ600 Button Replacement: paso 6, imagen 1 de 3 Ninja NJ600 Button Replacement: paso 6, imagen 2 de 3 Ninja NJ600 Button Replacement: paso 6, imagen 3 de 3
    • Desolder the five wires from the solder pads shown.

    • If you do not know how to do this, iFixit has a guide describing the process.

    • Before you begin to desolder these wires, flip the board over to confirm that you are about to desolder the correct component.

    • Soldering iron is very hot, use caution when handling

  7. Ninja NJ600 Button Replacement: paso 7, imagen 1 de 1
    • After the wires have cooled enough to touch, carefully slide the circuit board free of the wires.

    • NOTE: keep track of which pad each wire was soldered to. This is important for your blender to function.

  8. Ninja NJ600 Button Replacement, Button: paso 8, imagen 1 de 2 Ninja NJ600 Button Replacement, Button: paso 8, imagen 2 de 2
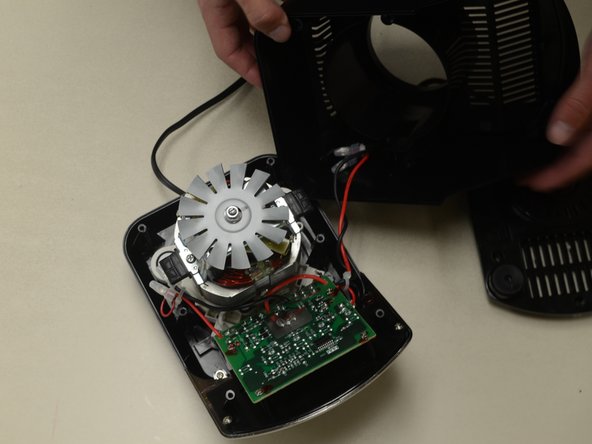
    • After removing the circuit board from your device, locate which button you wish to replace.

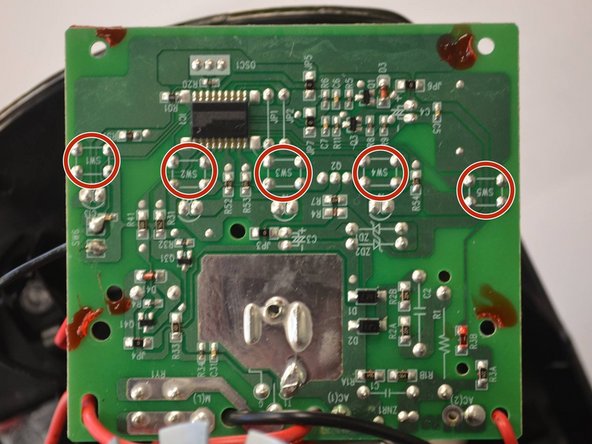
    • On the opposite side of the circuit board from the button, there are four solder pads with the designation "SW" followed by a number.

  9. Ninja NJ600 Button Replacement: paso 9, imagen 1 de 1
    • Desolder these four solder pads.

    • These pads are small, so take care to not damage the circuit board.

    • NOTE: the orientation of the buttons is important. Make sure you place the new button in the correct orientation.

    • Soldering iron is very hot, use caution when handling

Conclusión

To reassemble your device, follow these instructions in reverse order, except soldering when you desoldered previously.

Kody D

Miembro Desde 04/01/15

537 Reputación

3 Guías creadas

Equipo

Cal Poly, Team 24-2, Lancaster Spring 2015 Miembro de Cal Poly, Team 24-2, Lancaster Spring 2015

CPSU-LANCASTER-S15S24G2

4 Miembros

6 Guías creadas

Un comentario

ZNR1 please help in value

Kalpesh Patel - Contestar

Agregar Comentario

Ver Estadísticas:

Ultimas 24 horas: 0

Ultimos 7 días: 2

Ultimos 30 días: 6

Todo El Tiempo: 1,209