Saltar al contenido principal

Nikon Coolpix S5300 LCD Display Screen Replacement

Qué necesitas

  1. Nikon Coolpix S5300 LCD Display Screen Replacement, Battery: paso 1, imagen 1 de 1
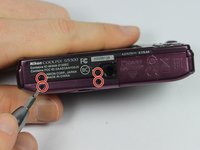
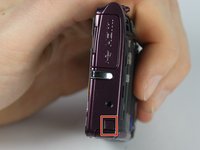
    • Turn the camera upside down and locate the battery compartment.

    • Slide the compartment open following the direction of the arrow.

  2. Nikon Coolpix S5300 LCD Display Screen Replacement: paso 2, imagen 1 de 1
    • Press the orange release button to release and remove the battery.

    • Replace or insert battery in it's respective terminals

  3. Nikon Coolpix S5300 LCD Display Screen Replacement, Outer Casing: paso 3, imagen 1 de 3 Nikon Coolpix S5300 LCD Display Screen Replacement, Outer Casing: paso 3, imagen 2 de 3 Nikon Coolpix S5300 LCD Display Screen Replacement, Outer Casing: paso 3, imagen 3 de 3
    • Remove the four 0.1mm screws from the bottom of the camera using the phillips head screwdriver

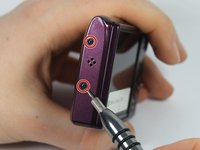
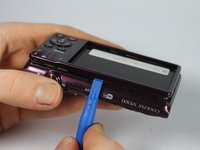
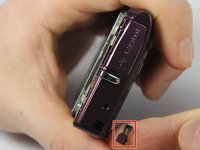
    • Using the same screwdriver, remove the 2 screws on the side of the camera.

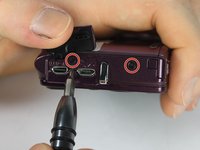
    • Remove the 2 screws from the other side of the camera.

    • One of the screws is under the I/O port cover.

  4. Nikon Coolpix S5300 LCD Display Screen Replacement: paso 4, imagen 1 de 3 Nikon Coolpix S5300 LCD Display Screen Replacement: paso 4, imagen 2 de 3 Nikon Coolpix S5300 LCD Display Screen Replacement: paso 4, imagen 3 de 3
    • Use the plastic opening tool to carefully separate the cover from the camera.

    • Work the plastic opening tool around all the edges of the front plate.

    • Pull the purple plastic cover off gently from the screen.

  5. Nikon Coolpix S5300 LCD Display Screen Replacement: paso 5, imagen 1 de 3 Nikon Coolpix S5300 LCD Display Screen Replacement: paso 5, imagen 2 de 3 Nikon Coolpix S5300 LCD Display Screen Replacement: paso 5, imagen 3 de 3
    • Turn the camera over so the LCD screen is facing you.

    • Carefully remove the front shell by gently prying around the corners with the plastic opening tool until it releases.

  6. Nikon Coolpix S5300 LCD Display Screen Replacement: paso 6, imagen 1 de 2 Nikon Coolpix S5300 LCD Display Screen Replacement: paso 6, imagen 2 de 2
    • Be careful to keep track of little pieces of the outside casing.

  7. Nikon Coolpix S5300 LCD Display Screen Replacement: paso 7, imagen 1 de 2 Nikon Coolpix S5300 LCD Display Screen Replacement: paso 7, imagen 2 de 2
    • Carefully remove the top button casing by pulling it away from main camera.

  8. Nikon Coolpix S5300 LCD Display Screen Replacement, Button Panel: paso 8, imagen 1 de 1
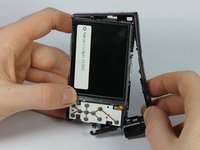
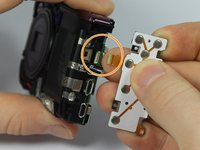
    • Remove the 2 screws on the silver plate

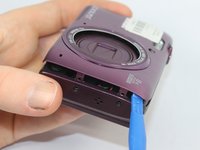
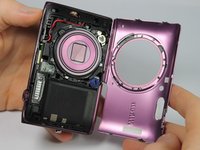
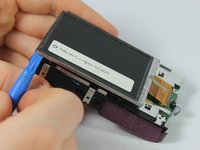
    • Gently lift the screen and silver plate away from the internal components.

    • Do not separate the plate and screen from the camera

  9. Nikon Coolpix S5300 LCD Display Screen Replacement: paso 9, imagen 1 de 2 Nikon Coolpix S5300 LCD Display Screen Replacement: paso 9, imagen 2 de 2
    • Carefully move the button panel away from the silver plate.

    • To disconnect the ribbon cable, use the tip of a plastic opening tool or your fingernail to flip up the small retaining flap.

    • Safely pull the ribbon cable out and then remove the button panel.

    • Be sure you are prying up on the hinged retaining flap, not the connector itself.

  10. Nikon Coolpix S5300 LCD Display Screen Replacement, LCD Display Screen: paso 10, imagen 1 de 2 Nikon Coolpix S5300 LCD Display Screen Replacement, LCD Display Screen: paso 10, imagen 2 de 2
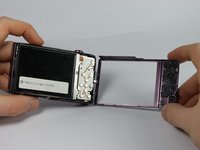
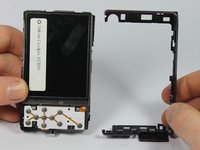
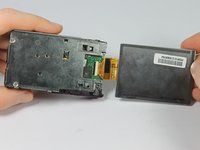
    • Carefully remove the screen away from the silver plate.

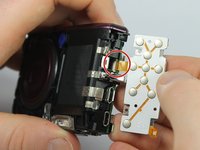
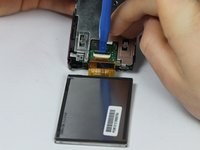
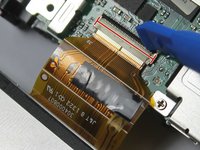
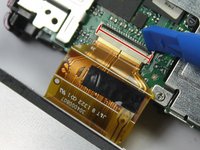
    • Carefully fold the screen over exposing the latch for the ribbon cable.

  11. Nikon Coolpix S5300 LCD Display Screen Replacement: paso 11, imagen 1 de 3 Nikon Coolpix S5300 LCD Display Screen Replacement: paso 11, imagen 2 de 3 Nikon Coolpix S5300 LCD Display Screen Replacement: paso 11, imagen 3 de 3
    • To disconnect the ribbon cable, use the tip of a plastic opening tool or your fingernail to flip up the small retaining flap. Then, you can safely pull the ribbon cable out.

    • Be sure you are prying up on the hinged retaining flap, not the connector itself.

  12. Nikon Coolpix S5300 LCD Display Screen Replacement: paso 12, imagen 1 de 1
    • Once the ribbon cable is disconnected, remove the LCD screen.

Conclusión

To reassemble your device, follow these instructions in reverse order.

Waleed Chakir

Miembro Desde 03/04/16

301 Reputación

3 Guías creadas

Equipo

UMass Dartmouth, Team 6-1, Bhusal Spring 2016 Miembro de UMass Dartmouth, Team 6-1, Bhusal Spring 2016

UMASSD-BHUSAL-S16S6G1

3 Miembros

12 Guías creadas

0 comentarios

Agregar Comentario

Ver Estadísticas:

Ultimas 24 horas: 1

Ultimos 7 días: 10

Ultimos 30 días: 37

Todo El Tiempo: 832