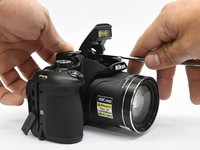
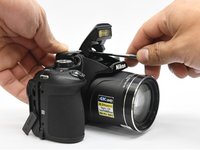
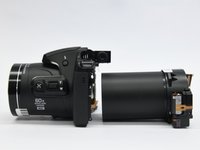
Saltar al contenido principal

Nikon Coolpix B700 Lens Assembly Replacement

Qué necesitas

  1. Nikon Coolpix B700 Lens Assembly Replacement, Back Frame Assembly: paso 1, imagen 1 de 1
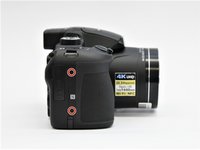
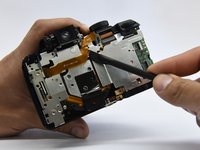
    • Use the Phillips screwdriver to remove the two 5.5 mm screws on the left side of the camera.

  2. Nikon Coolpix B700 Lens Assembly Replacement: paso 2, imagen 1 de 1
    • Use the Phillips screwdriver to remove seven 5.5 mm screws from the bottom of the camera.

  3. Nikon Coolpix B700 Lens Assembly Replacement: paso 3, imagen 1 de 2 Nikon Coolpix B700 Lens Assembly Replacement: paso 3, imagen 2 de 2
    • Use the Phillips screwdriver to remove the two 5.5mm screws on the right side of the camera.

    • Open the HDMI flap to remove a 5.5mm screw.

    • Don't forget to replace the hidden screw under the HDMI flap during reassembly.

  4. Nikon Coolpix B700 Lens Assembly Replacement: paso 4, imagen 1 de 1
    • Use the Phillips screwdriver to remove the two 5.5mm screws under the LCD panel.

  5. Nikon Coolpix B700 Lens Assembly Replacement: paso 5, imagen 1 de 3 Nikon Coolpix B700 Lens Assembly Replacement: paso 5, imagen 2 de 3 Nikon Coolpix B700 Lens Assembly Replacement: paso 5, imagen 3 de 3
    • Open the flash assembly and insert the spudger into the slot under the flash unit and twist.

    • While twisting, pry apart the shell to split the camera in half.

  6. Nikon Coolpix B700 Lens Assembly Replacement: paso 6, imagen 1 de 1
    • Be careful not to damage the ribbons that connect the halves together.

  7. Nikon Coolpix B700 Lens Assembly Replacement: paso 7, imagen 1 de 2 Nikon Coolpix B700 Lens Assembly Replacement: paso 7, imagen 2 de 2
    • Place the pry tool under the black latch. Lift gently until the latch flips up.

    • Gently pull the ribbon away from the latch.

    • Be gentle when taking ribbons out and apart because they are fragile.

  8. Nikon Coolpix B700 Lens Assembly Replacement, Internal Bracket: paso 8, imagen 1 de 1
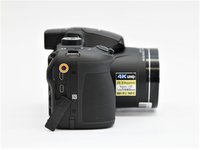
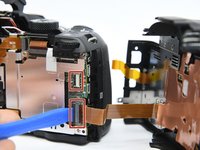
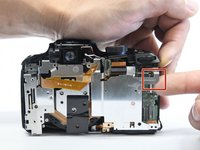
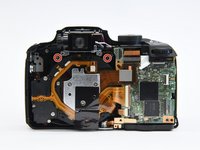
    • Use the Phillips screwdriver to remove the remaining five 5.55mm screws.

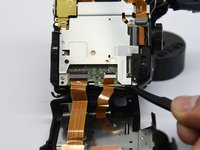
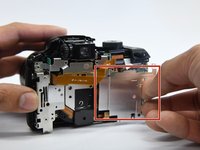
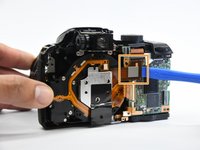
    • Remove the single 6mm screw.

  9. Nikon Coolpix B700 Lens Assembly Replacement: paso 9, imagen 1 de 1
    • Insert the pry tool under the latch and gently lift up to remove the ribbon.

  10. Nikon Coolpix B700 Lens Assembly Replacement: paso 10, imagen 1 de 1
    • Move the ribbon out of the way to reveal the hidden screw.

  11. Nikon Coolpix B700 Lens Assembly Replacement: paso 11, imagen 1 de 1
    • Lift the button assembly gently to give access to remove the 4mm screw.

  12. Nikon Coolpix B700 Lens Assembly Replacement: paso 12, imagen 1 de 1
    • On the top of the camera, remove the 6mm screw.

  13. Nikon Coolpix B700 Lens Assembly Replacement: paso 13, imagen 1 de 2 Nikon Coolpix B700 Lens Assembly Replacement: paso 13, imagen 2 de 2
    • With the spudger tool gently pry off the white tap holding in the bracket.

    • Use the same tool to remove the glued-on ribbon.

  14. Nikon Coolpix B700 Lens Assembly Replacement: paso 14, imagen 1 de 2 Nikon Coolpix B700 Lens Assembly Replacement: paso 14, imagen 2 de 2
    • Gently lift up the button assembly to slide the bracket out.

  15. Nikon Coolpix B700 Lens Assembly Replacement: paso 15, imagen 1 de 2 Nikon Coolpix B700 Lens Assembly Replacement: paso 15, imagen 2 de 2
    • With the pry tool gently lift up the latch and pull the cable toward the lens assembly.

    • Use the pry tool again and place it under the ribbon and lift straight up to disconnect the ribbon.

  16. Nikon Coolpix B700 Lens Assembly Replacement, Lens Assembly: paso 16, imagen 1 de 2 Nikon Coolpix B700 Lens Assembly Replacement, Lens Assembly: paso 16, imagen 2 de 2
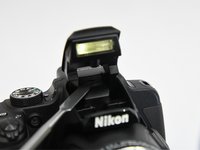
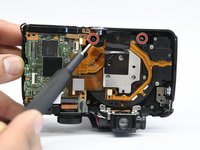
    • Use the Phillips screwdriver to remove the four 6 mm screw that hold on the bracket housing.

  17. Nikon Coolpix B700 Lens Assembly Replacement: paso 17, imagen 1 de 1
    • Remove the tripod mount from it's slot.

  18. Nikon Coolpix B700 Lens Assembly Replacement: paso 18, imagen 1 de 3 Nikon Coolpix B700 Lens Assembly Replacement: paso 18, imagen 2 de 3 Nikon Coolpix B700 Lens Assembly Replacement: paso 18, imagen 3 de 3
    • Now you just have to slide the lens assembly out of the housing.

Conclusión

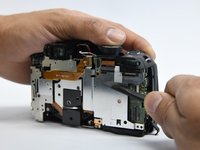
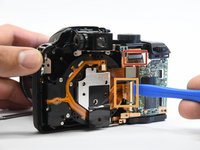
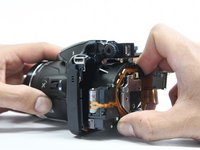
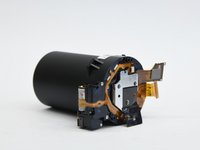
To reassemble your device, follow these instructions in reverse order.

8 personas más completaron esta guía.

2 comentarios

how to reset an objective error on B700 ? the lens is stopped in the middle of a hike

Per Benny Paulsen - Contestar

how to reset an objective error? the lens is stopped in the middle of a hike

Per Benny Paulsen - Contestar

Agregar Comentario

Ver Estadísticas:

Ultimas 24 horas: 2

Ultimos 7 días: 9

Ultimos 30 días: 37

Todo El Tiempo: 2,591