Esta versión puede contener ediciones incorrectas. Cambie a la última instantánea verificada.
Qué necesitas
-
Este paso está sin traducir. Ayuda a traducirlo
-
Power off the phone, by long-pressing the power button and touching Power off.
-
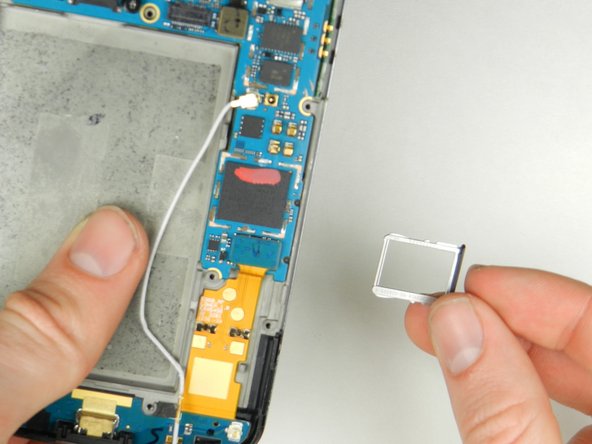
Remove the SIM tray using the SIM Card Eject Tool.
-
-
Este paso está sin traducir. Ayuda a traducirlo
-
Remove the two screws from the bottom of the phone with a T5 Torx Screwdriver.
-
-
Este paso está sin traducir. Ayuda a traducirlo
-
Gently open the back case by prying along the edge of the cover, starting at a corner of the phone and circling around the phone using a plastic opening tool.
-
-
Este paso está sin traducir. Ayuda a traducirlo
-
Remove the two 1.8 mm Phillips screws holding down the battery connector.
-
Using a plastic opening tool, disconnect the battery cable from its socket on the motherboard.
-
-
Este paso está sin traducir. Ayuda a traducirlo
-
Remove the blue tape that secures the white antenna cable to the battery.
-
Using a spudger, carefully disconnect the white antenna cable.
-
Carefully pry the battery out with a Plastic Opening Tool, starting at the top left-hand corner and working down towards the bottom right-hand corner.
-
-
Este paso está sin traducir. Ayuda a traducirlo
-
Remove the nine 4.6 mm Phillips #000 screws. Gently lift out the plastic cover.
-
The midframe is held in with two clips, one at either side. Use a plastic spudger to release each side and gently lift up and away.
-
-
-
Este paso está sin traducir. Ayuda a traducirlo
-
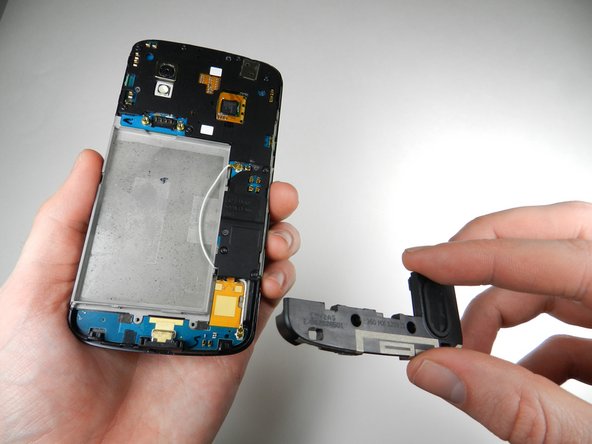
Remove the two 4.8 mm screws that hold the speaker enclosure together using the Phillips 00 screwdriver.
-
-
Este paso está sin traducir. Ayuda a traducirlo
-
Gently pry the speaker up and away from the back of the phone using a plastic opening tool, and lift it out of the phone.
-
-
Este paso está sin traducir. Ayuda a traducirlo
-
Using a spudger, pop off the gray connector on the top right of the motherboard.
-
-
Este paso está sin traducir. Ayuda a traducirlo
-
Gently lift the audio jack upwards and to the left to remove it from the motherboard.
-
-
Este paso está sin traducir. Ayuda a traducirlo
-
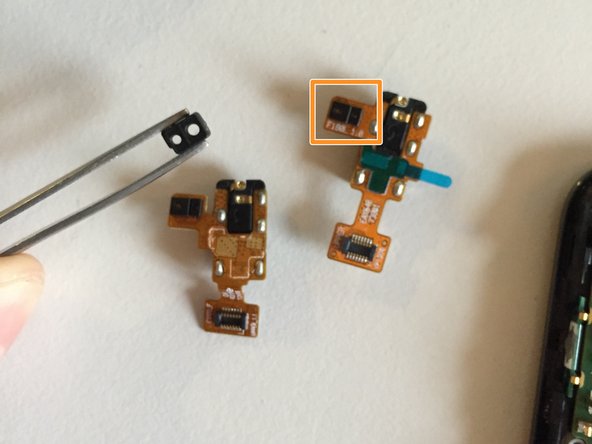
The audio port will likely lift out together with the ambient light sensor rubber cap.
-
Remove the cap from the old part and move it to the new one. Ensure the cap stays in place when installing the new audio port into the phone.
-
-
Este paso está sin traducir. Ayuda a traducirlo
-
Gently pry the metal tab up using a spudger, and lift up the disconnected black flap.
-
-
Este paso está sin traducir. Ayuda a traducirlo
-
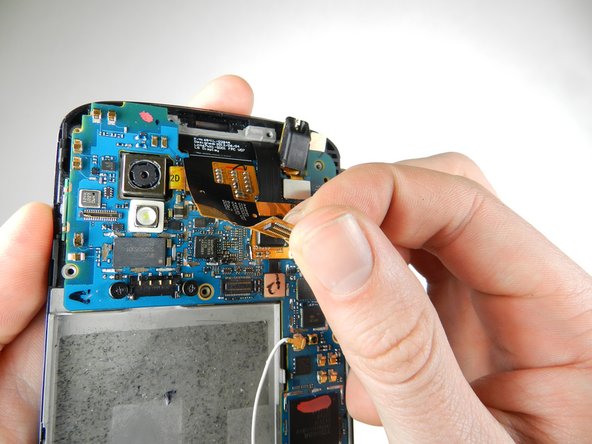
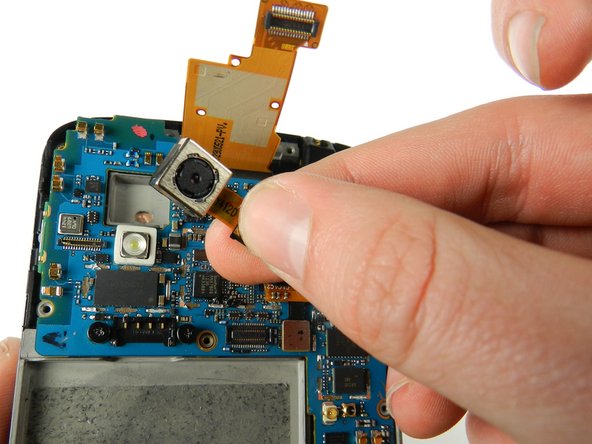
With a spudger, carefully pry up the black tab connecting the camera to the motherboard.
-
Lift up the camera from the socket.
-
-
Este paso está sin traducir. Ayuda a traducirlo
-
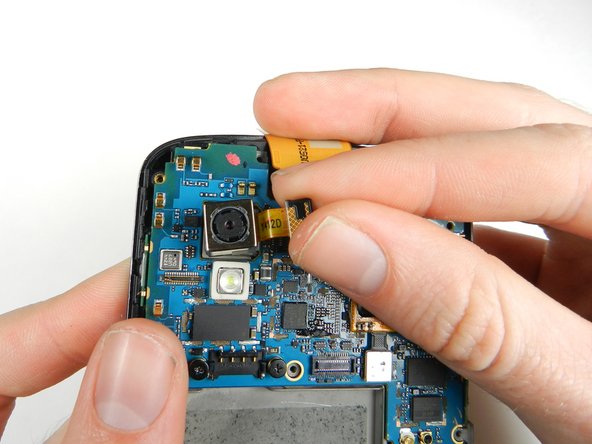
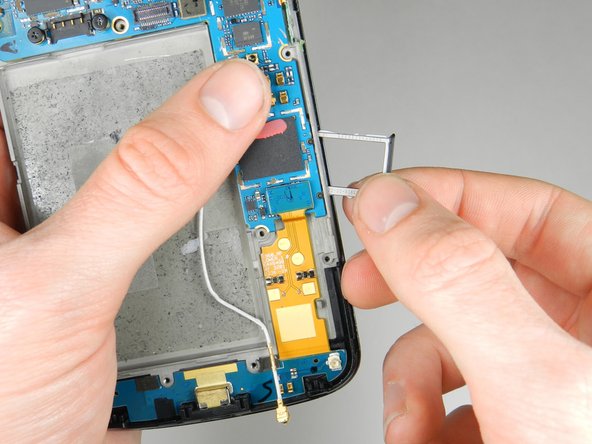
Remove the white antenna interconnect cable that attaches the motherboard to the bottom right-hand corner of phone by pulling on it gently.
-
-
Este paso está sin traducir. Ayuda a traducirlo
-
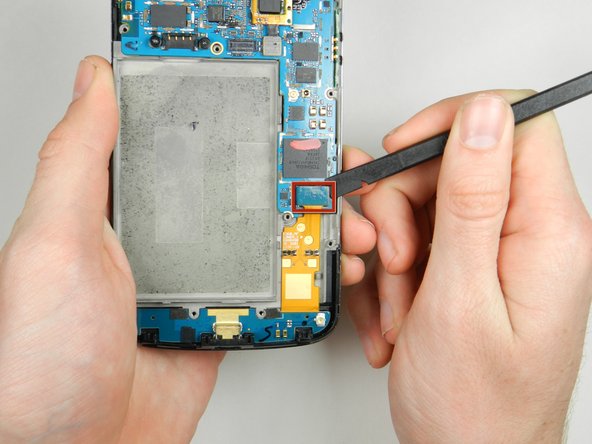
Remove the tab located in the bottom right-hand corner of the motherboard attaching the motherboard to the front display assembly using a spudger.
-
-
Este paso está sin traducir. Ayuda a traducirlo
-
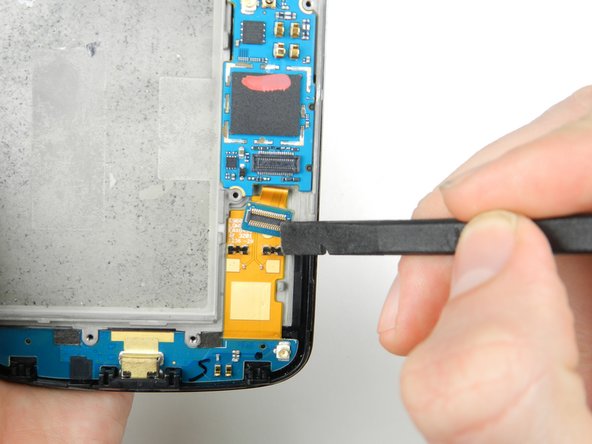
Remove the last tab connecting the motherboard to the front display assembly located in the upper right-hand corner of the motherboard using a spudger.
-
-
Este paso está sin traducir. Ayuda a traducirlo
-
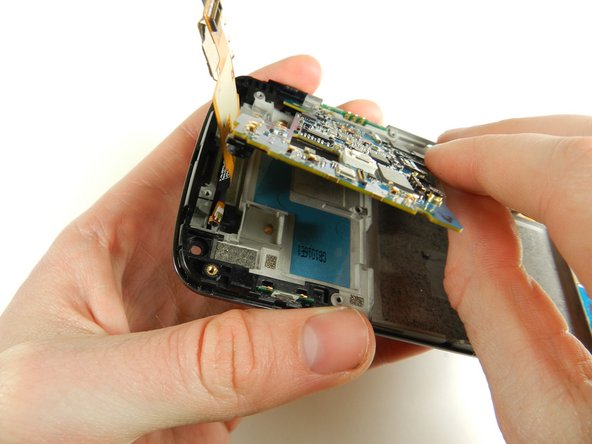
Using a spudger, gently lift up the motherboard from the front display assembly.
-
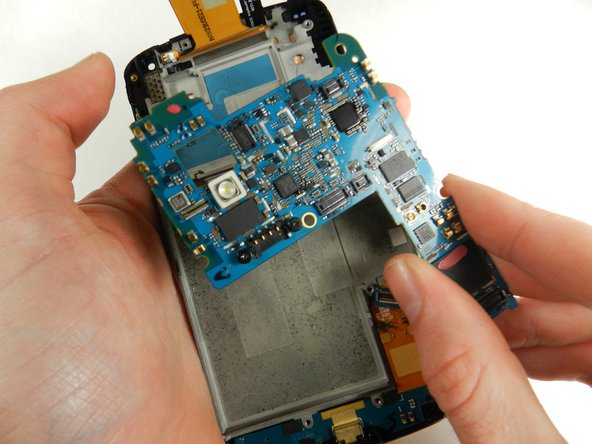
Carefully remove the motherboard using your hands.
-


Cancelar: No complete esta guía.
49 personas más completaron esta guía.
Equipo

Cal Poly, Team 3-32, Amido Winter 2013 Miembro de Cal Poly, Team 3-32, Amido Winter 2013
CPSU-AMIDO-W13S3G32
4 Miembros
8 Guías creadas
4 comentarios
This manual doesn't mention to take out volume and Power Buttons and removing the lower PCB with the USB port and LED!
I would edit but unfortunately I didnt take any pics
As Robin says, this misses out a few bits that are needed if you are trying to replace the screen and digitiser - two buttons, lower usb assembly and also a very small, mysterious, soft rubber insert that goes at the top and no doubt does something vital. Sorry also no pictures but none of these are exceptionally tricky - though the usb assembly needs gentle handling and patience. It took me a lot longer than the guide suggested but thanks to those clear instructions it all got done … and now my faithful old phone works again! Thanks a million!
My Nexus 4 Battery socket on the Motherboard has blown off.
How do i retrieve the Data from my phone. Please help me !!!
If you want to exchange just the MB there are some steps you can skip, i.e. step5 (removal of the battery), steps 7 & 8 (removal speaker), steps 10 & 11 (removal of the audio port, unplugging is sufficient) and step 15 (just unplug the antenna cable from the MB)